Stock width g1 raptor

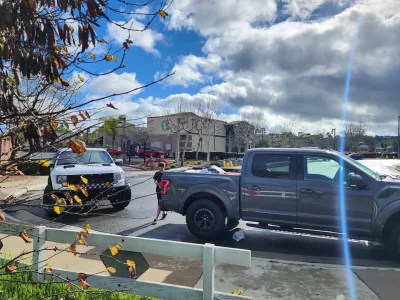
finally got the truck driving.

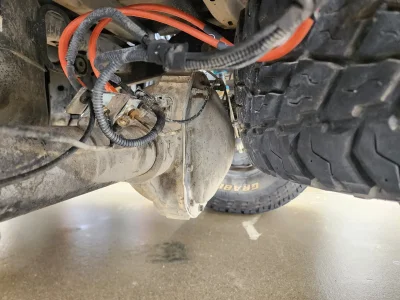
Put a new muffler on, I will probably put a second muffler on later this one is still kind of loud.
20240224_104222.jpg20240224_110336.jpg20240224_112348.jpg20240224_171613.jpg
20240224_171503.jpg

And with that I went around the block a few times, I'm going to double check the bolts and hopefully tomorrow I can get the resivors mounted then go on a mellow run with my friends next weekend!

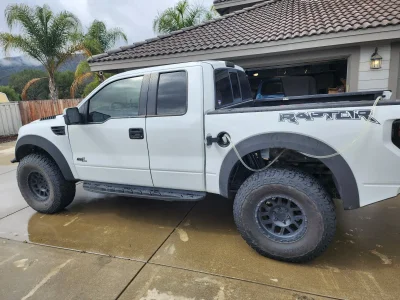
The back is definitely sitting much higher than I was hoping... not sure what im going to do about it, I don't really want to take a leaf out but I guess I could.

20240224_171403.jpg
20240224_171121.jpg
20240224_171325.jpg


The new headlights and tail lights really look much better.
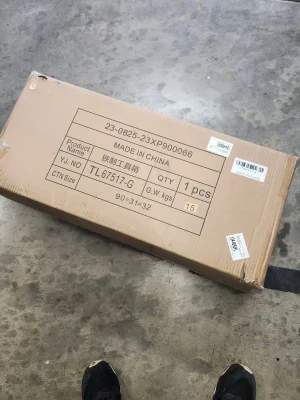
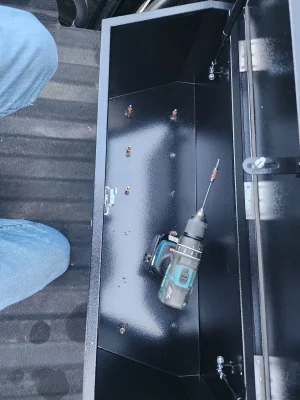
20240224_171237.jpg

Bed empty: 20240224_171159.jpg
20240224_171149.jpg
 
Add more weight to the rear somehow. Leaf springs are terrible with an empty bed (I know you have a single spare - still not enough imo). Ammo cans with tools, full cooler, cap the rear frame section and fill it with lead… whatever it takes, get as much weight as far back as you can
 
Does the rear already have a longer shackle?

I'd think it would settle a little but after a month of driving and getting loaded down.

Which Deavers are those?
It dose have the longest shackle, I put a 8.5" BMS shackle on, I had to trim the bed it's so long, so I'm maxed out there.
Leafs are the +4.5 HD.
Add more weight to the rear somehow. Leaf springs are terrible with an empty bed (I know you have a single spare - still not enough imo). Ammo cans with tools, full cooler, cap the rear frame section and fill it with lead… whatever it takes, get as much weight as far back as you can
The rear will have a few more items for sure, like you said I have some tools and spares plus camping gear all going back there. I may look at relocating the battery, and maybe a second spare.
 
Last edited:
Got a little tool box today from chy-na

Anyway poped her in:

20240227_172725.jpg20240227_181952.jpg20240227_171401.jpg
Left over sound mat from a different project figured may as well:
20240227_184354.jpg
 

Attachments

  • 20240227_170736.jpg
    20240227_170736.jpg
    379.3 KB · Views: 6
  • 20240227_173437.jpg
    20240227_173437.jpg
    461.4 KB · Views: 5
Okay I am in panic mode. Weekend trip in two days...

My resivor mounts had to get installed. I designed it with a back plate that was going to have counter sunk hardware but didn't get it in time, but I only ordered the original hardware so this is just temporary for this one trip.

So anyway temp install for this weekend.

The ideal is to build off of these for some more bed stuff later:

1000004957.jpg1000004965.jpg1000004959.jpg1000004963.jpg1000004964.jpg
Ewww to be fair the leaking resivor is my fault because they were going to be temporarily so they do not have thread sealant, but now they are extended temporary.
1000004962.jpg
1000004967.jpg
20240229_183440.jpg
It will look better when it's all finished with the upper supports I have in mind.
 
We did a quick trip this weekend. Throgh JV to slash x the to Calico to camp, we didn't camp due to the wind but I'm pleased so far looking forward to getting the front done now!
Ended up with some minor Dino damage, all driver error. The rear shocks did great but the truck is too stiff overall. I didn't even try to adjust anything because it was so windy.

Screenshot_20240303_115513_onX Offroad.jpg


This happened trying to get past some rocks in a little canyon: just the line-x was hurt. My bad.
1000004994.jpg
1000004986.jpg
Fenders survived...
1000004996.jpg

Axle hitting shock in droop:
1000005001.jpg

Didn't fold the mirrors, magic eraser got it done...
1000004987.jpg
1000005004.jpg


1000004989.jpg
1000004978.jpg

But like I said truck was stiff, the woops and g-outs felt really good but the chop shook me apart. Could be the HD springs but once the front is set up Ill figure it out. This is my rear valve stack: 3.5 FOA piston.

Compression:
2.625 x .015
2.6 x .015
2.3 × .015
2.15 x .015
1.85 x .015
1.55 x 0.15
1.3 x 015
2.6 Valve stop washer

Rebound:
2.625 x .015
2.3 x .008
2.15 x .008
1.85 x .010
1.55 x .010
1.3 x .010
 

Attachments

  • 1000004990.jpg
    1000004990.jpg
    418.4 KB · Views: 13
  • 1000004977.jpg
    1000004977.jpg
    448.9 KB · Views: 13
  • 1000004993.jpg
    1000004993.jpg
    331.3 KB · Views: 13
Last edited:
Brick mode engaged!
Pulled the leafs out to get preped by camper shell fun, really looking forward to seeing the difference.
20240412_165007.jpg
20240412_180727.jpg

While they are pulled out I decided it's time to work on the front set up.

The sealed bearing spring mout I made is still in good condition so that is promising.
20240413_133203.jpg

Bypass test filing and eye balling the mount. I Ended up making the mount in such a way that I can slide it up and down before I weld it, as well as rotate the shock mount to dial it in. The files have been sent to laser.
image001.png
20240413_141154.jpg
20240414_121131.jpg

20240413_141207.jpg

Also there is no way the fenders will survive so I am going to try to trim the stock ones first... maybe I can clear them.

This is the tire hitting the inside of the fender:
The suspension still has about 2 more inches of up travel:
20240413_151553.jpg
 

Attachments

  • 20240414_121125.jpg
    20240414_121125.jpg
    321.3 KB · Views: 7
Front limit strap build.
Driver side is done! Pass will be a bit easier with out dealing with the bracket for the brake ABS.

1000005810.jpg
1000005814.jpg
1000005818.jpg
1000005817.jpg
1000005823.jpg
20240419_175945.jpg
1000005825.jpg1000005835.jpg
20240419_191550.jpg

I ordered to long of straps but just glad to get something on the truck, every small bit helps!20240419_193457.jpg
 

Attachments

  • 1000005820.jpg
    1000005820.jpg
    378.1 KB · Views: 2
Last edited:
Send cut send came though. 6 day turn around to my door!
1000005836.jpg
I was able to get the drivers side mout 90% finished today, pics:::
1000005838.jpg1000005840.jpg1000005848.jpg1000005850.jpg1000005854.jpg1000005857.jpg1000005859.jpg1000005858.jpg20240420_174422.jpg
 

Attachments

  • 1000005860.jpg
    1000005860.jpg
    285.3 KB · Views: 2
Back
Top