1993 Camburg ranger build.

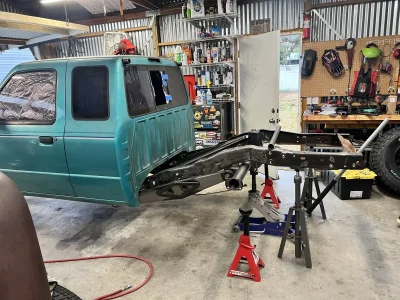
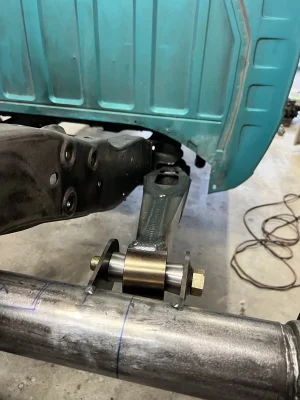
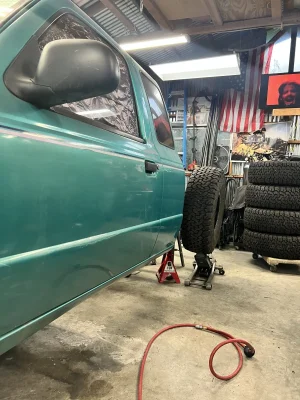
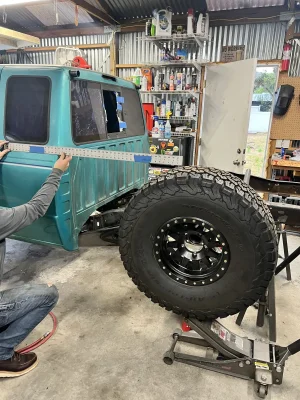
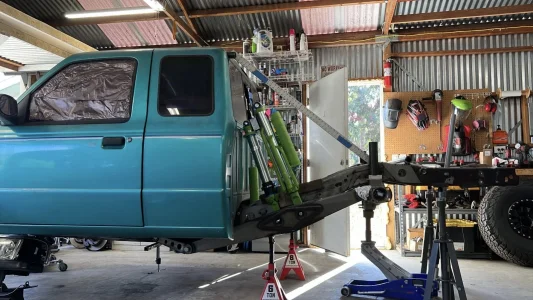
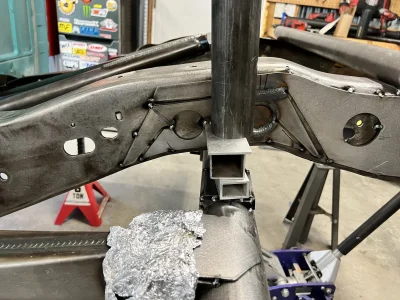
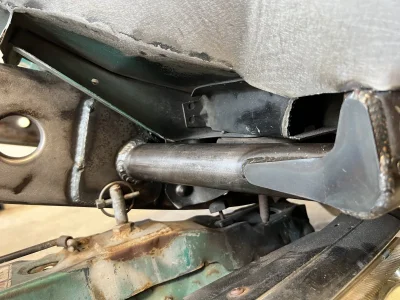
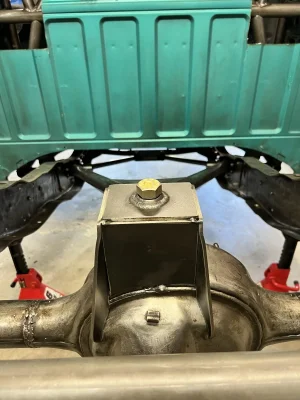
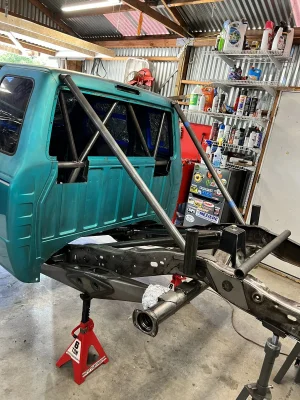
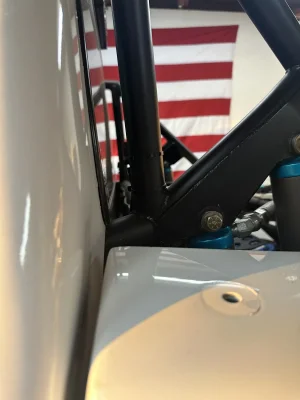
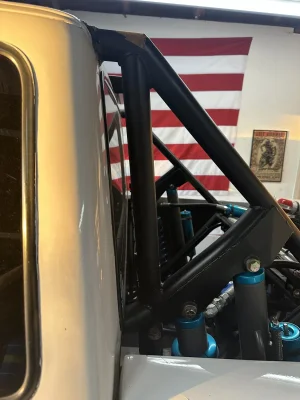
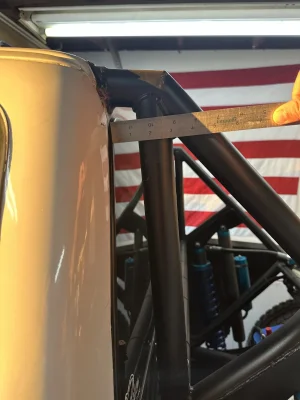
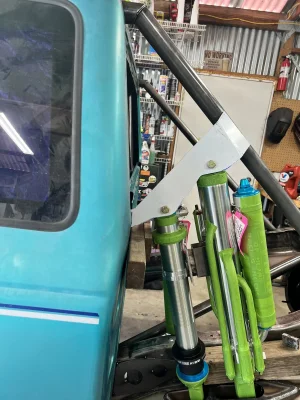
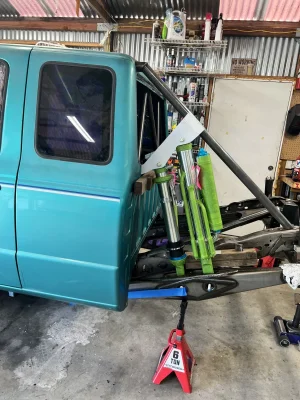
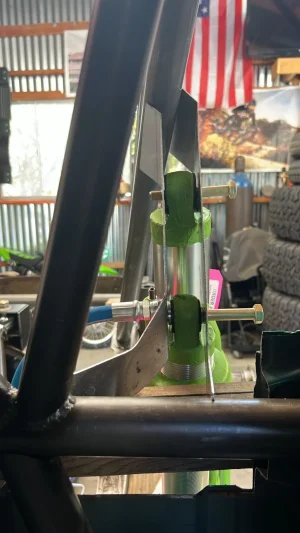
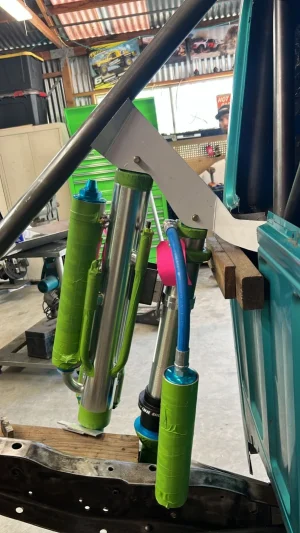
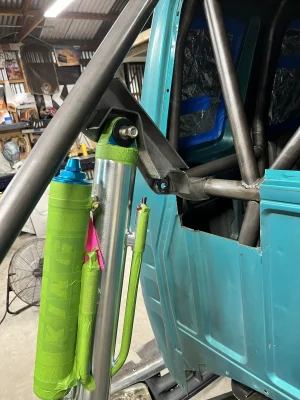
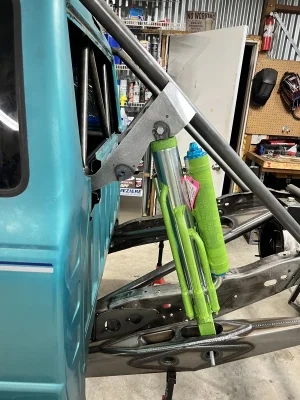
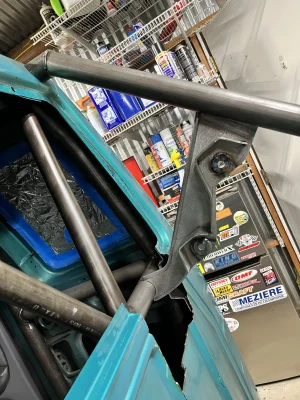
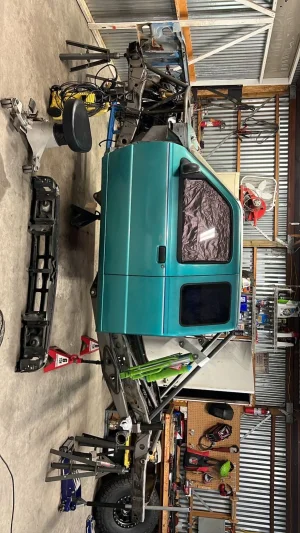
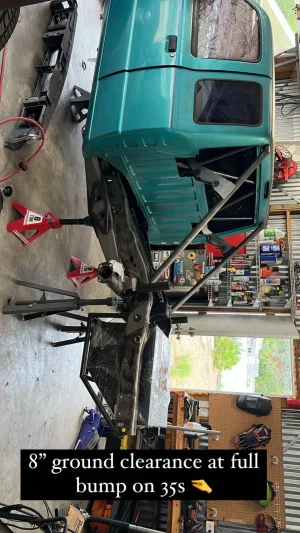
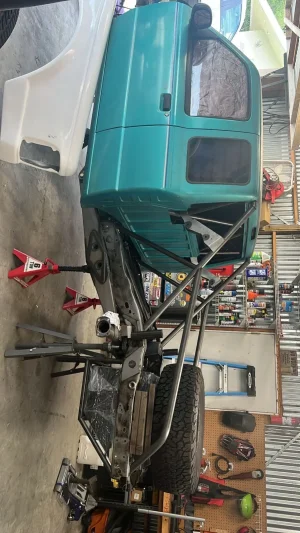
I got all the links mocked up today! Still need to set pinion angle with the upper link and pull some measurements to make sure she is square but hey progress none the less. This weeks tasks are gonna be bump stop mounts, mock up the shocks and some miscellaneous plates and overlays.
 

Attachments

  • IMG_2678.jpeg
    IMG_2678.jpeg
    479.9 KB · Views: 167
  • IMG_2681.jpeg
    IMG_2681.jpeg
    260 KB · Views: 115
  • IMG_2679.jpeg
    IMG_2679.jpeg
    379.3 KB · Views: 90
  • IMG_2680.jpeg
    IMG_2680.jpeg
    463.1 KB · Views: 101
Here’s an update. Gonna land the down tubes today and cut the back of the cab to tie in the shock mounts. Then I’ll end up drawing some shock mounts. Had to adjust the bump mounts a lil to help where it lands on the strike pad.
 

Attachments

  • E3128650-51B5-4502-8A8E-CD8C5348F60A.jpeg
    E3128650-51B5-4502-8A8E-CD8C5348F60A.jpeg
    315.7 KB · Views: 80
No problems getting that rear window out with the stub/miter so close to cab? (I mean now it might not be too hard to get to it from bottom.. but depening what tubework gets added... I could see that getting tight)
 
No problems getting that rear window out with the stub/miter so close to cab? (I mean now it might not be too hard to get to it from bottom.. but depening what tubework gets added... I could see that getting tight)
it might get tight. Gonna try and design the rear shock mount with that in mind I’ll definitely tack everything into place and test fit before anything gets welded.
 
Here’s the other side. Mocked up out of aluminum to help make it more accurate
 

Attachments

  • DB97AF77-359E-4E4E-AD1A-AC38BE8E475A.jpeg
    DB97AF77-359E-4E4E-AD1A-AC38BE8E475A.jpeg
    169.6 KB · Views: 69
  • E296478C-E750-4EC4-B8FF-3BC4FCFD7B1E.jpeg
    E296478C-E750-4EC4-B8FF-3BC4FCFD7B1E.jpeg
    247 KB · Views: 67
Recommendation...put weld washers on the inside of the plate. This allows for more misalighnemt in the shock...and typically they have a bevel which helps slide the shock in easier.

Ps. great job on everything!
 
Recommendation...put weld washers on the inside of the plate. This allows for more misalighnemt in the shock...and typically they have a bevel which helps slide the shock in easier.

Ps. great job on everything!
Yessir that’s the plan! I was going back and forth on what I was gonna do but I like that idea the best.
 
Here’s some shock mount updates! Been a busy couple weeks at work. Plus the garage is like 100 degrees when I get home so it’s been a slow crawl to get anything done. Hoping to get some afternoon / nights coming soon
 

Attachments

  • IMG_3097.jpeg
    IMG_3097.jpeg
    331.7 KB · Views: 70
  • IMG_3098.jpeg
    IMG_3098.jpeg
    419.8 KB · Views: 66
  • IMG_3099.jpeg
    IMG_3099.jpeg
    411.6 KB · Views: 63
  • 1AC18460-4FDA-4378-A4D6-8780FD2B8318.jpeg
    1AC18460-4FDA-4378-A4D6-8780FD2B8318.jpeg
    360.7 KB · Views: 65
Here’s some shock mount updates! Been a busy couple weeks at work. Plus the garage is like 100 degrees when I get home so it’s been a slow crawl to get anything done. Hoping to get some afternoon / nights coming soon
Killer work! The shock mounts look awesome, I definitely prefer the more simplified design like that as some shock mounts can get a little gaudy sometimes
 
Killer work! The shock mounts look awesome, I definitely prefer the more simplified design like that as some shock mounts can get a little gaudy sometimes
Thank you! I agree, I’m not a huge fan of the massive shock mounts. I think some trucks it flows nicely and ties it in but for me I wanna keep it simple low profile and clean
 
Last edited:
Here’s where I got with some time I had on Saturday to try and get something mocked up for a fuel cell. I had to grind those frame rivets off the back and clean up the last half of the frame. Plan is to make a radius tire carrier that’s bolted on maybe with some tube fefe’s. Gonna try and tie as much as I can together so it doesn’t look like an after thought. Bit of slow progress as of late but I’ll be getting back after it as the weather cools down. 14D468D0-E270-443C-A423-01DD59033C13.jpeg
 

Attachments

  • A1181DCF-2ECA-43FD-A64F-E72FC6B32FB3.jpeg
    A1181DCF-2ECA-43FD-A64F-E72FC6B32FB3.jpeg
    330 KB · Views: 62
Here’s a small update. Been pretty miserably hot outside. I was debating to make a fuel cell basket and chop the last bit of frame off but this is what I’ve got tacked up. Not a 100% certain if I’m gonna keep it
 

Attachments

  • 19FD46E1-E626-4A2F-B7C9-3CC649455C40.jpeg
    19FD46E1-E626-4A2F-B7C9-3CC649455C40.jpeg
    291.6 KB · Views: 52
  • IMG_3447.jpeg
    IMG_3447.jpeg
    336.5 KB · Views: 63
Back
Top