1993 Camburg ranger build.

Thicks91

Active member
Joined
Jan 9, 2023
Messages
91
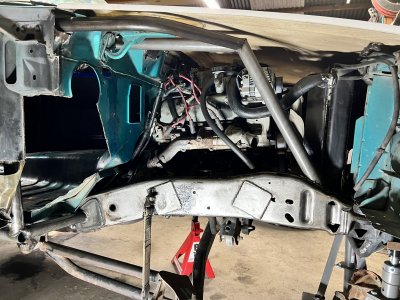
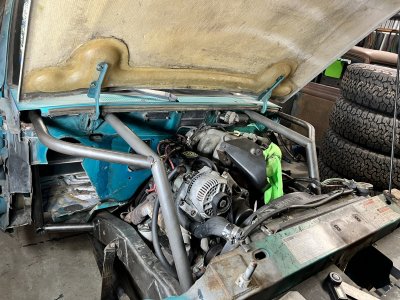
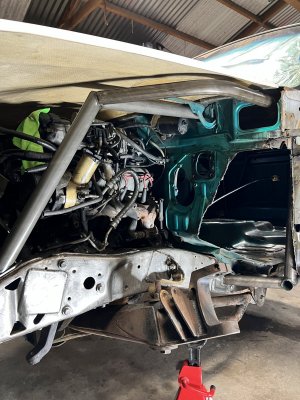
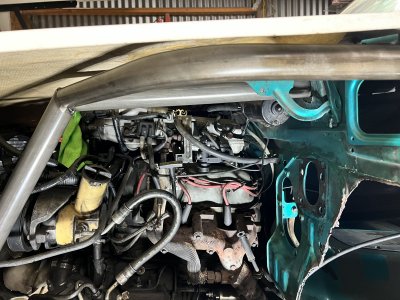
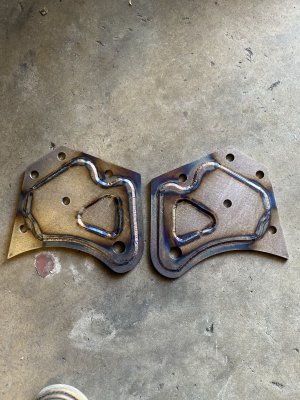
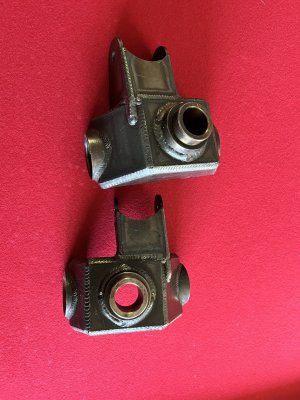
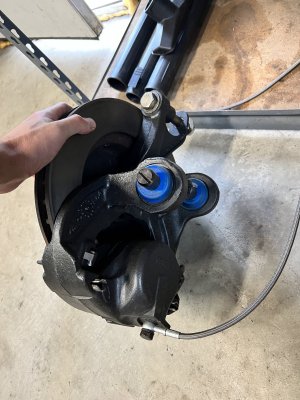
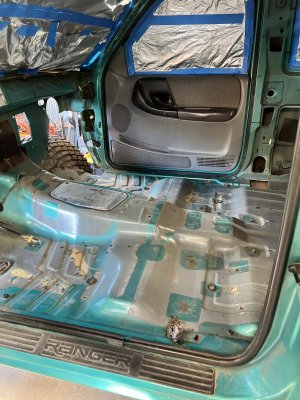
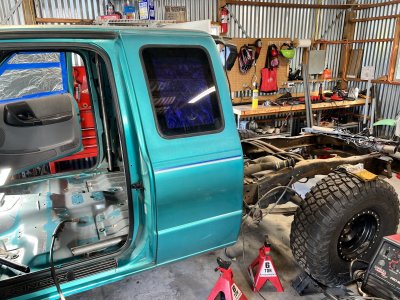
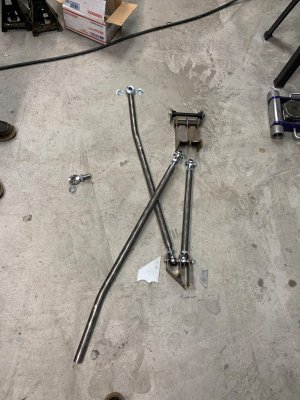
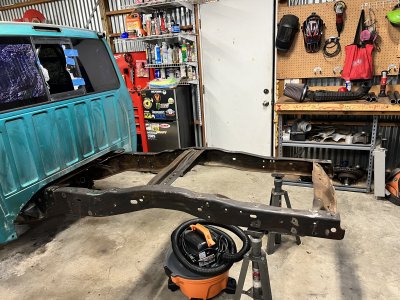
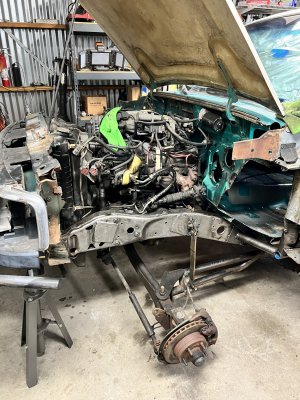
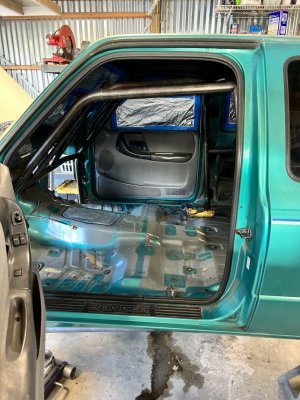
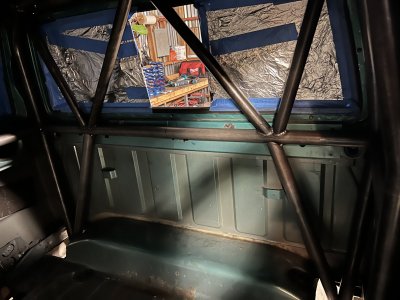
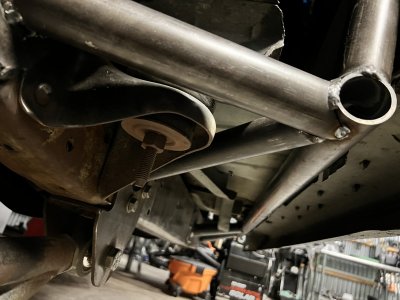
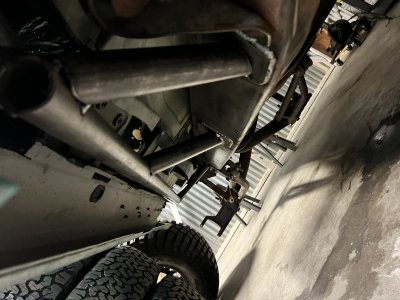
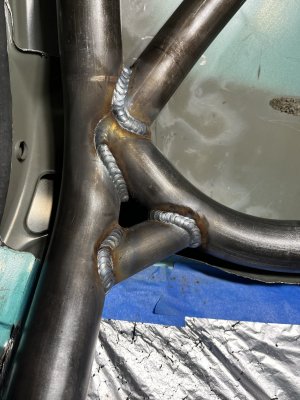
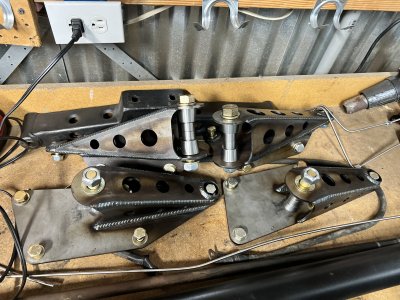
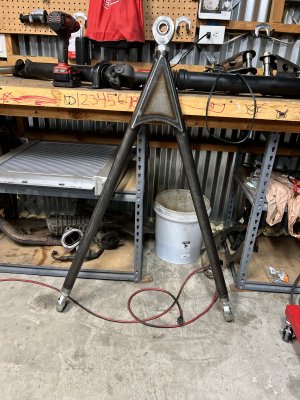
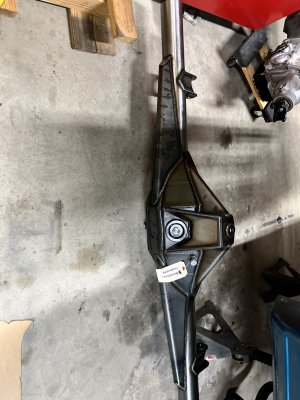
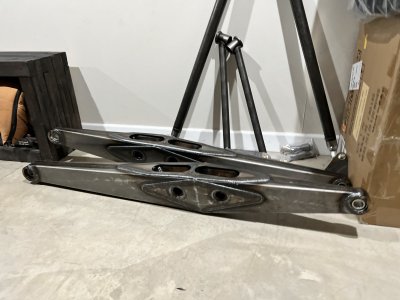
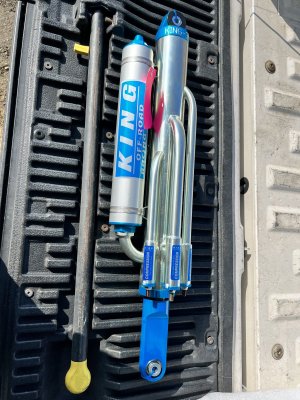
Hey everyone! I’m Tyler Hicks from San Diego. I’m 31 and a union electrician by trade. I posted all this on dezert rangers but this is the new form apparently. Im building a 1993 ford ranger using Camburgs parts and trying to tastefully build something on a budget. I wanted somewhere to document the process and get help / share things along the way. Here’s where I’m at now I’m the process. I bought this truck October 22 2022.84EABFB2-2584-4E0C-89D3-4D25ED3D5D18.jpeg
 

Attachments

  • 0B9E65EB-4BBC-42EE-AE86-C5847279E76F.png
    0B9E65EB-4BBC-42EE-AE86-C5847279E76F.png
    1.1 MB · Views: 99
  • A8492619-C973-4C29-9C47-54B4BB338F4E.jpeg
    A8492619-C973-4C29-9C47-54B4BB338F4E.jpeg
    389.1 KB · Views: 69
  • EB5FA0D2-EC03-4733-A3EB-0538571CCA8F.jpeg
    EB5FA0D2-EC03-4733-A3EB-0538571CCA8F.jpeg
    483 KB · Views: 68
  • BDA24450-1D23-4F78-9BA1-26F1301A0C8C.jpeg
    BDA24450-1D23-4F78-9BA1-26F1301A0C8C.jpeg
    370.7 KB · Views: 67
  • 32D2BF77-E687-4AF6-8343-CDE28D666C93.jpeg
    32D2BF77-E687-4AF6-8343-CDE28D666C93.jpeg
    502.4 KB · Views: 78
  • FE844ED6-7459-45EE-889E-57528429ADE2.jpeg
    FE844ED6-7459-45EE-889E-57528429ADE2.jpeg
    518.7 KB · Views: 76
  • 67455E97-8A8C-4768-B281-42424DB503EB.jpeg
    67455E97-8A8C-4768-B281-42424DB503EB.jpeg
    397.2 KB · Views: 82
  • 5A0FF0CB-68FD-4BBC-A7CB-EB07724EB919.jpeg
    5A0FF0CB-68FD-4BBC-A7CB-EB07724EB919.jpeg
    286.4 KB · Views: 78
  • ED8200B2-91FF-4B08-804B-B7968563355E.jpeg
    ED8200B2-91FF-4B08-804B-B7968563355E.jpeg
    245.4 KB · Views: 75
  • 6CFEEF92-EDAB-478E-BEFC-0D71F1B387E9.jpeg
    6CFEEF92-EDAB-478E-BEFC-0D71F1B387E9.jpeg
    308.6 KB · Views: 88
  • DA83094B-B088-489E-9FA5-2C83E0E0E7BD.jpeg
    DA83094B-B088-489E-9FA5-2C83E0E0E7BD.jpeg
    336.8 KB · Views: 100
Last edited:
Here’s some of the parts I’ve been stacking! Made the decision to not run the Camburg housing until later. Gonna tab out a ford 9” that I found on offer up for 300$
 

Attachments

  • 39CF542E-4F17-4DB7-959D-62B07D5304C1.jpeg
    39CF542E-4F17-4DB7-959D-62B07D5304C1.jpeg
    419.7 KB · Views: 95
  • 01127F7A-5A2A-45E2-8F83-E28D45158695.jpeg
    01127F7A-5A2A-45E2-8F83-E28D45158695.jpeg
    436.9 KB · Views: 98
  • 49C2162C-5D52-44F1-806A-8FB84AF49891.jpeg
    49C2162C-5D52-44F1-806A-8FB84AF49891.jpeg
    324.9 KB · Views: 100
  • 4AA922E6-ED3B-447C-9BE7-F9DB9A4194DA.jpeg
    4AA922E6-ED3B-447C-9BE7-F9DB9A4194DA.jpeg
    219.3 KB · Views: 95
  • 1A03A97D-E6F7-4A34-9CA1-8784290C3246.jpeg
    1A03A97D-E6F7-4A34-9CA1-8784290C3246.jpeg
    480.3 KB · Views: 103
I’m down in blossom valley (alpine)! Absolutely saw the instagram story and laughed. I’m not much of a social media guy I dig the forums
 
I’m a one man band most of the time. My Dad is a prep guy at alumicraft and my roommate (friend) is a fabricator for alumicraft as well. They both have there own projects too, my dads got a 03 ext cab Silverado and my roommates building a 32 Plymouth hot rod so our house is a busy place
 
Here’s an update of the engine cage. Started after work yesterday. Had to work today so got a few more tubes in. Gonna get after it tomorrow and maybe get a couple more in
 

Attachments

  • CB37E28A-6C28-4BDF-9F7E-9F8C485A6406.jpeg
    CB37E28A-6C28-4BDF-9F7E-9F8C485A6406.jpeg
    431.7 KB · Views: 103
  • 6F0C05F9-5C38-455D-A89F-8E903F60646A.jpeg
    6F0C05F9-5C38-455D-A89F-8E903F60646A.jpeg
    511.7 KB · Views: 101
  • 2BCCD1AB-0588-445F-9C60-E6C5165C3131.jpeg
    2BCCD1AB-0588-445F-9C60-E6C5165C3131.jpeg
    415.3 KB · Views: 100
  • EA37CF08-7F84-4FB2-A37D-8795767B1ADF.jpeg
    EA37CF08-7F84-4FB2-A37D-8795767B1ADF.jpeg
    390.9 KB · Views: 93
  • 4E6FBE92-061A-4C78-B853-D4BB9E39C40C.jpeg
    4E6FBE92-061A-4C78-B853-D4BB9E39C40C.jpeg
    390 KB · Views: 100
Looking good.

I like that you were smart enough to cut a bunch of metal out to clear and weld everything. When I first built my truck I didn't not... and well it made everything a lot more difficult.
 
Thanks! Gonna do some more mock up for where I wanna do the shock mounts tonight. I’ve already got some templates for some new radius arm pivots from a couple of my other rangers. Gonna decide where I want the bump stops to land etc. alumicraft uses an older projector style plasma table which makes taking paper templates to metal pretty easy. Here’s some sweet overlays on a older set of pivots
 

Attachments

  • FBC676AB-20DA-4E65-BBFC-F2D21970C99D.jpeg
    FBC676AB-20DA-4E65-BBFC-F2D21970C99D.jpeg
    353.9 KB · Views: 85
  • 85E075A3-46FE-4015-AF2E-F1DF4F79CC55.jpeg
    85E075A3-46FE-4015-AF2E-F1DF4F79CC55.jpeg
    316.2 KB · Views: 82
  • F32C1BB6-3609-45C0-BBE6-2A84ADDFE22A.jpeg
    F32C1BB6-3609-45C0-BBE6-2A84ADDFE22A.jpeg
    533 KB · Views: 93
what are your plans for the front hubs? going to upgrade the beams or snouts at all?
Also if you are keeping those beams, i suggest plating the ends where the shock mounts are. It wasnt uncommon for that portion to bend where they milled out the center to reduce weight. I twisted a set once.
 
I’m gonna keep the beams hope to make them last I’ll probably plate those on both sides. I have f150 spindles and hubs that I have already set up that are freshened up. I also have a set of Camburg spindles that are set up for the pin style snout.
 

Attachments

  • C618B760-D825-4C52-985C-3C115C167249.jpeg
    C618B760-D825-4C52-985C-3C115C167249.jpeg
    440.4 KB · Views: 85
  • 6E69E576-EC17-4166-B9AF-C3BF6A119F54.jpeg
    6E69E576-EC17-4166-B9AF-C3BF6A119F54.jpeg
    346.4 KB · Views: 86
word on the street is their link pivot geometry is a copy of the SI stuff. only camburg is 3 link and SI is 4 link. ive not confirmed but my friends ranger with the camburg link "kit" works tits out back thats forsure!
 
word on the street is their link pivot geometry is a copy of the SI stuff. only camburg is 3 link and SI is 4 link. ive not confirmed but my friends ranger with the camburg link "kit" works tits out back thats forsure!
SI and Newline have the same geometry as well right? Years ago when i was linking my ranger Jerry told me his kit geometry was just like Nestors and Planks.
 
"4 links bind" ... LOL.

I think i mentioned it on other forum... but i assume you stuck link brackets up to make sure you have room to clear those subframe tubes to frame? I had to cut shit off on brodaddy build so links would clear.

oh, and if you angle those upper shock mounts diagonally... instead of straight across... your upper shock uniballs will see less misalignment.
 
Last edited:
Back
Top