Looks good. I did the ghetto fixed yoke on my 85yota with a 4.3L 700r4 trans. I got a yoke from a corvette since it bolted on from factory or something like that. I used a copper washer at end of the shaft and under the bolt head/washer as well. No leaks in the years I ran that setup and it kept my carrier bearing alive and well when racing it also.
You are using an out of date browser. It may not display this or other websites correctly.
You should upgrade or use an alternative browser.
You should upgrade or use an alternative browser.
Local Legend Don't Call It An S10
- Thread starter the bodj
- Start date
the bodj
Well-known member
Looks good. I did the ghetto fixed yoke on my 85yota with a 4.3L 700r4 trans. I got a yoke from a corvette since it bolted on from factory or something like that. I used a copper washer at end of the shaft and under the bolt head/washer as well. No leaks in the years I ran that setup and it kept my carrier bearing alive and well when racing it also.
Now that I’m thinking about it, I don’t know if I’ll be able to do the ghetto fixed yoke. I’m at the limits of how long my one piece driveshaft can be with the yoke not bottomed out. Maybe pulled out 1.5”. If I bottom out the yoke to bolt it in, I’m sure the driveshaft will be too long for a one piece steel shaft.
A longer yoke is easy to get, but I’d need to make a spacer for inside the yoke so it takes up the space between the tail shaft and backside of the yoke itself. It might work to put the yoke back to stock position, or even slightly further back. Any negatives to this plan?
Heer_O
Well-known member
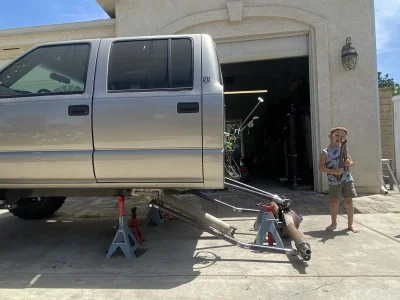
That's a sweet S-10 
For the driveshaft you would need to get a new one made with the slip in the driveline. They have slips for driveline up to like 7" long pretty easily. Yours probably has a 1310 u joint so it would be easy for driveshaft pro in Ventura to make you a shaft that would fit easily. Bottom out and fix tcase side and then measure length at bump and droop and get a new shaft done. It won't be the cheapest way to do it but would be the right way to not have any problems in the future.
the bodj
Well-known member
Yes I know exactly how it all works, I’m saying that the driveshaft will be too long for a single piece driveshaft when the yoke is bottomed out in the transfer case. I need a way to space it off the transfer case before bolting it in. I’ve been in contact with Willie at Driveshaft Pro in Ventura and he says a 60” ds is as long as he’d go with a steel ds. I don’t want aluminumFor the driveshaft you would need to get a new one made with the slip in the driveline. They have slips for driveline up to like 7" long pretty easily. Yours probably has a 1310 u joint so it would be easy for driveshaft pro in Ventura to make you a shaft that would fit easily. Bottom out and fix tcase side and then measure length at bump and droop and get a new shaft done. It won't be the cheapest way to do it but would be the right way to not have any problems in the future.
the bodj
Well-known member
I don’t want to deal with figuring out the carrier bearing crossmember location or pay for an individual two piece driveshaft. Id rather buy two one piece driveshafts and have a spare to keep on the truck.Gotcha and you don't want to go to a 2 piece driveline since plunge will be worse I'm guessing.
michael_gonzalez
Active member
- Joined
- Apr 1, 2022
- Messages
- 144
60" is as long as he will go. But 61.5" is too long?Yes I know exactly how it all works, I’m saying that the driveshaft will be too long for a single piece driveshaft when the yoke is bottomed out in the transfer case. I need a way to space it off the transfer case before bolting it in. I’ve been in contact with Willie at Driveshaft Pro in Ventura and he says a 60” ds is as long as he’d go with a steel ds. I don’t want aluminum
RIP Nuns
the bodj
Well-known member
Yes. 60" is already pushing it for a steel driveshaft. Starts noodling and jump-roping.60" is as long as he will go. But 61.5" is too long?
RIP Nuns
Gotcha. That's what I figured. Also I have never needed a driveshaft when I raced or any of the 30k+ miles in my Tacoma. I did use my jack and impact more often and wish I had a vehicle specific impact that lived on the truck
It only takes once. I've been on a trip where Brandon Miller overshot a blind corner on a high speed powerline trail and went through some big rocks and jacked his driveshaft up. 30 minutes later and the new one was on, and we continued the trail.
the bodj
Well-known member
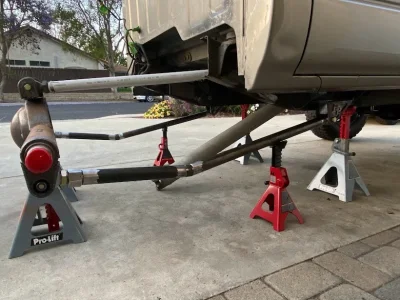
Started the lower links yesterday. The front two pieces of tube are 1.75" x .250", and the rear section is 1.75" sleeved with 1.5" all the way up to the tube adapter, since those are meant for 1.5"ID tube. All the plate work will be 1/4" and 3/16"
Miters?! Line up the nuns!


Going to build the uppers next since they should go quick, and I won't have to worry about having loose heims or tube adapters floating around the garage. Plus I'm tired of worrying the heims are going to slip out of the pvc. Won't get to that till next week, though.
Miters?! Line up the nuns!
Going to build the uppers next since they should go quick, and I won't have to worry about having loose heims or tube adapters floating around the garage. Plus I'm tired of worrying the heims are going to slip out of the pvc. Won't get to that till next week, though.
Attachments
theycallmeWALLY
Administrator
- Joined
- Mar 30, 2022
- Messages
- 1,530
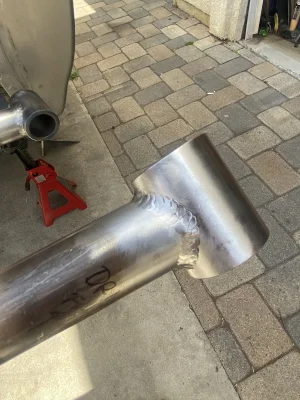
What's that little guy doing at the miter joint?
the bodj
Well-known member
I was initially going to make it a bit longer, maybe 4" or so, to take the "sharpness" out of the miter, so to speak. But then I got lazy and decided not to include the middle piece. Well, somewhere along the way I cut a tube an inch short lol. Since quarter inch wall tube is expensive, I threw the 1" spacer in. It does the trick, is getting tigged in HOT, and will be plated up the wazooWhat's that little guy doing at the miter joint?
theycallmeWALLY
Administrator
- Joined
- Mar 30, 2022
- Messages
- 1,530
Copy. Yeah I was just wondering if there wasn't something I was missing. I had assumed it was some type of... 'not long enough' scenario.
michael_gonzalez
Active member
- Joined
- Apr 1, 2022
- Messages
- 144
1/4" plate? You sponsored by ruffstuff now?
the bodj
Well-known member
Copy. Yeah I was just wondering if there wasn't something I was missing. I had assumed it was some type of... 'not long enough' scenario.
First time I've had to say that in a sentence in my life
1/4" plate? You sponsored by ruffstuff now?
Hah. I have a very specific ideology with this build. Make it comfortable to drive (not a full kill truck) and make it simple to build. Could I make it all out of 1/8"? Sure, but I'd be doing a lot more internal bracing and making the manufacturing process more complicated. I want to be able to explore at a quick (not race) pace, comfortably, without getting a migraine at the end of the day, and be in remote places without worrying about potentially under-built links.
the bodj
Well-known member
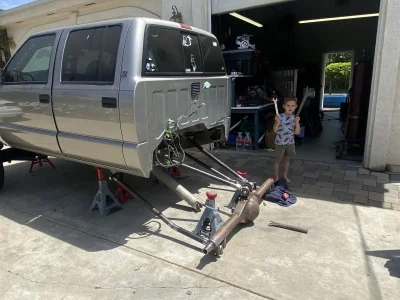
Made the upper links today, and got the bushing tubes fully welded on the front of the links, and made templates/drew the plates up in SW for the lower links. Should be able to get those cut out tomorrow. Probably have them cleaned up and tacked together, and have the miters on the lower links fully welded By Saturday evening. It was super cool picking up the rear end with my hands and getting to feel how effortless it cycles and flexes. Can’t wait to drive it!
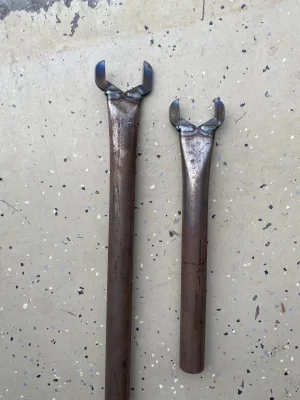
Also, I had to cut out wrenches for the jam nuts. Levi was helping me since, “I’m taking too long building out monster truck.”
Also, I had to cut out wrenches for the jam nuts. Levi was helping me since, “I’m taking too long building out monster truck.”
Attachments
GahnRacing
Well-known member
- Joined
- Apr 4, 2022
- Messages
- 420
You scare me
the bodj
Well-known member
Why's that?You scare me
Similar threads
- Replies
- 24
- Views
- 555
- Replies
- 86
- Views
- 4K
- Replies
- 34
- Views
- 930
- Replies
- 13
- Views
- 994