Local Legend Don't Call It An S10

Got the frame rails welded and in place. Ground down the side welds so I can do overlays next week. Made pieces to get more weld area covering the old/new frames and welded those in (the stock frame is taller and doesn't allow you to sleeve the rect tube into it). Just need to cut out the inside plates, which I already made the template for and just need to cut out on the plasma table.

1654990455533.png

1654990519842.png

1654990535540.png


Set the tank and spare in place. Going to have the tank under the frame with a subframe and skid plate. It has 12-13" of clearance at full bump, but I think a skid would be a good idea to do anyways. I may lower the tank 2-3" to get the fuel inlet lower, allowing the spare to sit a little lower, as well.

1654990638852.png

1654990699079.png

1654990709747.png
 
Got the shock mounts triangulated where that back section where the frames meet and welded the cab directly to the tube work. This helps take a lot of the drum sound out of that panel when rocks hit it and helps keep the cab from ripping itself apart. Also, added the inside frame plates. I had those reach pretty far onto the stock frame to help share the load. I'll get pics of that today. Also I added the first down-tubes for the bedcage, bought craftsman versa-stack boxes for tools (these are actually made in the USA... with global materials), and started laying out where things are going to go. Cooler will be directly behind the cab (it will only be accessed at night when cooking, so I'm not terribly worried about accessibility. The closer to the middle of the truck, the better shot I have of keeping fragile food items, like eggs, intact. Anyways, tool boxes behind that in a lockable/sealed metal container, spare tire at an angle over the gas tank, bumper tubes below the spare tire which will house/protect the jack. Jack handle and shovel will be underneath the spare tire. I may make storage to the left and right of the spare tire to house spare parts, but that won't come until the fiberglass is mounted.

1655307208062.png
1655307215290.png

Had to flex it out to know where I can run tubes

1655307235157.png

1655307244638.png

1655307254989.png

1655307272968.png

1655307287467.png

1655307305965.png

1655307321925.png
 
Added more tubes, cooler and small propane tank arrived. Not sure if it’ll be big enough for a full weekend though.
 

Attachments

  • 1DB35454-6B62-46A4-9360-8B39748367BC.jpeg
    1DB35454-6B62-46A4-9360-8B39748367BC.jpeg
    371.5 KB · Views: 31
  • 2299A3A8-20E6-4AC4-A8BC-3DF0A4F87542.jpeg
    2299A3A8-20E6-4AC4-A8BC-3DF0A4F87542.jpeg
    442.3 KB · Views: 27
  • A3987ACA-F240-4AD9-AAC2-BC6A3B7CE8EC.jpeg
    A3987ACA-F240-4AD9-AAC2-BC6A3B7CE8EC.jpeg
    374.3 KB · Views: 28
  • E1A58BD5-5417-455B-B9F5-8F7827F5A0B1.jpeg
    E1A58BD5-5417-455B-B9F5-8F7827F5A0B1.jpeg
    411.3 KB · Views: 33
That looks slick as fuck! But… are you going to add some more side to side strength or are we just gonna commit a nun genocide?

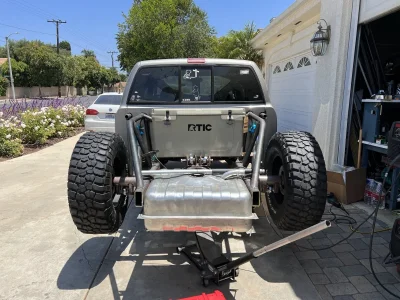
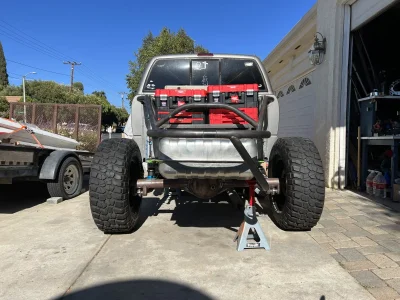
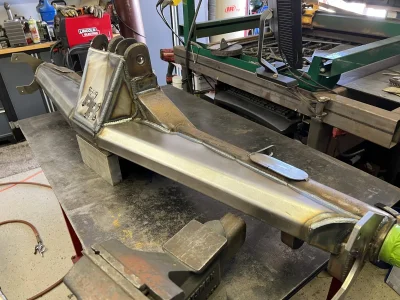
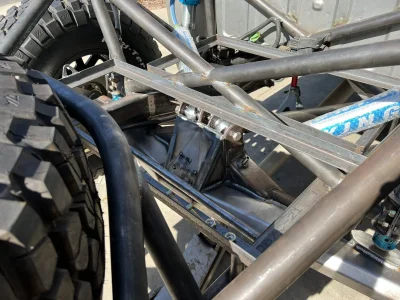
Thanks Patrick! I'm trying to figure out where/how to incorporate a horizontal X across the frame rails. I think I can get one below the cooler (probably should have done that first lol), and I'm going to add a tube across the down tubes, just aft of the tool boxes. From there, I'll run tubes from the frame up to the center of that cross tube. Imagine like windshield ^ tubes. It's going to get a bumper and I'll try adding an x somewhere in there, and possibly an x in the gas tank cradle.
Edit: Looking at it now, I can throw an X between the tool boxes and cooler. It'll make getting the cooler in and out a pain, but will add a ton of strength.

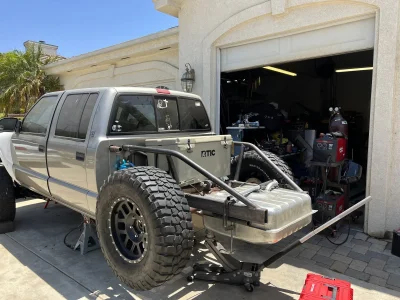
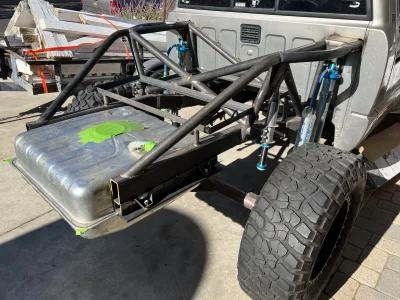
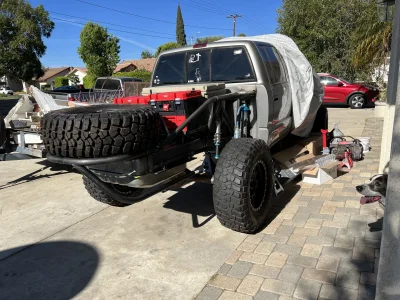
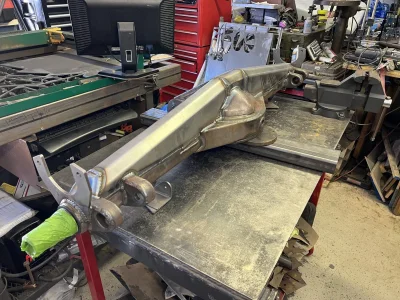
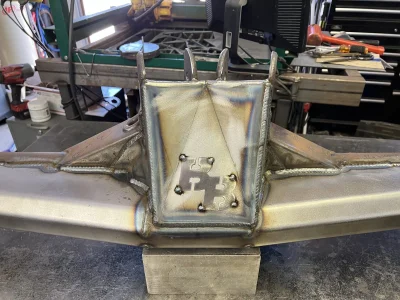
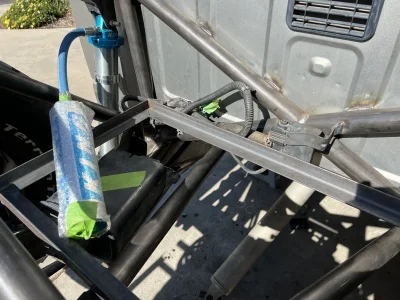
Here is where I finished off yesterday. Cooler and tool box tie down tabs welded on, limit straps tabbed up (I need the right hardware), and upper shock mounts boxed in.

1655650626794.png

1655650647139.png

1655650656845.png

Notice the shaved bump mount. I'm a loser and didn't droop the driver side all the way when bumping the passenger side during mock up, so the tire rubs a bit. Now it rubs a bit less. Even though I have a hydro bump, the coilover is still going to get a foam bump on the shaft, so hopefully that limits articulation a bit. Maybe a swaybar is in the future?

1655650669038.png

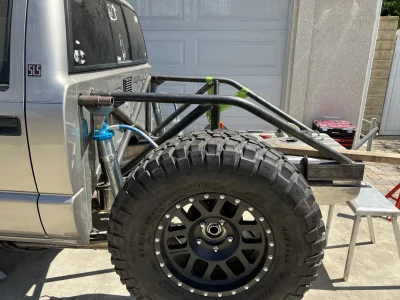
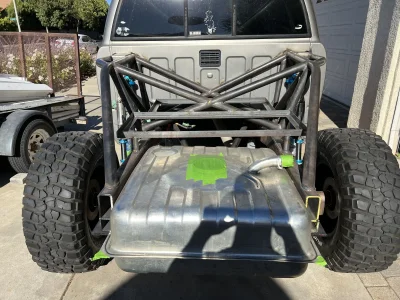
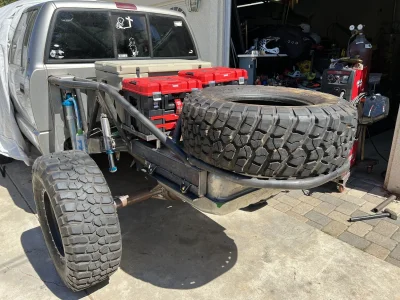
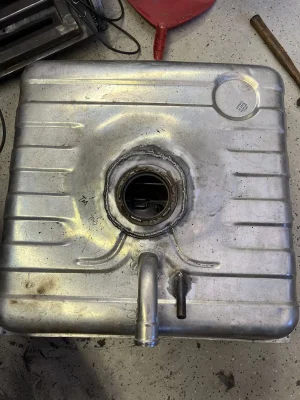
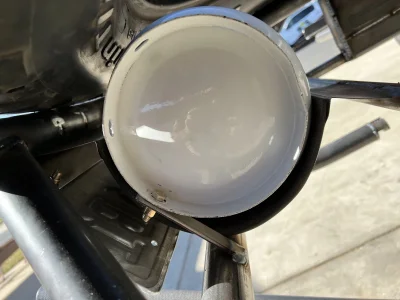
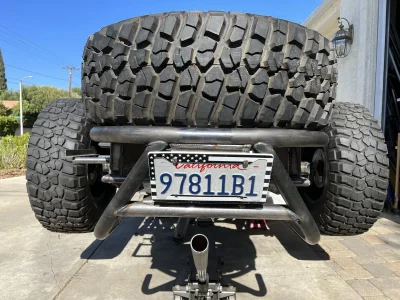
I keep going back and forth between flat and angled spare. I'm leaning towards flat...
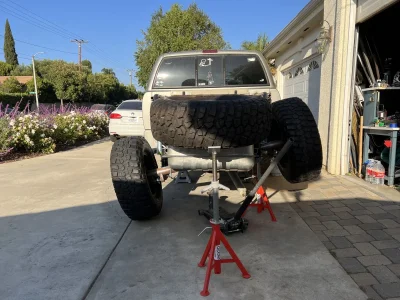
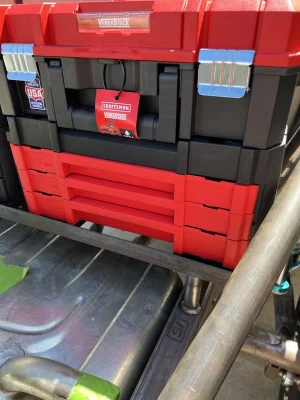
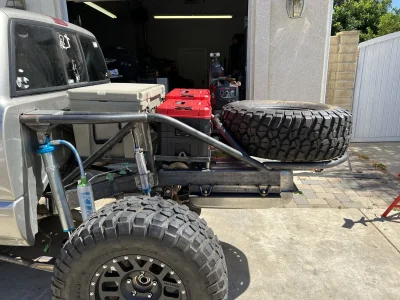
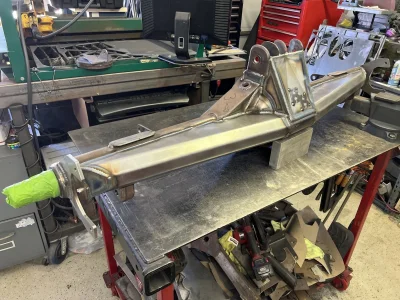
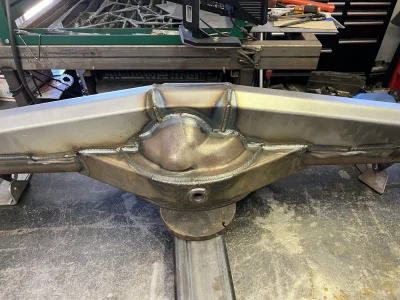
1655650709804.png

All together

1655650738265.png

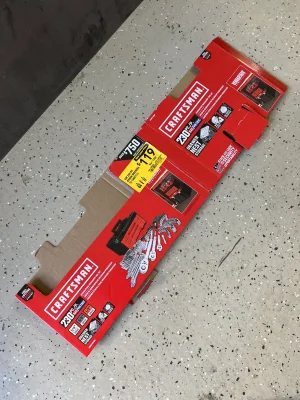
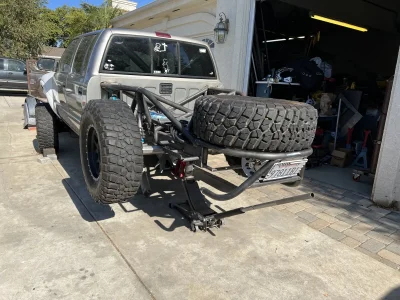
And how it's going to sit for a couple weeks.

1655650760221.png

Gotta pack and get everything squared away for our wedding/honeymoon!
 
Last edited:
I think the flat spare is where it’s at. Might make the truck a little bit longer, but I think it looks better.
 
I'm a fan of the flat spare. Are you going to have any type of bumper behind it like mine? Also I'm not one of them smart folks, but I think you'll need a sway bar immediately When everything's full those little shocks are going to be doing a lot of work back there and unless you had a shit ton of slow speed valving corning on the freeways may get a little sketchy.
 
I think the flat spare is where it’s at. Might make the truck a little bit longer, but I think it looks better.
I'm a fan of the flat spare. Are you going to have any type of bumper behind it like mine? Also I'm not one of them smart folks, but I think you'll need a sway bar immediately When everything's full those little shocks are going to be doing a lot of work back there and unless you had a shit ton of slow speed valving corning on the freeways may get a little sketchy.

I agree with the flat spare. Right now the plan is to have the spare flat, and have a bumper setup beneath it that is actually a closed compartment, which will hold the jack and maybe the jack handle and shovel.

No clue about the valving with the little shocks. I just compared my link geometry to Marcy's (who also doesn't run a sway bar). We both have low antisquat numbers (he has like 25% and I have 44% IIRC), and our supposed COG is about 8" above the roll center line. He says he feels he has less sway than some trucks with swaybars, so we'll see what happens. Kevin at Dialed Shock Prep told me what to put in my front shocks, and he will be valving the rear once it's all together. But I purposely made the rear as heavy as I can ( 2x4x.250" frame rails, nearly all .120 DOM tube, spare and gas behind the axle...) so I can run a bit heavier springs. I don't want a little bit of weight change to have a huge effect on ride height. I think that will help sway more than the valving.
 
Negative, added weight will make sway potentially more of a problem. More mass equals more force. You might have a hell of a time controlling low speed with a single 2.5". I know King's 2.5 prerun piston is a relatively low flow design anyways but maybe a rate plate might help in this situation?
 
Negative, added weight will make sway potentially more of a problem. More mass equals more force. You might have a hell of a time controlling low speed with a single 2.5". I know King's 2.5 prerun piston is a relatively low flow design anyways but maybe a rate plate might help in this situation?
More mass does equal more force. However that also equals higher spring rate, and more force required to compress the springs.

Better hide your nuns…
 
Back from getting married and my honeymoon, so time to get rocking on this thing.

Got started with the fuel cell cradle mounts on the side of the frame. I’ll build off the 3/8” plates that’ll sandwich the gas tank flange. The tubes underneath will support it and get a 1/4” aluminum skid. The tubes will get tube couplers near where they meet the bumper. Also added an x brace between the cooler and tool boxes, and a stop for the spare tire so it doesn’t run into the tool boxes. Speaking of tool boxes, Craftsman has a tool kit that fits the boxes I already have. I got it on clearance for $120. Super nice setup for the price and I don’t have to buy all the tools to load it.
 

Attachments

  • DD392C55-4E04-4AD7-8896-93E1590E2AC4.jpeg
    DD392C55-4E04-4AD7-8896-93E1590E2AC4.jpeg
    350.2 KB · Views: 37
  • 17E961E9-171A-40E5-8380-15402134BDBC.jpeg
    17E961E9-171A-40E5-8380-15402134BDBC.jpeg
    416.9 KB · Views: 42
  • 338B4451-F8E5-43C1-AF82-87EFA0369FAE.jpeg
    338B4451-F8E5-43C1-AF82-87EFA0369FAE.jpeg
    443.7 KB · Views: 41
  • 74F7A441-C6EE-4753-B730-FFC35847A3CB.jpeg
    74F7A441-C6EE-4753-B730-FFC35847A3CB.jpeg
    449.9 KB · Views: 38
  • BC6ED6D9-6B2A-4370-9794-3544B2CAF1B3.jpeg
    BC6ED6D9-6B2A-4370-9794-3544B2CAF1B3.jpeg
    267.5 KB · Views: 34
  • 9056646D-F92B-4120-87D6-1383CFBB2ADC.jpeg
    9056646D-F92B-4120-87D6-1383CFBB2ADC.jpeg
    445.2 KB · Views: 33
  • 7DEF3460-7479-4148-BAAB-49432AE3E576.jpeg
    7DEF3460-7479-4148-BAAB-49432AE3E576.jpeg
    505.8 KB · Views: 33
  • AB272F5F-352F-4906-8F95-DF5A03E5B361.jpeg
    AB272F5F-352F-4906-8F95-DF5A03E5B361.jpeg
    404.8 KB · Views: 34
  • 49191A4C-8747-41B6-9CA2-C2DB92BC6058.jpeg
    49191A4C-8747-41B6-9CA2-C2DB92BC6058.jpeg
    438.4 KB · Views: 31
  • 2027BE89-209A-4E9E-B7B4-59CF3B80C57D.jpeg
    2027BE89-209A-4E9E-B7B4-59CF3B80C57D.jpeg
    423.3 KB · Views: 32
Nothing really picture worthy today. Added the forward bracing tubes to the front tire stop thing, made a jack skid, started boxing in the front lower link mounts, added bracing to the gas tank cradle, and cut the skid plate out for that, and made a cradle to hold my 5lb propane tank. Not stoked on the location, but it’s the only place I could fit it. Going to add more to the bumper in case I get rear ended. I’ll get those pictures tomorrow. For now, here is the jack skid.
 

Attachments

  • 1D04CBF4-9FD3-462B-AB4A-EDBC95F16FD3.jpeg
    1D04CBF4-9FD3-462B-AB4A-EDBC95F16FD3.jpeg
    489.4 KB · Views: 21
  • C2804B12-1500-4CE0-8943-93F2E179CFA9.jpeg
    C2804B12-1500-4CE0-8943-93F2E179CFA9.jpeg
    480.7 KB · Views: 27
Alright here we go. Gas tank cradle and propane tank peeking out from under the spare

1657675151862.png

1657675187693.png

Got the jack mounted. Nothing fancy, just some 1" mild and some angle iron. It'll get a pull pin at the rear and some gussets for the 1" tube.

1657675238530.png
1657675253267.png

1657675274666.png

Propane mount is 18g sheet that I bead rolled. It'll get a top strap of some sort, and a tab or two off the diagonal bumper tubes to keep it firmly in place.

1657675355373.png

The welded seam on the tank sits nicely in the middle bead

1657675381647.png

Added a vent tube for the fuel filler neck since the stock tank had one. The tank is actually welding really nice, to my surprise. I'll finish the weld when I pull the tank to finish welding everything else.

1657675451206.png

Pulled the axle

1657675467036.png

1657675475761.png

Got the caliper mounts burned in, truss trimmed and halfway welded.

1657675506538.png

1657675523000.png

The stock ford center section has tubes that extend laterally further than my Schreiner housing, so I needed some filler plates. I'll weld these to the truss first, grind them flush, and then weld to the axle

1657675575087.png

1657675585102.png

1657675594169.png

Productive day!
 
Getting after it!

When do you hope to take it on it's first test drive?
I'm hoping to get it driving in the next three weeks. That's a goal, but I don't know if I'll meet it. Might need a 4th week. I'd just like it to be driving before I go back to teaching in the middle of August. I still have a list of about 20 small jobs needed to complete the back half and like 3 bigger jobs that take more thinking, like brake lines, fuel lines (already have the stuff to do them, I've just never messed around with them) and modify/hang the fiberglass. I decided I'm going to take material out of the center section and glass it back together. I think it'll be the best chance I have at making this glass look good.
 
Rear end is cloooooseeee. I need to box in the bump pads and fab work on it is done.
 

Attachments

  • C01F13F5-7501-41D3-967A-0AB975E54772.jpeg
    C01F13F5-7501-41D3-967A-0AB975E54772.jpeg
    473.4 KB · Views: 27
  • 71811A0C-3FA0-44C9-B180-03F7FD29550F.jpeg
    71811A0C-3FA0-44C9-B180-03F7FD29550F.jpeg
    425.6 KB · Views: 25
  • 550FA2D2-8F19-44BB-B1D6-95C25877050D.jpeg
    550FA2D2-8F19-44BB-B1D6-95C25877050D.jpeg
    413.9 KB · Views: 24
  • 59DB32D6-9FC1-44C6-9FBD-78B435D062A6.jpeg
    59DB32D6-9FC1-44C6-9FBD-78B435D062A6.jpeg
    403.5 KB · Views: 22
  • 5A95F628-35FD-436A-89B8-7D8222DFF627.jpeg
    5A95F628-35FD-436A-89B8-7D8222DFF627.jpeg
    462.7 KB · Views: 24
Got the bedcage all welded up and pretty much ready for paint. Got the charcoal can mounted back in the stockish location, got my fuel lines sorted (ish. I need to get another length of hose), cut apart the old tank to use the sending unit flange dealio and welded that to the blazer tank, reassembled everything (minus the tank) and started trimming fiberglass. This glass sucks. The vertical bedside part above the tire actually sucks inward, so I have to trim it super high to clear. I’m figuring out the front first, then I’ll cut a section out of the middle, glass it back together, and then trim the rear how it needs to be. Once the glass is done I’ll be able to paint everything, assemble the axle and measure for my driveshaft. Then brakes and it should be pretty much done! Hoping to get it on its own weight by the end of next week.
 

Attachments

  • E2024F8E-4D0E-4084-92B8-2D304645415B.jpeg
    E2024F8E-4D0E-4084-92B8-2D304645415B.jpeg
    401.8 KB · Views: 24
  • F632889F-2565-486C-88CE-52EAD2EE6E70.jpeg
    F632889F-2565-486C-88CE-52EAD2EE6E70.jpeg
    338.2 KB · Views: 23
  • 385FE3A9-C2C2-4A9B-95C0-C325D7597660.jpeg
    385FE3A9-C2C2-4A9B-95C0-C325D7597660.jpeg
    199.2 KB · Views: 23
  • F0B2ED33-D09A-4012-A73C-3CCDE04AB882.jpeg
    F0B2ED33-D09A-4012-A73C-3CCDE04AB882.jpeg
    357 KB · Views: 23
  • 9CFAAA02-9FB4-41FB-AF69-39B2AC3CB488.jpeg
    9CFAAA02-9FB4-41FB-AF69-39B2AC3CB488.jpeg
    349.7 KB · Views: 23
  • 152C33E9-2E92-4FFC-A7D5-B151CC8E245E.jpeg
    152C33E9-2E92-4FFC-A7D5-B151CC8E245E.jpeg
    408.9 KB · Views: 23
  • 971C48D9-74AB-4F6D-897A-A382E5716EDE.jpeg
    971C48D9-74AB-4F6D-897A-A382E5716EDE.jpeg
    459.6 KB · Views: 23
  • 7C9B2806-9F0D-42FC-8997-D282EE3A7C22.jpeg
    7C9B2806-9F0D-42FC-8997-D282EE3A7C22.jpeg
    392.8 KB · Views: 23
  • FA0385DB-CF9B-47AD-9B2A-B6EDBEA17C90.jpeg
    FA0385DB-CF9B-47AD-9B2A-B6EDBEA17C90.jpeg
    225.1 KB · Views: 23
Back
Top