1993 Camburg ranger build.

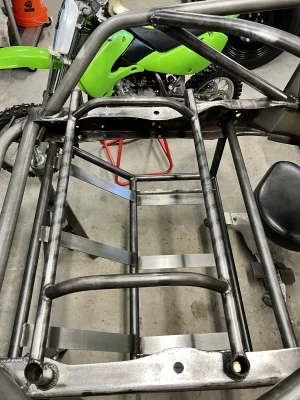
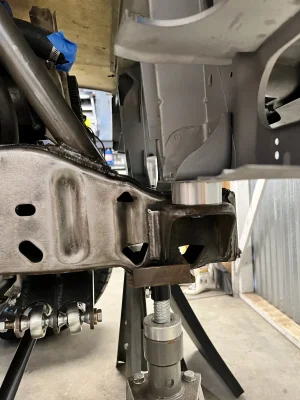
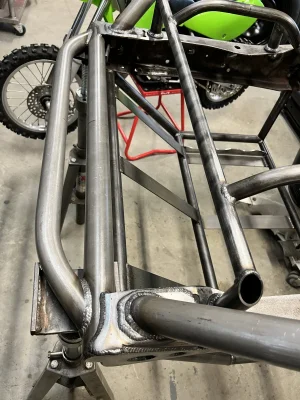
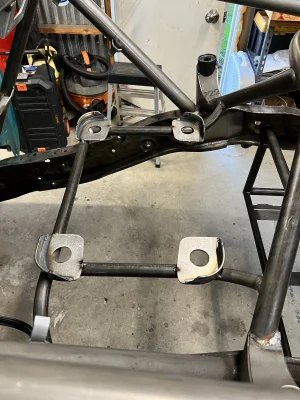
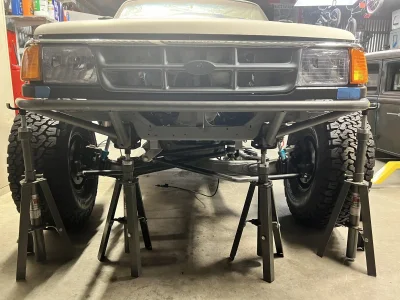
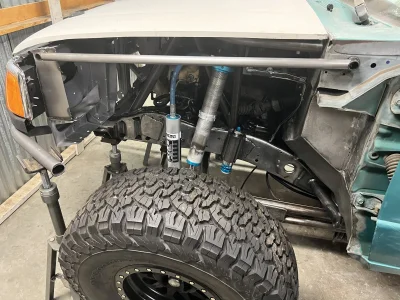
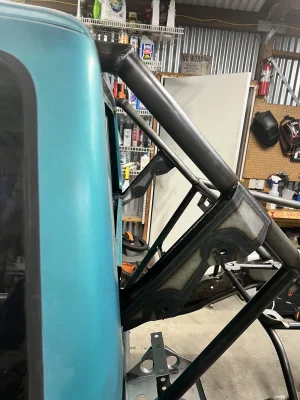
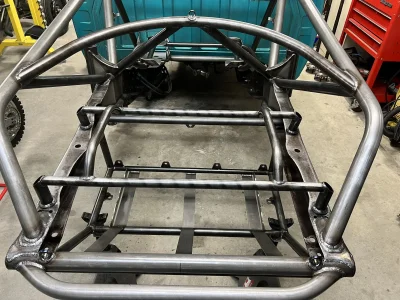
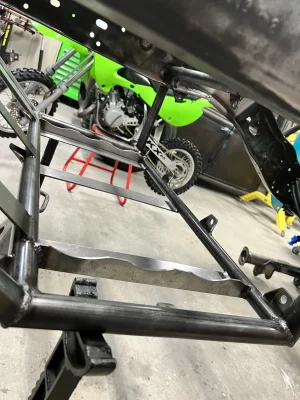
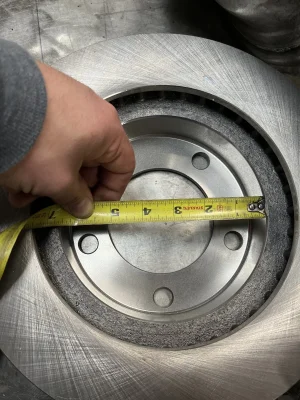
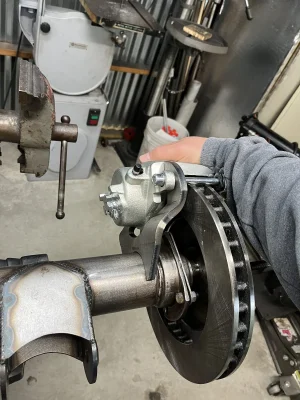
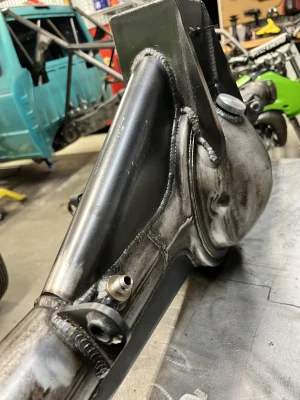
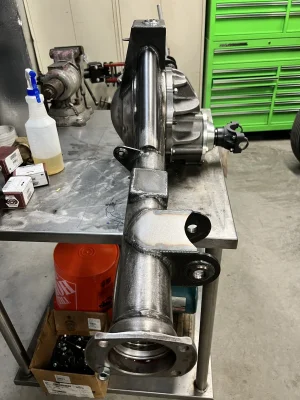
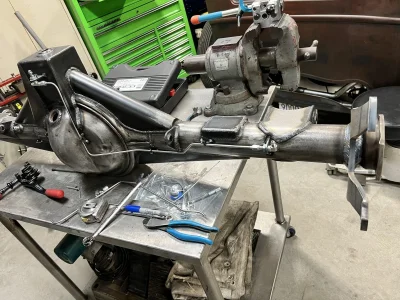
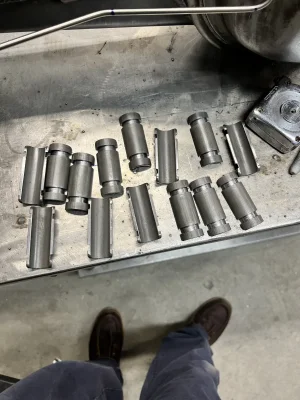
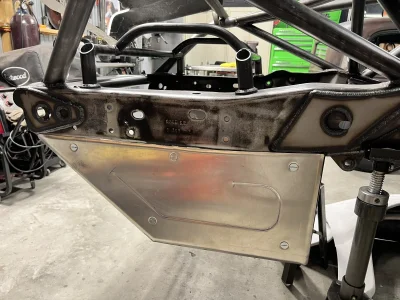
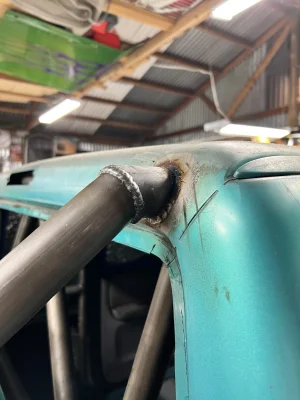
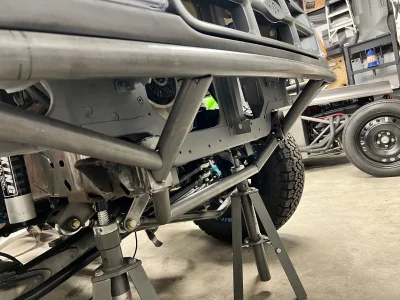
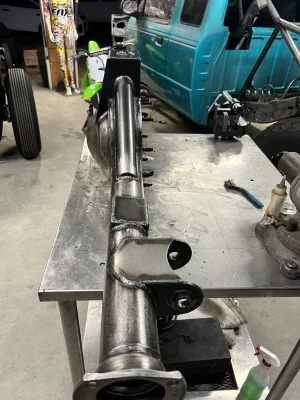
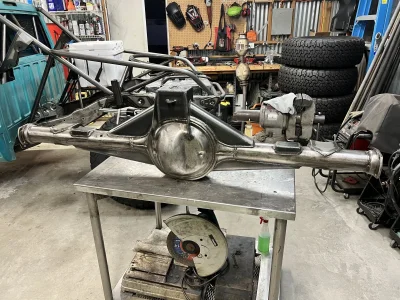
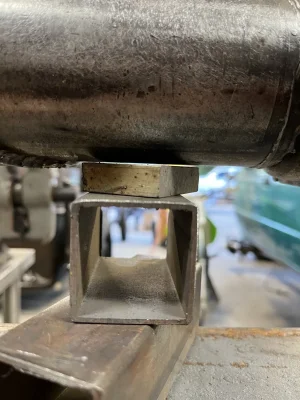
Limit strap tabs and then brake caliper tabs. I was lucky enough that a family friend that works at IMS hooked me up with the I beam out of the rem rack. There is a bunch of different ways to do it. After pre loading it a 1/8” per side down and welding 3” per side jumping around. Had to check the ratchet straps because they were stretching with the heat. It still has a 16th of preload in the axel after all said and done.
 

Attachments

  • IMG_4184.jpeg
    IMG_4184.jpeg
    362.8 KB · Views: 255
  • IMG_4183.jpeg
    IMG_4183.jpeg
    506.4 KB · Views: 159
  • IMG_6778.jpeg
    IMG_6778.jpeg
    297.2 KB · Views: 123
Last edited:
I also use the chains and bottle jack method. Put 3/8" preload into the center section.. I did still opt to have it tru'd by Burleson Design and he told me it was strait enough that I wouldn't have had issues. Many ways to skin a cat I guess.

The taco gussets are baller as fuck!
 
I also use the chains and bottle jack method. Put 3/8" preload into the center section.. I did still opt to have it tru'd by Burleson Design and he told me it was strait enough that I wouldn't have had issues. Many ways to skin a cat I guess.

The taco gussets are baller as fuck!
Cool simple way to do the taco gussets with minimal tools! Thought I’d share that haha
 
I took a bit of a Christmas break on the truck but started to get things rolling again yesterday. Working on getting the hood and core support mounted and the fenders mocked up. Fuel cell hold down was final fitted and welded as well as some key ways to keep the cell from shifting. Final tie ins to the back bumper were also final welded. The core support got those sweet aluminum pucks to delete the old rubber ones. I also had to get some new 88 f150 brake discs and rebuild the brake assembly. Checking things off the list one at a time haha
 

Attachments

  • IMG_4297.jpeg
    IMG_4297.jpeg
    460.3 KB · Views: 60
  • IMG_4301.jpeg
    IMG_4301.jpeg
    379.1 KB · Views: 48
  • IMG_4302.jpeg
    IMG_4302.jpeg
    431.2 KB · Views: 48
  • IMG_4303.jpeg
    IMG_4303.jpeg
    299.9 KB · Views: 47
  • IMG_4304.jpeg
    IMG_4304.jpeg
    285.5 KB · Views: 48
  • IMG_4305.jpeg
    IMG_4305.jpeg
    355.2 KB · Views: 62
  • IMG_4306.jpeg
    IMG_4306.jpeg
    425.7 KB · Views: 72
Productive day! Got to go down and roll a tube for the front bumper and that’s spiraled into getting the core support set in place and really getting down to the nitty gritty of finding out about the driver side wreck this thing was in… it’s got a clean title which is rad but had to pull the aluminum puck out of the front core support and gonna have to turn it down about a 1/8in to get the level with the cab. Lots of finish welding in the rear got the skid plate tabs on and I bought the aluminum Friday for that. Also got the tire mount hooks set in place. Chassis side of the limit strap tabs mounted as well. Still lots more to do but slowly checking things off.
 

Attachments

  • IMG_4374.jpeg
    IMG_4374.jpeg
    376.7 KB · Views: 45
  • IMG_4373.jpeg
    IMG_4373.jpeg
    351.9 KB · Views: 47
  • IMG_4372.jpeg
    IMG_4372.jpeg
    404 KB · Views: 50
  • IMG_4371.jpeg
    IMG_4371.jpeg
    306.1 KB · Views: 46
  • IMG_4369.jpeg
    IMG_4369.jpeg
    432.9 KB · Views: 39
  • IMG_4368.jpeg
    IMG_4368.jpeg
    339.9 KB · Views: 36
  • 65AA1174-1AA7-44CF-9D54-0981EEC717C9.jpeg
    65AA1174-1AA7-44CF-9D54-0981EEC717C9.jpeg
    262.1 KB · Views: 41
  • 9991C932-8B00-417B-80C6-B4CFB3F74699.jpeg
    9991C932-8B00-417B-80C6-B4CFB3F74699.jpeg
    324.5 KB · Views: 59
This weekend since it was raining we tried to do some bench stuff, discovered that the 9” I have isn’t so friendly to a disc brake conversion so it’s gonna take some lathe work to smooth things out. Nevertheless the fill plug,limit straps, breather AN were all checked off, managed to get one set of bearings on the axel and the other side was 20 thousands off. To add fuel to the fire the rotors weren’t sliding over the axel face, so some investigation and pulling measurements then come to find out the rotor ID is 6 5/8 and the axel face is 7” go figure so gonna see what we can do on the lathe to get it sorted. The driver side bearing when I tore this axel apart originally was seized and it looked like someone beat the bearing on.. anyways here some pics from the adventure. I plan to continue on with the front bumper this week and my roommate is gonna take the axel to work and turn it down in the lathe for me. This is what happens when you have more time than money and access to tools 😂
 

Attachments

  • IMG_4411.jpeg
    IMG_4411.jpeg
    412.2 KB · Views: 41
  • IMG_4408.jpeg
    IMG_4408.jpeg
    459.6 KB · Views: 38
  • IMG_4407.jpeg
    IMG_4407.jpeg
    370.1 KB · Views: 35
  • IMG_4409.jpeg
    IMG_4409.jpeg
    282.5 KB · Views: 37
  • IMG_4415.jpeg
    IMG_4415.jpeg
    452 KB · Views: 41
  • IMG_4414.jpeg
    IMG_4414.jpeg
    324.5 KB · Views: 45
  • IMG_4412.jpeg
    IMG_4412.jpeg
    334 KB · Views: 41
  • IMG_4416.jpeg
    IMG_4416.jpeg
    429 KB · Views: 46
Last edited:
Here’s some Friday progress! This brake line tool is the best investment. I use RC car shock shaft pliers to hold the stainless line while I cut it. Skid plates on the fuel cell mounted, tabs for the tin on cell done and some brake lines and finish welding for the caliper mounts.
 

Attachments

  • IMG_4487.jpeg
    IMG_4487.jpeg
    434.3 KB · Views: 43
  • IMG_4488.jpeg
    IMG_4488.jpeg
    272.5 KB · Views: 45
  • IMG_4489.jpeg
    IMG_4489.jpeg
    372.7 KB · Views: 41
  • IMG_4490.jpeg
    IMG_4490.jpeg
    453.8 KB · Views: 39
  • IMG_4491.jpeg
    IMG_4491.jpeg
    363.6 KB · Views: 43
  • IMG_4492.jpeg
    IMG_4492.jpeg
    460.9 KB · Views: 87
Last edited:
Here’s some 1” .120 dom turned down in the lathe and then cut in half, that will be welded to the chassis to route the fuel lines and the transmission lines.
That’s a cool idea that I can’t remember or that I’ve noticed on any builds.. any idea on the total amount of weight this will add by the time you have all the pieces you’ll need to run the lines? Additional Weight is the only downside here right?
 
A lot of tedious work getting wrapped up. The back window doesn’t fit or slide right in so gonna have to cut the frame unfortunately, working on wrapping up the front bumper as well. Here’s some pics of the half tubes.
 

Attachments

  • IMG_4530.jpeg
    IMG_4530.jpeg
    304.6 KB · Views: 47
  • IMG_4529.jpeg
    IMG_4529.jpeg
    345.9 KB · Views: 45
  • IMG_4531.jpeg
    IMG_4531.jpeg
    266 KB · Views: 53
  • IMG_4532.jpeg
    IMG_4532.jpeg
    351.9 KB · Views: 59
  • IMG_4533.jpeg
    IMG_4533.jpeg
    257.8 KB · Views: 67
Small update this weekend. Moved to the cab on Friday night with mocking up roughly where my seats were gonna go, then bent up some door bars & lacing, then ran the cross tubes and bent my seat rails. In between that I had to cut the sheet metal some more on the floor to get to the under cab lacing for welding. I then ordered up some prp universal seat sliders. Hoping to mount the seats and harness next weekend and see about getting the dash in there. One step at a time haha
 

Attachments

  • IMG_4651.jpeg
    IMG_4651.jpeg
    336.8 KB · Views: 32
  • IMG_4654.jpeg
    IMG_4654.jpeg
    415.9 KB · Views: 41
Back
Top