Local Legend "jolene" 1993 ford ranger

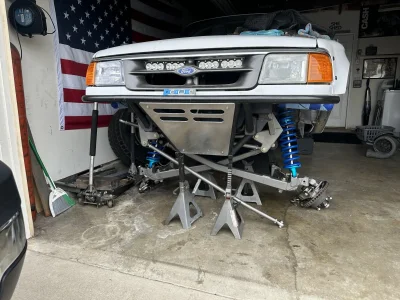
so the trucks been great for the last two years or so. Naturally, I had to ruin that by cutting shit off
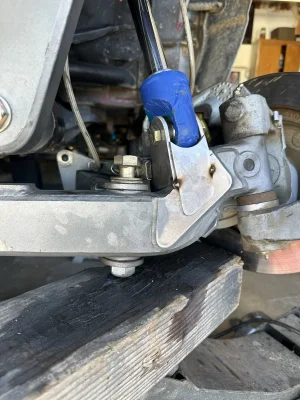
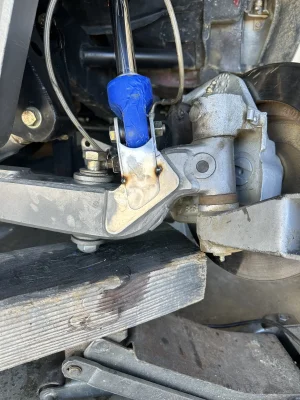
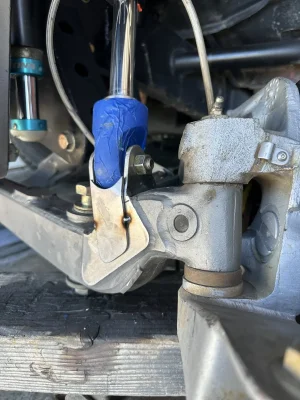
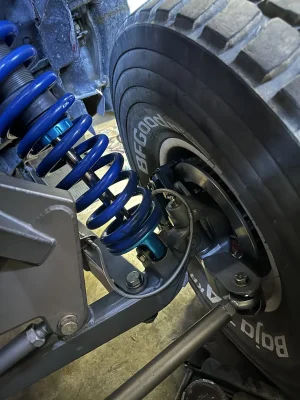
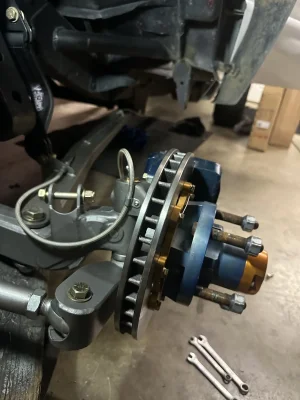
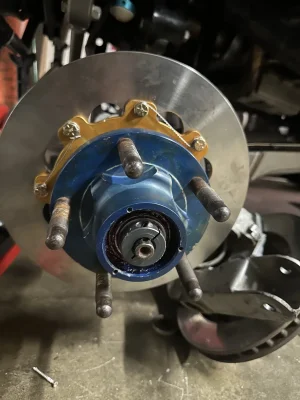
First order of business is redoing lower shocks mounts on the beams. They bind the lower misalignments on the shocks at droop and I actually had to strap it higher than what it was capable of. Also putting the shocks on was a pain in the ass.
Shocks are going to dialed to get the added internal spacers removed to bring the shocks back to 14” stroke (we shortened em closer to 13)
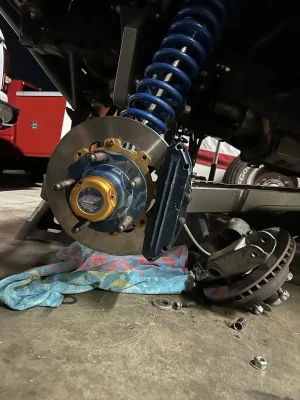
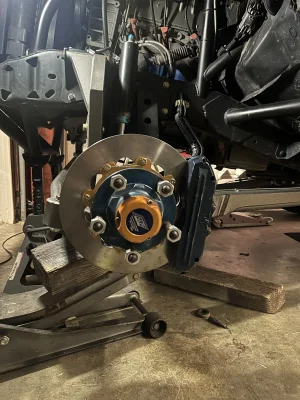
Cut some really nice fab work off today. That was painful but we got through it 😂
View attachment 13503

So are you doing anything 'trick' to make the new lower shock mounts easier to mount? Like really thick mounts so they don't flex when you tighten them or???
 
Nothing really “trick” just correcting the angles so there’s no weird forces trying to max out the lower shock unibal
The old mounts never really flexed. They just weren’t clocked right for the angle of the shock dangle

Using 3/16 4130 for the two main tabs of the shock mount and 1/8” 4130 to box it in.
 
Work has been absolutely nuts lately so today has been the first day I’ve been able to work on it since cutting the mounts off.

Built up some new shock mounts. Cycled, rebuilt shock mounts. Cycled and now I’m happy with them. They’re clocked 45° from where they were and now the uniball sees hardly any movement and I gained some droop! It cycles just shy of 21” metal to metal so it’ll be strapped around 19.5-20”
depending where the limit strap stretches to.

Here’s some pics of the new mounts. I only have a mig welder so I Kept the tack welds to a minimum cuz I want to take the beams to a buddy’s shop and tig the mounts on.
Now just to copy/paste to the other side!
 

Attachments

  • IMG_9885.webp
    IMG_9885.webp
    267.1 KB · Views: 127
  • IMG_9884.webp
    IMG_9884.webp
    315.6 KB · Views: 86
  • IMG_9883.webp
    IMG_9883.webp
    249.9 KB · Views: 94
I never understood why people would put the shock mounts in the wrong plane.... I see it a lot too. Why make things misalign more than they need to? (Just causes more wear... and like you noticed... it will bind up with enough travel!)
 
I never understood why people would put the shock mounts in the wrong plane.... I see it a lot too. Why make things misalign more than they need to? (Just causes more wear... and like you noticed... it will bind up with enough travel!)

Yeah you know I’m not sure! I wonder that too. Maybe @JACKSONRALLYINC can shed some light on these things

It woulda worked if the shock wasn’t leaning back so far
Actually worked fine on the passenger side because the king pin beam ends are different driver and passenger side. But ya idk! It’s all better now! Gonna go tig weld em up next weekend!
 
Just packaging. The tabs inline with the beam packages nice as a single shock setup and works as designed when the shocks are not leaned back too far. Too much droop can give you issues as well. And I see zero issues using as much of the available angle from a spherical bearing providing it does not go into mechanical bind... I mean that is what they are for.
 
Just packaging. The tabs inline with the beam packages nice as a single shock setup and works as designed when the shocks are not leaned back too far. Too much droop can give you issues as well. And I see zero issues using as much of the available angle from a spherical bearing providing it does not go into mechanical bind... I mean that is what they are for.

Definitely agree that’s what the bearings are for. And I probably leaned the shocks back a little too far. I don’t know how I missed that binding issue when I was setting things up initially but oh well Im still learnin haha.
 
Gettin everything back together. Now I’m gonna be figuring out how to mount my new spindles and cone hubs. The spindles have a different overall length than my old ones where the king pin enters so my current kingpin is too long for em. Gotta figure out what they’re off of and how to get a right length kingpin!
 

Attachments

  • IMG_0116.webp
    IMG_0116.webp
    299.9 KB · Views: 65
  • IMG_0117.webp
    IMG_0117.webp
    324.4 KB · Views: 82
Got everything buttoned up over the weekend. Super stoked on all this stuff!! I used a threaded pinch “shaft collar” as a spindle nut and still ran a cotter pin as a second measure of security.
I can’t believe how small these Cnc brakes make my 12” rotor look lol.
I took the truck for a spin around the block to make sure it still stops. I didn’t need better brakes but they were what the spindles were tabbed for. That being said, I dont really notice much of an improvement in breaking. I have a 1” master for the front brakes. I think I need to step that down maybe?? I’m not sure. Anyone care to share what they have for 6 piston brakes?
 

Attachments

  • IMG_0273.webp
    IMG_0273.webp
    194.1 KB · Views: 38
  • IMG_0272.webp
    IMG_0272.webp
    193.6 KB · Views: 41
  • IMG_0249.webp
    IMG_0249.webp
    299.4 KB · Views: 34
  • IMG_0247.webp
    IMG_0247.webp
    115.1 KB · Views: 35
  • IMG_0244.webp
    IMG_0244.webp
    117.7 KB · Views: 34
  • 71661580488__33971169-380C-433C-AD7B-0821671E3120.webp
    71661580488__33971169-380C-433C-AD7B-0821671E3120.webp
    274.6 KB · Views: 33
The last piece of the puzzle gets finished JUST in time. I needed some real light on the front of my truck and splurged for some Baja designs LP6’s. I’ve never had anything that nice ever so I had to give them a good home so I Designed a billet light bar bracket to bolt to my bumper. My dude Ryan jubera machined it up in the most beautiful fashion with insane looking tool paths. I could not be happier with this piece!
I tucked the lights as close to the grill as I could so I didn’t have anything sticking past the bumper too far. Recessed the light brackets into the aluminum bar to help hide hardware and keep the lights right under the top chromes strip of the grille.

Can’t wait to go hit some bushes with it!

IMG_0356.webp
IMG_0376.webp
IMG_0374.webp
IMG_0373.webp
IMG_0371.webp
IMG_0370.webp
 
that light bar turned out so rad. Never seen that done before, great job thinking outside the box.
 
Back
Top