You are using an out of date browser. It may not display this or other websites correctly.
You should upgrade or use an alternative browser.
You should upgrade or use an alternative browser.
The Baja350 - a Dentside Story
- Thread starter DesertGoat
- Start date
DesertGoat
Well-known member
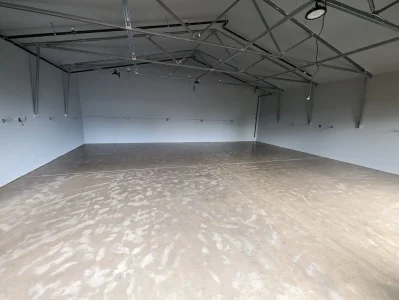
so... the first thing to know is that versatube subcontracts out the siding & the insulation.
so you basically end up with ~3 shipments of stuff & you're going to end up getting phone calls from businesses you've never heard of asking you about deliveries & things. That's more annoying than a problem, but they don't warn you about it.
More important to know is that the instructions that come with the thing are.... let's say... utter dogshit.
you get a generic set 8.5"x11"s that describe how each joint is usually assembled but you're on your own to figure it out for your specific building.
Which is really g.d. frustrating when you're trying to figure stuff out & have an eye for details.
I got lucky and had some local buddies more well versed in building construction to help me figure things out .
To be specific... nowhere in the instruction packet does it tell you where or how to install the insulation.
so we installed everything based on the packet & ended up with the whole frame & siding completed.
then when we went to do the insulation nothing was making sense based on the sizes of the rolls & how they were supposed to fit so I called versatube & asked and they said that the insulation goes between the frame & the siding. I'm pretty sure steam came out of my ears at that point.
otherwise... it's fine. It's pretty hard to make the thing straight & square as the joints are all pretty hokey.
the whole thing is held together with self tapping screws and until the drywall went up... the whole thing was quite rattle-y when i'd shut the man door.
not the kind of thing i'd suggest to anyone who lives in a hurricane/tornado region.
The last thing is costs...
I went fully permitted for mine (wish I didn't)
I'm at the finish line now but my total investment is 5x the cost of just what the versatube website shows you.
~20k of that was permit-related costs or extra shit I had to do in order to satisfy permits.
with that removed, it still would be 4x the base cost of the website.
I've heard the same about versatube instructions. I know Handeeman on YouTube built a huge versatube shop and he ran into issues after he started putting it together and had to redo a lot to make sure it was all correct. And yeah permits suck but you gotta pay that county/city bribe to let them do what you want to do on your property. I luckily didn't have any issues with permits on my shop in Phoenix besides them making me get another permit for a concrete driveway through the gate that was already there since the home was built 10+ yrs before. I also ONLY permitted the structure, Not the electrical, bathroom, plumbing etc that I added after the building was done. Then when I sold the home I just had to put on my disclosure that those items were not permitted, but that didn't effect appraisal and most likely only increased the ease of sale with those amenities in the shop.
So almost back on the Baja350. You'll get back on your before I'll get back onto my truck, I'm jealous. lol
So almost back on the Baja350. You'll get back on your before I'll get back onto my truck, I'm jealous. lol
DesertGoat
Well-known member
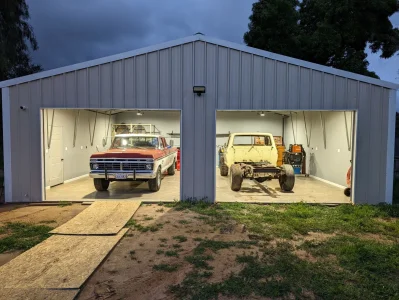
passed final inspection!
Started moving stuff in & getting a feel for layout.
gotta work up some more storage & organization solutions. I have one small pallet rack / shelving thing leftover from when I lived in Torrance and it's laughably small relative to how much space it used up in my old garage.
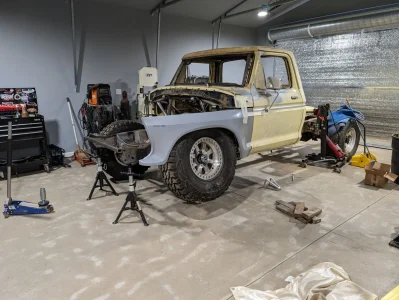
But both of my old fords are in with a ~5 ft perimeter around each one for work.
I will be installing the 2 post lift in the left bay here shortly.
Attachments
DesertGoat
Well-known member
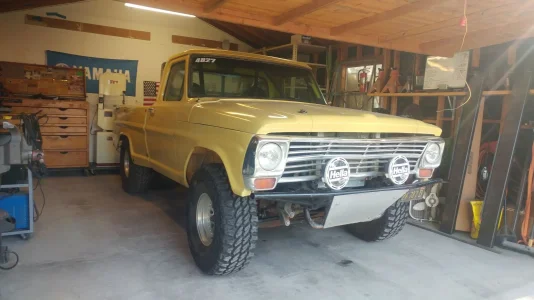
for the hell of it, since it's my thread.... i went down memory lane circa 2018 to find a picture of my old bumpside in the Torrance garage where I finished that thing. The pallet rack behind the truck in this picture is the same one as the rack behind the red truck in the previous image. to give ya'll a sense of size difference
Attachments
DesertGoat
Well-known member
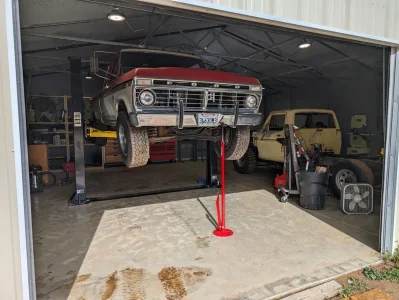
it was the smallest legally defined 2 car garage possible (20x22) with a ~5-6 ft sloped driveway right in front of it. definitely made it work & was happy to have it for the ~9 years I lived there. But a real shop with a lift has been on my brain for long time & this weekend i put my old truck in the air for the very first time.
Now I just have to finish organizing a few things & it's back to building!
Now I just have to finish organizing a few things & it's back to building!
Attachments
theycallmeWALLY
Administrator
- Joined
- Mar 30, 2022
- Messages
- 1,529
Stoked for you dude...
I too have this dream haha. Juan day i'll be in your shoes.
I too have this dream haha. Juan day i'll be in your shoes.
charlie brown
Well-known member
- Joined
- Apr 4, 2022
- Messages
- 376
looks great. so cool having a new larger shop. blank canvas to make arrangements your own convinces.it was the smallest legally defined 2 car garage possible (20x22) with a ~5-6 ft sloped driveway right in front of it. definitely made it work & was happy to have it for the ~9 years I lived there. But a real shop with a lift has been on my brain for long time & this weekend i put my old truck in the air for the very first time.
Now I just have to finish organizing a few things & it's back to building!
DesertGoat
Well-known member
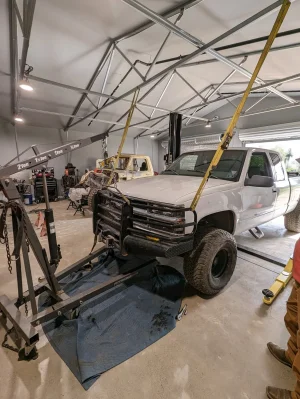
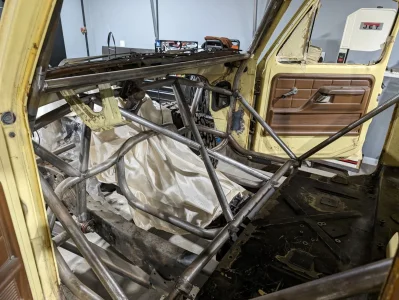
Starting to throw tubes again! Added a little X to the center section of my cab cage.
Moving to re-investigate the suspension & steering system next - i think i have to relocate my radius arms & it's going to heckin' wreck the a-pillar kick.
Also helped a friend hang his rancher bumper on a chevy & am already doing dumb shit with the steel trusses
Moving to re-investigate the suspension & steering system next - i think i have to relocate my radius arms & it's going to heckin' wreck the a-pillar kick.
Also helped a friend hang his rancher bumper on a chevy & am already doing dumb shit with the steel trusses
Attachments
DesertGoat
Well-known member
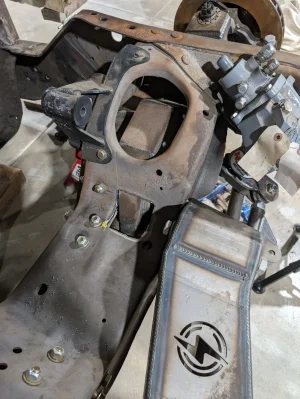
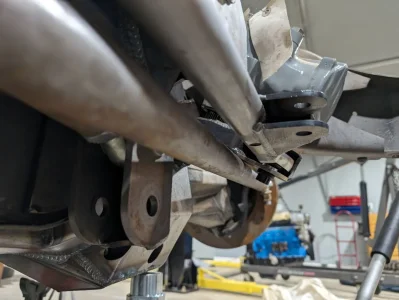
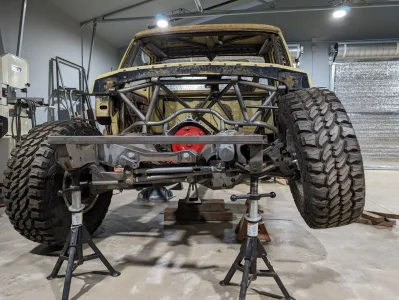
Got a few sessions in on the truck - focused back on the front suspension cycling & all of its interfaces.
had a few issues & here's how i dealt with them:
Fixed by getting some new brackets from WFO that mount to the side of the frame
notched out the engine crossmember so the cho-fab beam had more space to breathe
raised the frame's ride height ~2" to achieve 9" of compression travel, metal 2 metal. limited by tie rod to pitman arm now.
had a few issues & here's how i dealt with them:
- Radius arm relative height to beam pivots was wrong.
Fixed by getting some new brackets from WFO that mount to the side of the frame
- up travel was only 6.25"
notched out the engine crossmember so the cho-fab beam had more space to breathe
raised the frame's ride height ~2" to achieve 9" of compression travel, metal 2 metal. limited by tie rod to pitman arm now.
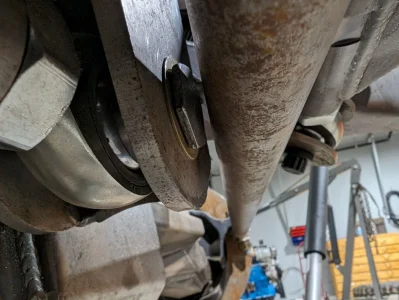
- couldn't get full lock-to-lock steering out of the box due to a bolt vs tie rod interference
Attachments
DesertGoat
Well-known member
it freaks me out, too. But this is the solution Cho offered.
The wheelbase is pushed as far forward as possible because I have ~the same clearance to the pitman arm bolt at full lock in the opposite direction.
so the only other option would be to bend the tie rod, cut & move the steering box forward to get more wheelbase, or cut the steering crossmember into the engine crossmember. None of which seem palatable.
smokeysevin
Active member
- Joined
- Mar 7, 2023
- Messages
- 240
Can you just cut the tube and sleeve it with a solid slug or thicker wall tube in the area where it cycles past the bolt head?
Sean
Sean
DesertGoat
Well-known member
sheesh, i fell back like 5 pages since I last updated this thing.
I got distracted again and worked on a bunch of stuff that wasn't the truck
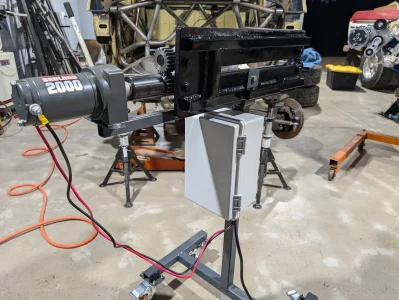
Converted my manual bead roller to electric with some harbor freight engineering hackery + stiffened it up.
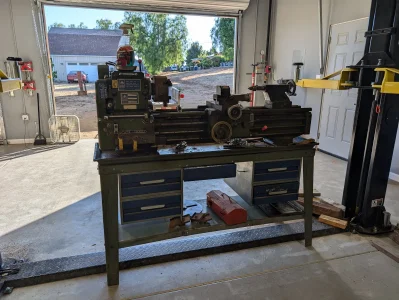
Bought a lathe.
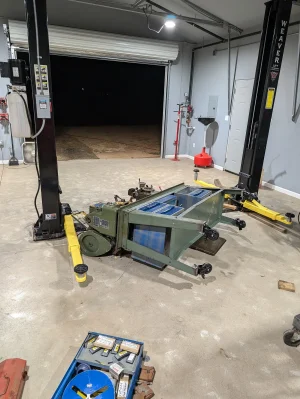
Proceeded to do one of the dumbest things i've recently done.... put it on casters and immediately flopped it over.
broke the pulley mounts & some safety covers but that was it thank goodness. No replacement parts available had to fab a new one. Took the opportunity to clean it all up though while I was at it.
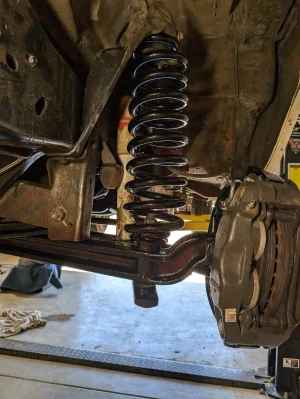
Removed the whole front end off my red street pickup, all new bushings & powder coated the front end parts
Also put a new AC system in the house & added a mini split to the shop so I can actually work in there during summers. Now that it's fall, of course.
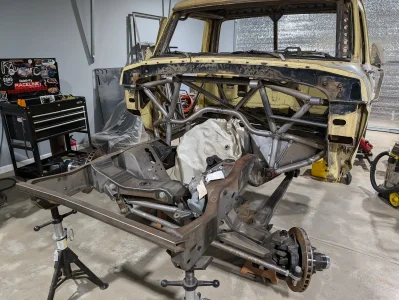
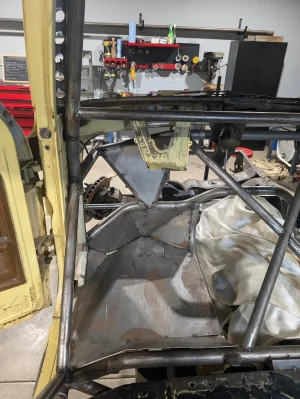
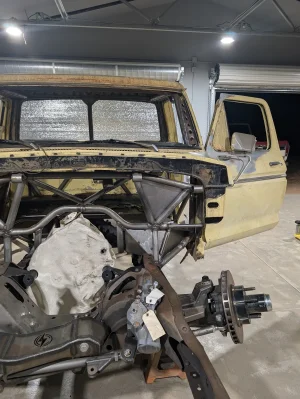
Anyway now i'm finally back on the prerunner project and working on sheet metal for the floor & firewall.
I'm not good at sheet metal so you're only getting far away pictures lol
Attachments
-
 PXL_20240711_033014683.webp372.2 KB · Views: 41
 -
 PXL_20240729_011336046.webp587.4 KB · Views: 36
 -
 PXL_20240808_041209919.webp605.9 KB · Views: 34
 -
 PXL_20240721_214116434.webp635.7 KB · Views: 38
 -
 PXL_20240902_163815113.webp746.8 KB · Views: 37
 -
 PXL_20240926_033149483.webp542.4 KB · Views: 36
 -
 PXL_20240926_033212652.webp631.9 KB · Views: 38
the_fablab_
Well-known member
- Joined
- Apr 15, 2022
- Messages
- 221
If that bolt is still keeping you awake at light, add a turn or two out to the radius arm heim. That should push your wheelbase out a little, enough to run a thicker headed bolt
Similar threads
- Replies
- 13
- Views
- 885
- Replies
- 17
- Views
- 608
- Replies
- 5
- Views
- 311

