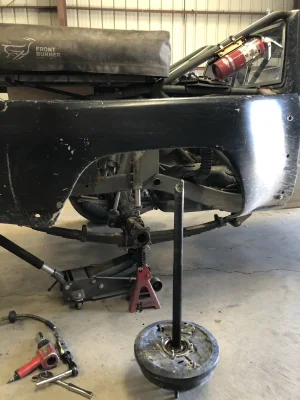
Local Legend Project: Tur-BRO-yota

May 2021

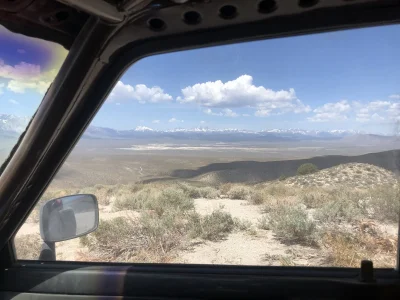
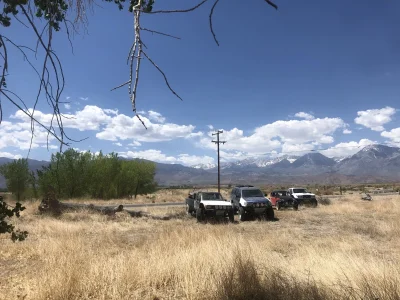
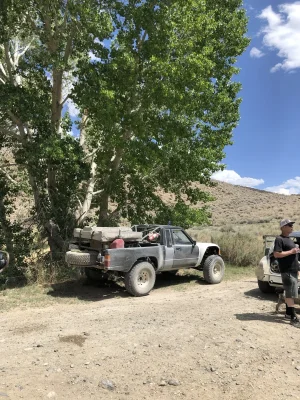
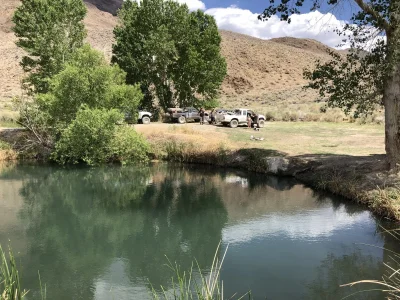
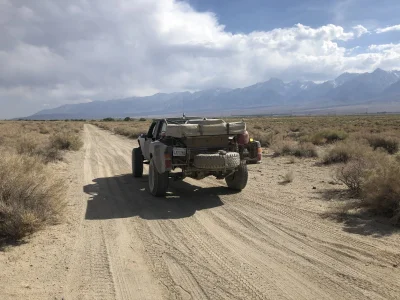
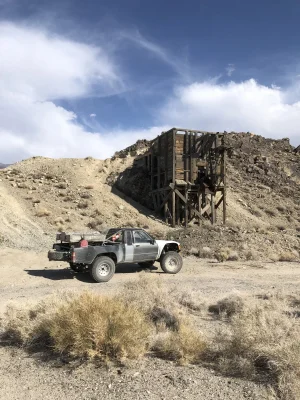
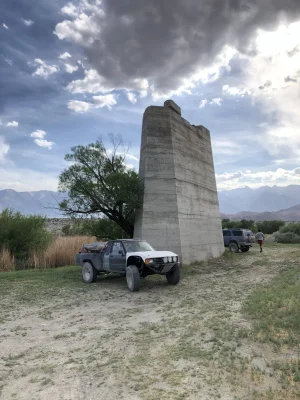
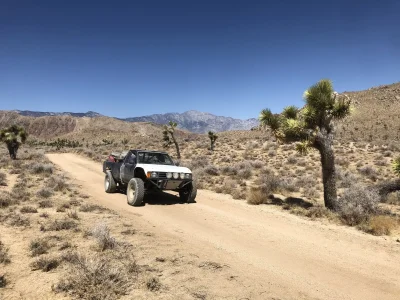
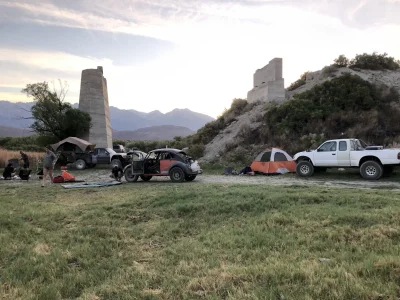
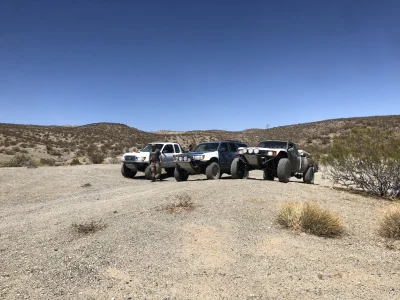
Mammoth to Phelan with @dose and @do dah

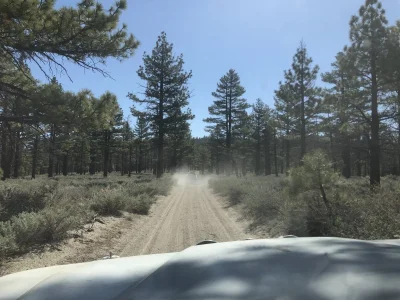
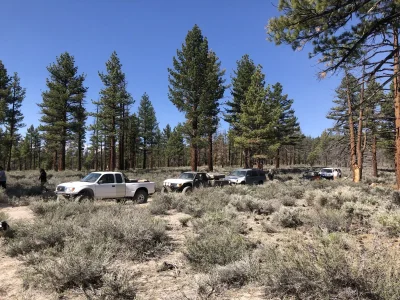
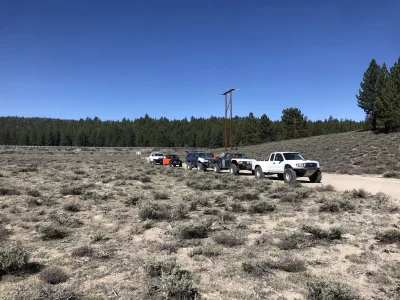
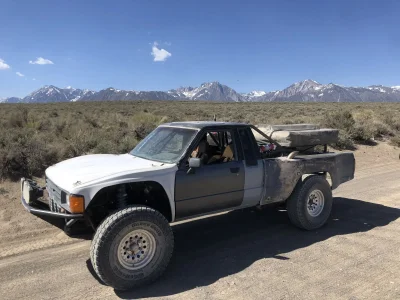
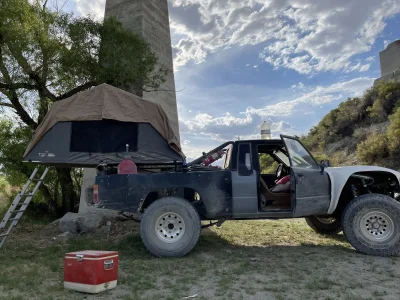
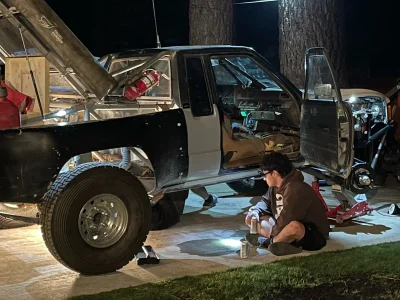
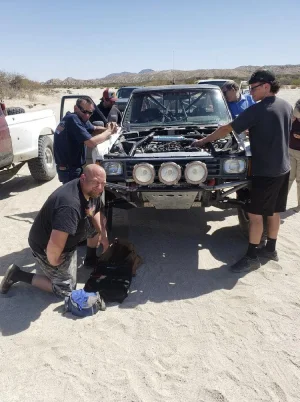
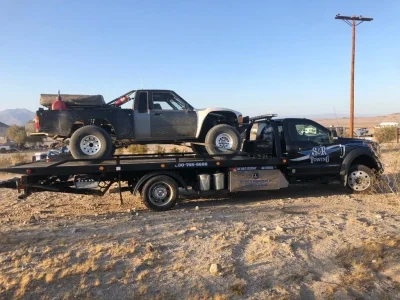
The Turboyota was missing and stuttering on the ~300mile commute, so we drunkenly changed them in Dusty’s driveway. I killed one of the TRI ACE tires outside Bishop, so I had to do the rest of the trip with no spare. Also, I had to fuck with my thermostat per usual.C56BBCF9-2C7C-4EB2-929A-47A834A0E930.jpegC6F9A076-67D9-490E-9D13-B28CD6FFB49A.jpegF4E67DDE-D722-4F03-B2EC-AB5407BD135E.jpegD90E1BFE-35B5-4491-9D57-A720CDC88C5C.jpeg6E8C64EC-AC68-4375-86F1-9DB07C604ED9.jpegA8801B1C-7B37-466A-A66C-D521B1A20C05.jpeg68A6BEA8-9E02-44FB-AD89-69C4C7917FD5.jpegA6EA1AAD-B15C-418C-BA1A-BC0CF40A4CA6.jpeg5EAB2684-177D-46EF-A13B-AA66EC438126.jpeg9B6A9E17-56E6-4A14-BCCE-51023AA597F8.jpeg040297A7-6C6A-4BCC-8F12-2FD92F9DB4A5.jpeg62AE7BED-B9EA-4777-AE34-C088009C46AC.jpegD1D538AD-9F34-415A-98D8-FBC7E3DCCE9E.jpegBE9CE42D-B1D3-48A2-801E-7874034B1FF1.jpeg531D9768-CADF-4759-A387-13472F2BF98F.jpeg68955B4C-33ED-47AD-BCE7-F52013758C86.jpeg725E8376-2836-4956-B7BC-CA93FF3528CC.jpeg28DEB75D-AC26-43BD-8F56-0E1276F01B32.jpegB8CCEED8-A329-4BC8-AC30-FA595049297F.jpegB07ACB4D-B5CD-4E5C-8799-5CD0518033A5.jpeg
 
July 2021
acdb9c2d327eb149f2a70d90f32b8274.jpg


76d3699d0cd066c0c75de67642482a01.jpg


868baafc533602a946798dee4b959279.jpg


b41db5a92371f9214cbdca9b271159e5.jpg


dbfc021f35ba7f4ff067186c865991dd.jpg


a6bb1761c9f07ca6e46cf328a7791922.jpg


58a1bdb00e1a2fd8c75c8127171fd1ee.jpg


f85007d744aff8bbca0e5b111af08690.jpg


0f611ec9234c132274cd36d4a811e6a1.jpg


1a5e23a0771438533324688c75136c3d.jpg


4455b17ce1cbe240d91b68b3bb07a5e5.jpg


68eeccb1fc86c89563291cdefc5a97f6.jpg


d5979fc4f1216a43bd4bf6e018fee71b.jpg


b01f32c6fef10cbf095452434000eade.jpg


Moises drove out from LA to hang with us. @the bodj has done work on that toyota, and it has my old trussed Turboyota rearend in it. He flogged that thing pretty good.
165d4c73af2498f24e4a5056feaaf689.jpg


71be8800204e3d2c42411f6a0b71a64b.jpg
 
July 12, 2021

Miles over the previous 12 months: 4739

Trips:
2X Apple Valley to Yucaipa via dirt 75 each
Phelan to mammoth 300
Bradshaw Trail 300
Lucerne-Caruthers Canyon-Primm-Afton Canyon 350
Landers-Calico-Hinkley-Adelanto 150
KOH TT course prerun 75
Rattlesnake Canyon/Swapmeet 75
Anza Borrego 300
DR Meat Feat 100
Mammoth to Phelan 350
+ Lots of rips through the local hills

Broken parts:
1 thermostat
1 loose T-bolt clamp on turbo inlet
1 melted turbo inlet coupler
1 broken T100 axle & diff carrier
1 cracked steering arm on upright
1 cracked 2” hollow spindle snout
2 blown head gaskets
1 A-Arm spindle-side tab delete
1 fuel pump & filter (not sure which was the culprit)

Great times!!!

c2d57baa5ce065efcf1918a176f00cb2.jpg


7853beab7e9c275c0633a0678dc38132.jpg


Bumper delete:
e486a7e022a775e9479af05a03b172fe.jpg
 
August 9, 2021

Since the motor was out, I plated the insides of the lower A-Arm pivot horns. There had been a significant amount of cracks propagating through the inner frame/horn interface area.

I noticed and fixed some of the cracks right before one of my recent trips, and threw on a quick gusset.

Recently added gusset circled in red, new cracked area shown in pink:
672e13d34243dc1ed131b573aa59a2e3.jpg


Did some cardboard CAD, then utilized my nesting software and bandsawed those bitches out:
8590955959e0d6ade38d0d10d747397a.jpg


Bent the 1/8” P&O gussets on my finger brake.
05df0f8b7d2a3925c59bcf325adf052e.jpg


75c0148eacbe590e9014810e9066c46d.jpg


Rear pivot gussets getting fitted. Passenger side required 1 bend, driver side required 3 bends.
4a459b7d74693029c8f2bac2da6ded78.jpg


0c8b004e1798a6fb82525f6f6b41c7e6.jpg


Clampage before tackage
ffa5e54abd8734d1bc2db4a1172da36d.jpg


Tacked those fuckers, then hammered the edges down to better contact and wrap around the chincy stock 0.090” jap samurai sword steel.
61b49ea91d9cafe1f60bda42fd6470f2.jpg


623ad0daa0d96550e7c5a563916566e2.jpg


c3c0c000b4ffe22f90fb8823aefd7047.jpg


Miggered those bitches in. I draped wet rags over the forward Delrin pivot bushings and rear 6-6 Nylon bushings. Fun fact: driver’s side rear bushing is 6-6 nylon, passenger is delrin.
db4572424f4f7b8361c08c0f17ef75ee.jpg


Firewall paint prep!
849018bdbfc396b801937d6b35a12ccc.jpg


More 3/16” gussets added to the forward side of the rear pivot tabs and vertical 3/8” bolts and fancy MS21042 jet nuts(of course) added to the removable sub frame at the forward a-arm pivot horn cross member. Tear-out strength added, and the subframe will still be removable.
ff3a352c391ef4c07f27fe7513599074.jpg


5cbdf3face3dc4f99dd9773fa88075c3.jpg


All that sexy MS and AN hardware makes my balls tingle!
6bae856ca481caf25b3ef28c247e4d0d.jpg


Drivers side rear lower arm pivot:
8bb807f062a04df05b16d14dec48ac43.jpg


Firewall & subframe gussets all painted. ACE premium spray paint is the fucking chronic, by the way. 10/10 would bang again. Highly recommend.
0d7cc5572e394df449e62edac459f516.jpg
 
Installed the fabricated stainless turbo manifold and Garrett T4 that I got from @Do Dah

Turbo was too close for comfort to the cagework and the engine cross brace would have needed to be moved or eliminated.


4024d1d15d824603a110b277d6c918fd.jpg


e642b62c479833f6c5493cfb7ca4d898.jpg


fb56cb2260499d59e24dc7013b5a4c79.jpg


0baaed18e31ce46b7a20a69c194246cc.jpg


After some deliberation and talks with turbo-smart friends, I purchased a Garrett GT2871R from Performance Techniques in San Bernardino.
b53a4d886c55dcea09257d1bb0ea6a77.jpg


6ae87d03daf72c3b438677f029dbe081.jpg


Even with a smaller frame turbo, shit still interfered with the shock mount cagework and engine crossmember.
9b88fc5b9e9c3b7b15c316bb0e00a23b.jpg


f9fff951198dbf6a5359c9994508f10e.jpg


It became apparent that the manifold would need to be modified to facilitate fitment.
380e399c4c1fa7a7539c3ca04c73a7e9.jpg


d9736c892f0b225b41c8d57206b3720f.jpg


Started manifold surgery. Clamped the T4 flange to a knee and bandsawed off the flange.
e89f4bbfc91a0a3f4a13b84a1f8b041c.jpg


a3e4f04fd28332b0a149ecf801baf7f1.jpg


Adios, T4 flange!
ce8817c3d13e4b17613b53ba3df3f8e5.jpg


I needed to pull the turbo inboard toward the motor, so I scribed my cut lines with a height gauge.
dbb6836f4593e7f2b020e9ecb019837e.jpg


Yes!
09714938e523413c302c2c18e05dfa54.jpg


YES!!!
4ec65119552c30da149a297302a9a7a6.jpg


Ground off the remaining welds flat~ish.
c775c17249ea97ed838611aa10735a2d.jpg


Sandblasted affected areas and welded myriad cracks
402dbf6e1ab3d1ecac51ac9a0646fc51.jpg


T4 flange was cracked off in the cylinder 3 area. Built it back up with 308L rod.
e5e8394953be254fc48d02e648778343.jpg


New flange tacked into position
54ce39774c2163e94ab9483d953651c7.jpg
 
August 9, 2021 continued still…

Modified manifold installed. There is at least 3/8” clearance between turbo and engine cage shock mount tubes. Previous setup only had 1/8” on some areas and there was no evidence of contact.
73bd32e329857c95d43c258bc93b61ff.jpg


Clearanced the shock mount crossmember.
b5f86fba5f34e197f497a5b2b1b640ee.jpg


c2d0c0e6016d8ec10b6b1959ecd04829.jpg


18946101e72c3680880b3fb2cc10edae.jpg


Started on the downtube. The V-band flange had this yucky step:
273e8ebbad153fa3840bd16bbcf83d2d.jpg


So I machined a 35 degree chamfer for better flow:

767ca83eb0dff24676e7bf870733424f.jpg


Much better!
d2dd8ddf0dbfc4c65f1848b5c1a23e86.jpg


f7f9304b8ab6f4af3eeec5e9e3213509.jpg


1adb9c0b1dabafa97bbc8c4d84882f19.jpg


Exhaust is all 3” 304 stainless mandrel bends. I bought a U-J bend on eBay and used damn near all of it. The discolored section at the bottom is a piece of Ford stainless exhaust that I needed to use after I ran out of 304. About halfway through building this exhaust, my Argon regulator started leaking and spewing gas out the pressure relief port. Cocksucker!! I tacked this shit up as quickly as possible to try and save gas.
39b717fec5d667fe7ab47f37885828f9.jpg


The TiAL 44mm wastegate used to be vented to atmosphere. I decided to route it back into the exhaust. I started with a section of 1.5” 304SS mandrel U-bend
13553fd5e93fa3434869a9f389cda276.jpg


Tacked the 1.5” tube to the TiAL v-band flange and 1.5” stainless flex coupler from eBay. Black Wastegate on the left.
1fb430d7848a6fca99e02fa97d25cb9b.jpg


Connecting into the 3” exhaust at a nice flowy angle. I traced the egg-shaped contact patch onto the 3” exhaust tube...
0fa49dfec42b1de2c5b0532c685ae89d.jpg


...and drilled it out with a carbide-tipped holesaw and my trusty 10-year-old Nairobi drill.
e02b321ebb8b8e9aace0c3162912e447.jpg


Opened up the round hole to satisfactory Easter egg shape with a drum sander. Fits nice and tight with no protrusion into the exhaust flow path.
3cbae23733c3dff267fd29e3416cb3e9.jpg


Assembled for the 420th time, and tacked it while on the truck.
da86a35e80598219dd1a246491f837b5.jpg


02079f9eeccef510a681aac3de8b33a3.jpg


Complete minus final purge weld.
4dc8d156ccc856a77dea2bd588ce8dd8.jpg


I’m stoked on it, and it’s easily removable!
e3a851b98b35c13d325d5b7e10a0f03c.jpg
 
August 14, 2021

Hot damn it looks clean with a stock bumper!

9c31f2939db95da75f9b0423939abdaf.jpg


Approximate trim location depicted with orange tape. It’s going to end up getting chopped even more because 37’s. That corner light will assuredly visit the saw.
12fa276060ab1cd8b31accc66c885c22.jpg


f6e45ae53f1a28d68578deb286456b41.jpg


948dd323ff2482e1e45af5aaf517d2c7.jpg


Seriously considering a stock valence to compliment this gorgeous bumper.
51e35e0b15b227b328810953d319be48.jpg


37” Tensors vs 35” Tensors
28bf4f91625c7ce6024ed6c2d9e02a26.jpg


Radiator and fan shroud mounting

2bd8d734fbe708ed3aae7dc05f4c2cb0.jpg


f15cc890ecfa380e9b2c351314e67cf5.jpg


1d13fdaff8d1f9b52a0d62baab68325e.jpg


And I made an aquarium stand for one of FatJeff’s clients:

c857a86ab6c2bab06b667a6910fd9528.jpg


2aab4003c6c02f186ecfa244b2b304ed.jpg


a7e0b1a96ece32ab604611f52a07f322.jpg


495bc502a475d01709272f220e2df5ff.jpg


6b98592a84be924f5d5edaaf38586327.jpg


85f42f491769dbac3f3abc28e6dbda18.jpg
 
August 28, 2021

Hours: 15ish.

Beers: zilch. Fucking loser.
Music: none. Fucking psychopath.

Weight added/removed: probably 5-10 lbs by converting from copper to aluminum radiator and shortening the boost and radiator tubes. (Lower radiator hose/pipe doesn’t loop around the motor mount anymore)

Cost: $74 is misc silicone couplers and reducer elbows for radiator & intercooler.

Made a beading tool. Works aight, makes the kung fu grip stronger.
700099c4e89d959bd8a6f8d098caca01.jpg


Turbo-to-intercooler boost tube:
b3e88f439ea1da577cf6dcde3caa0dec.jpg


Driled out the intercooler mounting bungs and tapped 7/16-20
e2a34ea9f709a5a14652daa65e869aaf.jpg


Drilled through the cross tube to mount the intercooler and made a quickie radiator hold-down clamp.
e4fde0a61da3e6985956d4565451ee13.jpg


Mocked up intake with 3” aluminum mandrel bends and a Ford flexy coupler
8d67295a2186e8f0c8fc03275e3d78d8.jpg


cfbf0d74841de26f6eddb2de1614a5f5.jpg


076f63edf088fbe58510c8dece7d9d49.jpg


5b8fcb9febfc8febce209c8330e2953e.jpg


Upper radiator hose goes from 1.375” at the thermostat housing to 1.5” at the radiator. That reducer 90 was $30. I had the 1.5” CBR 90 in my stash.
a960407b3a89e938be4631515f57f220.jpg


By moving the intercooler up I was able to eliminate about 2 feet of boost piping.
bc8a54b111415ea7fd47c3d1b8c00bbb.jpg


4bcc4ab88601a57eb822e5445a17151f.jpg


Intake tube fully welded and $9 egay hump coupler. Intake tube necks down to 2.75” at the filter side so I could reuse the AFE filter and prefilter. 3” ID filters will work also, just have to clamp them to the bigger tube.
85440a664dafb5874e9564a7ea7b4e9f.jpg


3” to 2.75” reduction at top, mediocre quality crimped bead at bottom.
f2451d2dec74a51f998359b5d3de2d80.jpg


Aluminum couplers with 1/8” NPT for turbo & wastegate cooling lines. $13 each on egay.
Lower radiator hose:
b7782712d6852b50f93662b5ab84d080.jpg


Upper radiator hose will have 2 water lines connected to it also in that little black coupler.
d4cd2c85428206e9d9a8b0f42410859b.jpg


I like this intercooler mounting scheme much better than my previous scheme that used rubber isolators. Super easy to remove.
60bb57c29950f613fa8d84bf57fbec22.jpg


Lower radiator mount is 1x2x0.120” rectangular tube. Radiator is fastened to that tube with 6X 10-32 screws.
78aa9c8de8b421f5e958aca387873498.jpg


Lower radiator fit tin prior to weld. It clears the steering box by 1/8”
13e57f934509747468f40b648fa5a97f.jpg


Turbo oil feed line & Earl’s filter. Need to buy a 1/8-28 BSP to 1/8” NPT adapter for the oil feed line. Block is that weird British thread according to the interwebz. 1/8” NPT is fucking close, but only threads in like a couple threads.
2b127434c055be3e4c354928452a141d.jpg


Then I pulled the motor out again for hopefully the last time.

I think I have sourced a 5 speed trans.
a1e9c4f623b4e06fa3ab8026feb86ee9.jpg
 
August 30, 2021

Purge weld setup

Time: 1 hour
Materials: 1/8” 7075 aluminum
Tools: bandsaw, Ameribrade, drill press, 7/16” drill bit, 1/4” NPT tap

I cut discs of aluminum on the bandsaw that easily sandwich inside the 1.5”, 2.5”, and 3” v-band clamps. I ground a bevel on one side similar to the flanges on a typical V-band clamp.

801650844f4daec13ee026700ca78fc9.jpg


08591fe9591700f9f8f1b02b76c2300e.jpg


8b31d0fb37e42b2edffdb9a5e1f1dbff.jpg


Dual regulator from weldmonger.com
74879cfdb54bc68e9aae3ef7a95ceea8.jpg


I let the argon bleed out from the gaps until it’s mostly welded, then drill some bleed holes
 
September 1, 2021

Down pipe complete & fully purge welded.

Total time: 12 hours fab, 1.5 hours weld

Materials: 3.0x0.065” 304 stainless U-J bend, stainless V-band flanges, 1.5” stainless flex coupler.

Cost:
3” 304SS U-J bend: $75
3” V-band clamps: $50
1.5” flex coupler: $19
1.5” 304SS U-bend: $29
Total: $173

Fucks yelled: 1. I blew a hole in the tube in one of the most visible locations near the turbo.

5861dad79225317734ff639fb96e15aa.jpg


6fc52cfaaef4319f13721def836a075b.jpg


Staring into the exhaust gape shows pretty good shielding coverage and resultant penetration. Yup, I used penetration and gape in the same sentence. I should call her…
c85b8c7ccc530897596263370dd0a731.jpg


Here are my simple aluminum purge plugs.
4f3fc9e4135d478d2ad71d6a295635e0.jpg


Like 0.025” hole in the weld regulator to 1/4” NPT fitting. I stole that fitting off one of my old leaky Victor argon regulators.
20e596b00a7bdf3c9978e0385c7aedfd.jpg
 
September 21, 2021

Worked on plumbing, final install & assembly.

Checked the standalone harness and megasquirt computer on the bench. Everything works. Deleting an unneeded resistor for the injectors and adding an Innovate Motorsports O2 sensor that’ll talk to the computer and AFR gauge.
641dcac8b6cfeaa0a4f74ff6052d82a5.jpg


Modified PS resi feed hose location. Silicon bronze is awesome for 0.0fuckingthin” jap tube.
a9b9bdc5a6122ed8664982d86c97a641.jpg


Welded AN-4 fitting on the stock sending unit for the return. That little 0.25” line was fucking thin also. Silicon bronze again.
55d9f0c77c359e2ecfeaeb74c4a49989.jpg


16f0e66861637cb4789552b7dde30005.jpg


Upgraded to a WalBRO 255 fuel pump
eda489f068656fb200526346413a5456.jpg


Back in its home.
8c325a5b5870c009ef011a3743db72c6.jpg


Drilled and tapped the front crossmember to hold the oil cooler down. Broke a 1/4-20 tap in one of the holes, so it’ll be held down with 3X fasteners.
617feb29ba4fb2011f0e1f9a87955af4.jpg


Power steering cooler mounts are old craftsman tool box 1/8”x1.0” locking bars.
e0d61e476f2023d667413df4fc4ddd64.jpg


Moved the Aeromotive 10 micron fuel filter from the side of the block down to where it’s easily accessible on the inside of the frame rail. I had a stock fuel filter before, and it was a motherfucker to access and change. It took both @Do Dah and me like 6 beers to change that bitch at @dose ‘s place before out bi-annual Mammoth to Phelan run.
9e25dee47b8b8fe432b0ce7f2f5039db.jpg


More power steering line routing mods involving thin tube and silicon bronze... this time on the pump.
6e6d0c94fccfd60c87a9978364a98857.jpg


Manifold was kinda warpy, so I sprayed it with dykem and assaulted it with the 20” disc sander. Got it within 0.009” flatness and called it good.
2088ac98f9470f576c497f345096fcfe.jpg


2215b6a229d97a898e94d7b136d23bc0.jpg


Yes, I broke out the granite surface plate.
ec1cf00d8403637c3ebf7b6436b35fc8.jpg


Added the O2 sensor bung 24” down from the turbo exhaust and wrapped it with lava wrap
bd87adceee6fd95163bd67d23018b0d8.jpg


Love welding 304 stainless.
77fab19c8fc1424ad139cb991a4512b3.jpg


45844c58ddbd07a62475c62d9f1be680.jpg


Dirty orange 440cc injectors above, 1050cc badass fancy Injector Dynamics units ready to go in.
df71d3b0273eca9187dd434311ce3e81.jpg


Made another custom AN-6 fuel return fitting. It never fucking ends...
afaa62fe315c3a1689761bcfe76279a1.jpg


Fuel rail installed and ready to fuckin’ party. Oil feed line for the turbo and filter can be seen atop the valve cover.
a3651793744f3e76702ad8763909846d.jpg
 
September 23, 2021

Clutch:

Clutchmasters 6 puck.

I described in detail exactly how I intend to drive and my typical driving conditions and took Clutchmaster’s recommendation on a setup.

c62a5f0b23184c9c11b339c678a573f9.jpg


434848ec4955431e61befcc5027382f7.jpg


Resurfaced stock flywheel is what they recommended. Unfortunately, this is an 8.875” stock 22R unit, not the 9.25” turbo badboy.
8878cadc2ea1c02e22e19531c3aa0f18.jpg
 
September 28, 2021

Almost fucking ready.

Final to-do list before startup:

Install Fuel pressure gauge
Add fuses into the standalone harness(there were no fuse provisions)
Add Lucas 30W high zinc break in oil
Add power steering fluid
Bolt in radiator and shroud
Throttle cable
Wastegate vac line
Add Trans oil 75W80
Tighten v-bands
Yell fuck
Install steering
Figure out new drivers side shock resi mount or replace hose
Drink beer
Zip tie up old harness and worry about it later
Replace carrier bearing
Install colder spark plugs
Coolant
Wire oil pressure gauge
Route wires for innovate Motorsports oxygen sensor and AFR gauge


Mounted the coil with sexy NAS1304 bolts and jet nuts.
20907da9d78749bb7bc2368fb849e690.jpg


Everything is pretty much in there.
11872040a39b5d58af28a81738d99ef6.jpg


Machined one of the stock plugs in the intake manifold for my water temp sensor
50f187e56f6fdef128bf0d2095a59733.jpg


9dd8850ba2c0a174c8c0f5da439e5c92.jpg


Steel fitting is toyota British standard pipe thread bullshit. Brass 3/8NPT only screws in like 2 threads before fuckery ensues.
c4fec2ff934a0ffd0faf4e8e0393546c.jpg


e1228d78b423896148aa2403cd30af72.jpg
 
January 6, 2022

Time: 17.5 hours
Time to get just the fucking seats out: 1 hour
Sawzall blades: 1
Flap disc: 1 (36 grit CGW)
Fucks yelled: 5ish
Dropped truck off sketchy high-lift Jack: 2
Music: Bad Religion Christmas & Metallica And Justice For All extra bass YouTube
Beers: 0. my liver is getting a break.

Pulled the truck into the back of my shop and started removing shit:
3b276402e0b5a09eb4e5d04dc10dea9f.jpg


Leveled the truck side-to-side, but left it ass up for headroom.
1bd3c18776a20217e9ff7c7594d60427.jpg


Adios, sissy 30 spline T100 rearend. I broke lots of parts on that rearend, the fronts of the tubes are very dented from rock hits because they are 1/8” ~ish wall tube, and I’m constantly fixing gear oil seepage from cracks around leaf spring pads & shock mounts.
4e5c0f8183de5fa0b21b7c6fae6f2333.jpg


Gas tank supported on pipe stands made removal easy.
f85905ff2a55b03610906e533fa7774b.jpg


Stripped!
351a568f6217f6734a28b19c739ad81e.jpg


Stock crossmember is an impediment to progress. The /\ is where my carrier bearing used to mount, and it ties into the bottom of the 1.25x0.065” seat mount tube.
78ddcb5431b4e4a00ed1e45647fa362e.jpg


Get outta there, bitch! Used a corded Milwaukee sawzall with a Milwaukee blade and the M18 hackzall with a Diablo blade. No appreciable difference in cutting speed or vibration.
a12fed616af551b5ba2c6842ff34a9ee.jpg


Aero air hammer cuts through the welds like butter. It took like 3 minutes to cut all those leftovers off.
21bf24e61eef5fdf1879153ce71475ee.jpg


Freshly shorn.
0885444e90fafd5a09c78843aac798a6.jpg


Upper link pivots want to be thru the floor, so fuck that floor!!
e73da92dead3082e5ed66b37d3ee36b6.jpg


See that upper link pivot sticking up off the frame like a sore dick? That’ll get some gusseting and frame plating down the road. I want to check geometry and get shock mounts started. Also, I haven’t hacked off the rear cagework yet because I want to determine what can stay and what needs to get bailed.
6e3df97f77d5f88abff15e76774bbbe1.jpg


Frame side:
Link vertical separation 7”
Link fore-aft separation 7”
f8e537115bff43e97b33c1c66a8d1568.jpg


What a ball-tingly upskirt shot!
f12a860e4f8f9f2a327b5ceab94f0d0b.jpg


Axle-side upper link pivot from muffstuff.
92e5366633f2e8dae17ac0dd80050e2f.jpg


4091521f4f232cf4bb35ba3c577ebef6.jpg


Got down with the lazy migger.
5b3c19091fd3efd911db665234b2a1b5.jpg


Hello Schreiner 40 spline floater with 3.25x0.312” wall tubes and ugly truss! Axles are equal length.
657a0b0dbb3ac2c738e6316bd5592978.jpg


CAD work. I’ve been using Ram board from Home Depot lately. It’s way cheaper than buying the 24x36” sheets from Amazon, but it always has an annoying radius because roll.

Vertical Link separation at axle side: 11” ~ish.
e4c5a998b496f0226e3ca4b7ed5535c7.jpg
 
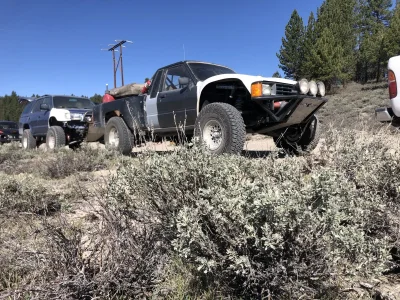
You bes slow your roll there little mis. I’d like to add these to the historical record.
March 20th 2021
View attachment 8169View attachment 8171View attachment 8170
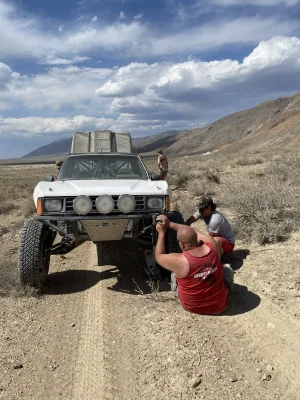
Toyotas doing Toyota thangs.. carry on


Interesting.

We have done 3 trips together.

1 of which you completed approximately 20% of the trip before retreating with your Ford tail between your legs with a broken transmission. On the Lucerne-Primm-Afton-Lucerne trip, you broke an axle and had to do the rest of the trip in 4x4 because you got stuck in a campsite outside Afton.

Interesting.


On the Anza Borrego trip, you had to add 69 quarts of oil to keep your venerable 2.9 motor alive on the arduous commute from anza to my house.
 
Interesting.

We have done 3 trips together.

1 of which you completed approximately 20% of the trip before retreating with your Ford tail between your legs with a broken transmission. On the Lucerne-Primm-Afton-Lucerne trip, you broke an axle and had to do the rest of the trip in 4x4 because you got stuck in a campsite outside Afton.

Interesting.


On the Anza Borrego trip, you had to add 69 quarts of oil to keep your venerable 2.9 motor alive on the arduous commute from anza to my house.
I’m reporting this
 
January 6, 2022

All 4 links mocked up

Time: 3 hours.
Tools: JMR notcher, Millermatic 210, 13/16” & 7/8” wrenches, digital angle finder
Music. Metallica

9c9ee1c27c8040eab66d00432ef6c4e9.jpg


932c58fb60bed39d34dbeab9bd5f3154.jpg


e28c7202ce7ac003cbf753cb90e5e697.jpg


558ac2f083abf37241fdc11140fdf5b2.jpg


dfb26e6e88de2c8660f3f271f0186bd6.jpg


Lower frame pivots are fugly. I’m going to church them up a bit when I cut the tacks off for frame plating. Probably shave 1/2” of the rock magnet lower side at least…
2d5c4325d0951557b374749d2d0576f6.jpg


7ac7e8a0fe05245a61119c7e271d6f0a.jpg


Next I’ll tack the RuffMuff uglylinks together and determine how much original cagework will be retained. My guess: almost none.
 
Back
Top