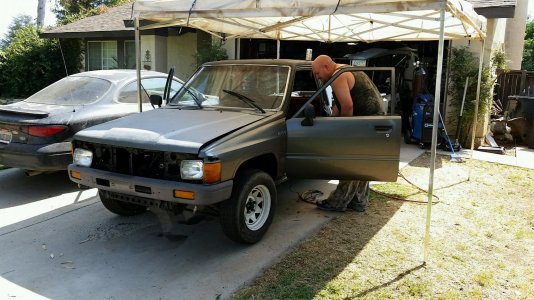
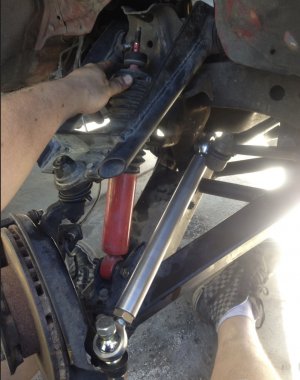
Local Legend Project: Tur-BRO-yota

Turboyota

Well-known member
Joined
Apr 1, 2022
Messages
621
This project was conceived while carpooling 125 miles/day round trip from Yucaipa to Adelanto. The saga began in mid-2015 when my buddy/coworker and I were spending 3+ hours in the car every day fighting the construction traffic through the Cajon Pass. We'd sit there in our shitty, boring commuter cars and fantasize about being able to get off the freeway at HWY138 and take dirt roads north all the way into work. We hoped to avoid the vast majority of the fuckity crossover lanes and construction traffic.


We decided that we needed a dirt-worthy, commuting-friendly truck to help ease the freeway pain. We planned on 40 dirt miles/day. If we were going to spend that much time commuting/carpooling, we were going to laugh our asses off in the dirt.


Important factors that we considered when choosing a starter truck:

Truck purchase price: under $3000

Economy: around 20mpg

Decent street manners

Air conditioning, defrost and heater

Good budget-minded Prerunner platform--this was narrowed to: 2WD and 4X4 2.3 & 4.0 liter beamed Rangers, 84-95 22RE Toyotas, and all Tacomas.

Availability of used performance parts was of paramount importance. We wanted to source the requisite parts for the build on Craigslist, RDC classifieds, and the Leduc swapmeet to keep build costs reasonable.


Between the two of us, we had all the shocks and enough 1.75"x0.095" 4130 tube for a complete truck build.


We started perusing Craigslist for 84-04 Toyotas and 83-97 Rangers. Looked at quite a few rangers and toyotas. 80's toyotas are especially expensive. We found a factory 22RTE TURBO(!) Toyota truck in downtown LA listed for $4000. Significantly more than we were hoping to spend, but turbo! Test drove it--very fast and fun to drive. It was a tire smoking sonuvabitch! It came complete with a sweet ricer blow off valve and ghetto vatozone lowering blocks. We talked the El Salvadorian vatos down to $2000 and drove her home! Commence BROmance! Yes, gentle readers, a joint project—we’ll see how this plays out…

Timeline: Mid-June 2015

My girlfriend got me some sweet ‘80’s OP shorts to compliment my sweet ‘80’s lowered toyota. What an awesome woman.
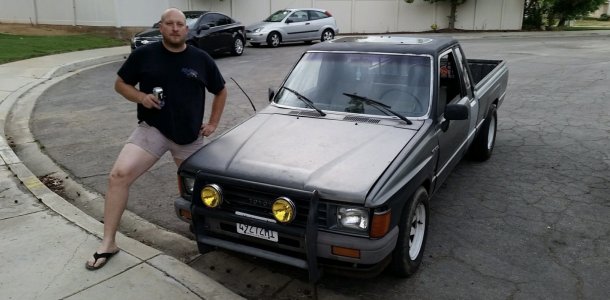
484B7B7E-C557-4FCC-A9F8-A127B00D01BF.jpeg

A keen observer will notice that the driver’s side rear tire is in fact a trailer tire.
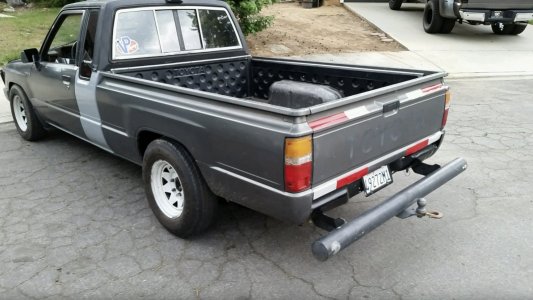
B61189E7-A00B-4553-BC5F-96D241853333.jpeg

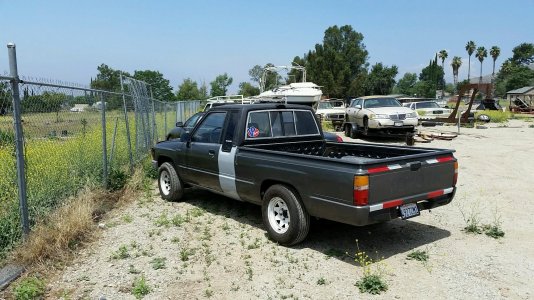
After selling the bumpers and cranking the torsion bars:
8C64A48D-0772-46D2-A9A0-27A395F6F0F3.jpeg
 
Last edited:
We started by removing the bumpers and cranking the torsion bars to get rid of the low rider stance.

Next, we fixed all the stuff that was held on with baling wire--which was almost everything. All bolts were loose. Most the hoses leaked coolant. It leaked oil from everywhere. Exhaust had a leak. Replaced cap, rotor, plugs, wires, hoses, coolant, oil, and cleaned the K&N. wired the ignition so we didn't have to start it with speaker wires that hung below the dash. We smogged, registered, and insured it and drove it to work twice.

Total time spent tuning up and un-ghettoing the truck: 16 hours

Expenditures thus far:

Truck $2000

Registration & smog $397

Tune-up parts $70

9B8C4D68-0E59-427A-8410-52100C37A029.jpeg
 
Let’s cut this bitch apart!!

Gutted the interior and listed everything for sale on Craigslist.

Sold all this unnecessary crap:
Bed & tailgate $280
Bumpers $100
Bench seat $50
Stock front bumper $40
Fenders $40
Hood $40
Blow off valve and stock turbo fittings $60
Valence $15
White spoke rims & tires $100
Bilstein front shocks $50
Rear helper coilovers $40
Third member $140
Total: $955 parts sold.

Not bad for a $2000 truck.

We decided to approach the build incrementally: the truck should never have downtime longer than a 3-day weekend. This would keep the truck in-use and help us stay motivated and focused.

This would have worked if my buddy had the stones to tell his girlfriend that we went in on a truck together. Instead, he hid it from her, avoided the confrontation, and snuck over on occasion. See where this is going??

Me:
"Dude, did you tell her about the truck yet?"

Buddy:
"Ahhhhh, no. I don't think I'm gonna tell her."

Me:
"JesuuuuusssstittyfuckingCHRIST!!!"

Cagework:

ba5ef4929ec18e91f50492a0db368e89.jpg

58a631d9f9e78ac7b5954da7bbb7c5da.jpg


We rolled the upper windshield tube, upper rear window tube, and the lower windshield/firewall tube.

3f815a141c9609d5cbcb4cdd94fceadb.jpg


d3d308a22de04f526ba18aec2987e473.jpg


The cage took longer than I would have liked due to my buddy's sporadic attendance, but it got done. All the X-bracing is 1.5x0.058" 4130. Nice and light.

59848f2f63c8a762954e08cd88f90645.jpg


87011ce8f580d8bd62a24347fafb475d.jpg


ee52b96f60970af221d4e1e72af79879.jpg


8322b19cf5753ac7a48123c6729e7571.jpg


All joints were fully welded before the diagonals covered up the underlying tube joints. The shitty sun roof made it damn near impossible to tuck the roof tubes in as tight as I would have liked.

We welded all the tubes directly to the cab sheet metal above and below the doors.

Total man-hours in the cab cage including stubs out the firewall: 55 hours

I think we finished the cab cage around August or September 2015. A little longer than the weekend downtime we schemed about.
 
Last edited:
We built the cab cage together, but when the co-owner wasn't there (the build took place in my driveway). I made the boost tubes, mounted the intercooler, and whipped up a 304SS 3" turbo downtube and full exhaust complete with V-band clamps and a stainless flex chingadera. Machined an O2 sensor bung out of 304 stainless. Purge-welded the exhaust. I really enjoyed all the exhaust and turbo plumbing stuff.

Bought the CT20 turbo flange on eBay for $120. Welded the 3" stainless V-band flange to the mild steel turbo flange with 309L filler rod. 304 stainless U-J bend: $75. Stainless V-band flanges were purchased on Ebay for around $19 each. Chyna Stainless muffler $60. Stainless flex chingadera $20.

CT20 to 3” adapter with V-band I welded
4503b56f299747bebe1b0e09a8210755.jpg


Here's the bitchin' El Salvadoran exhaust that I was replacing:
65a7e2cf96c710380f405f9c5d339da9.jpg


Looking up:
9988227b3ea4febfc3fa16298e84981f.jpg


Downtube tacked together

f410e425c9647116750a6957149d7043.jpg


Purge welding

0db3cef9b7e981d8759277fd0856e691.jpg


Adding O2 sensor plate to stock-ish location. Machined that fucker during a lunch break.

7b9abe0ae1d7923600bf650dcbca3169.jpg


ca247817d04c419da8aafb3599485e41.jpg


93d159d4a1ef203795d6a19eebc76e3f.jpg


Wrapped it with Lava wrap

75b324940b8630ef9c2c4645cf04eea1.jpg


654cab045fc04f145e12e812d0f63eb4.jpg


The second O2 sensor is for the AEM wide-band air fuel ratio gauge: $165

Intercooler, myriad silicone bends & couplers, blow off valve kit, and aluminum flanged mandrel bent tubes were all from eBay.

Total exhaust cost: $321
Total intercooler, intake, Autometer boost gauge, blow off valve, and associated boost piping: $343

06299a16d1d2ad61283663fedf2721df.jpg


398af4bd7fa60b4dec5a38ae894d8de6.jpg


7f0312f22c97766e09a44955527449e1.jpg


adb24256080373e8149a3b9afa96806b.jpg


Purchased Hannemann Ivan fiberglass fenders and hood for $280. The 'glass hood saves around 12 lbs compared to the stock hood and wiper cowl. Fenders weigh slightly more than the stock steel ones.

Terrible picture... 33x10.50 Bajas look totally class 7-ish with stock suspension

0bdf7b06a8f42460707cdc182efc0b25.jpg


Intercooler, boost tubes, boost gauge install and BOV mounting: 15 hours
Full Exhaust: 15 hours
Mounting fiberglass: 2 hours
 
Over Fourth of July weekend, 2015, I gusseted the stock Toyota 8" rearend with a RuffStuff axle truss. Fitment was decent, but I had to cut the truss in a few places to get it to fit. I really like the styling, and it's HEAVY duty. Added a Jegs filler cap that my buddy had sitting around.

RuffStuff Truss: $95
Time: 20 hours (It would probably only take 6-8 hours if mig welded. Cutting/grinding all the stock bracketry off takes a few hours regardless).

0c6a13c27a2d87bd76720532f8f9fb75.jpg


a288dfd1a72406f604aa699ac03eaf4d.jpg


b4c45f98f045140779949d14c9ba6e11.jpg


b7bcce0ad776eba94156d3234cf7f702.jpg


02694d1d9cb0a412e567fb629a372564.jpg


053f740a31a027984cdd2547b727aeb8.jpg


Aaaaannnnnnnd I made the links for the Z-link suspension we were going to use. For those unfamiliar with a z-link, the lower links come from the front of the truck under the cab and attach to the bottom of the axle housing. The upper links attach to the top of the axle housing just like a regular 4 link, but they extend toward the back of the truck and pivot slightly below and behind the stock frame. Coilovers, bypasses, and lower links were designed to attach to a common bracket. With 16" coilovers, 17" Bilstein bypasses and a lot of geometry fiddling, we were able to design 20" of travel into the rearend before the negative geometric effects of a z-link made the pinion angle get crappy. Our design had around 3/4" of driveshaft plunge. According to our buddy/Broseph, street handling characteristics of the z-linked trucks he fabs are really quite good (he daily-drives a Z-linked Colo-RAY-do).

2306f6fab42a06068317a1a39524531c.jpg


Lower link, Coilover and bypass mount

92129b837487418b410a318846db518b.jpg


Upper shock mounts:

bbc5b5f1a9451061f357ba64efb111dc.jpg


Here is how the cagework and shock-mounting scheme was planned out:

6897b48bf510fa43d330121030ec8a60.jpg


dd947b60ab43acfcf80c0ef70c4caae6.jpg


Heim kits: $250 for the 1.25 heim kits or lower links + $140 for the 7/8" heim kits for upper links.
4130 for the links: we had it laying around
Axle Brackets & upper shock mounts: made them ourselves out of 1/4" plate.
Total time in the links & brackets/tabs 6 hrs
 
We finished the cab cage in early-September 2015. Picked up Beard seats for $260, so it was time to fab seat mounts.

Seat mount tubing is 1.25x0.065" 4130.
Formed doubler plates that weld to the trans tunnel are 0.062"~ish 4130. I stitch welded the seat mount tubes to the floor, and I only burned holes in the thin sheet metal floor like 69 times.

Total fab time was around 8 hours including floor closeouts.
I hate the 1" bent tube that goes over the trans tunnel with a hot, hot hate. Looking at it makes me angry. I'll eventually build a console that covers it.

e9751a7d3ff0ca7ba9a4be72701e3d19.jpg


4cb183f4e15b56c0d31b6fd85f5655b6.jpg


aff16c06b4f5db6c0a6cd8656171801b.jpg


The rear tube had enough clearance to go continuously through the trans tunnel. Cover plates are formed 0.050" 4130 sheet.


05f82b5acb2720dc4f531246870458d8.jpg


Seats mounted:

9db2f00a0e48bd18cadf8d398accf12a.jpg
 
Toward the end of September 2015, we found a long travel kit on Craigslist for $450. It came with arms, Tokiko mono-tube shocks that were 3" too short, stainless braided brake lines, strut frame, and tie rod extensions that were made from galvanized pipe--¡I'm not shitting you!--welded to the stock Toyota tierod adjusters. The threads were still on the pipe and everything. I wish I had a picture of those little gems for the crappy fabwork thread.

I have no idea why the mohawk-looking gussets were added to the upper arms. I had to trim the upper driver's side mohawk to clear the steering shaft.

I made new tierods out of 1.25" 6061-T6 aluminum bar. Drilled tapers out of the spindles and center link. Machined the bolt heads and misalignment spacers so the inner tierod pivot would clear the frame.

My plan is to run this kit until I get around to making new control arms and spindles.

LT kit cost: $450
3/4" Heim kits for new tierods: $100
LT Kit Install & tierod machining: 8 hours

a1b04be47c5457b1485defa38ad7c2d5.jpg


69fb718b59e0b876a0dfe9adee70b6c8.jpg


6fbaa6c72394f644f62ccafceec9ab29.jpg


ee7c09c1159ff5bd998a0c4f1a87f6c7.jpg


268251cc6b022da481d7980497dfe9f4.jpg


70d5c73573af02a89f9c91c52bad452d.jpg


The shocks slightly limit the suspension travel.
C19EBBE7-05BE-4BB0-87C4-A690B305DA15.jpeg
 
Last edited:
More intake and intercooler plumbing pictures. I cut up the stock boost tube and reused part of it. I cleaned it up and cut the little coolant line off after the picture was taken.

Love the picture with FatTrevor in the background taking a leak in my front yard.

Stay classy, Yucaipa.

eb94de5e31defab8757c872c87f783b9.jpg


8ab41aa37e5321aff9255a9a1db30bf7.jpg


aa5c97baca6f1bc0a67c827a66f72844.jpg


bc176f0637afb8b5c5f4ec03081767d6.jpg


1da596f5e7d160e98ceaff3a2bc812e8.jpg


b85ae7e2248d3043b52b8e67a511f35c.jpg
 
Mid-October 2015

By this time, the co-owner's attendance was abysmal. He had logged 13 hours during September and only 5 hours in October. I was building this truck predominantly by myself. It was quite apparent that he was losing interest in the project. ADD is a bitch.

I made all the dimple died cage-to-cab sheet metal tie-ins. I thoroughly enjoyed making these.

Material: 0.050" 4130 sheet
Man hours: 8

07087de29af9eb52f7f72bc1613739e5.jpg


121035c71e6aa2f5aaacacf5764df7ae.jpg


eb65d4a58de21715ffe7431571836ff5.jpg


95e2f4b6da752df5f8d5fdcdb1e92ca5.jpg


cc15f7b193c17cf3b2cc2fee236436e9.jpg


30aa6f1bb7e1bad1246bf34522b1fdce.jpg


aa7d2b234fcfba1c91a7cf6dea30e266.jpg


94963ddf9786369c83c169d68202ae1e.jpg


Welded firewall sheet metal closeouts

bfb5bb036827a7705943642031f19539.jpg


35c8f7c0b4aea84542864578f578c362.jpg


3e1cdc6ff5e19e100a7b6bba1fa699c4.jpg


ce1e4efb2d3296e5cebefe4e53e436ec.jpg


Co-owner machined a huge custom dimple die. We welded two dimples together to make formed gussets like this:

7a2bb207e19092aaee82236bed62a772.jpg
 
Halloween 2015:

Started driving it around with the trailer wheels, gutted interior, and long travel front end. Rearend still had the lowering blocks and helper coilovers.

Besides the fiberglass, the truck still looked like it should have a couple line weeders and mowers in the back...

My fiancée wasn't very excited to ride around in it with me. What the hell??? Maybe she would have liked it more if I had donned the OP shorts from the beginning of the thread...

5bfc665a911555f3eeccb5699505af71.jpg


I drove it to work a few times in that condition, got 16-17MPG with 3.91's, 4 speed, and 205/75/R14's. Maxing out the stock computer at 8psi of boost.

8070cd204b9e0ce524520963a1460303.jpg


62422e5e8c661dddda0664e2e4a7e821.jpg


One day when I was leaving work, I was getting into the Turboyota and one of the female engineers was walking to her Va-Jetta, and she looked at me in the turboyota and she started to laugh.

Women don't seem to think the truck is as cool as I do, apparently.

Picked up Hanneman bedsides from Clist for $260

A couple days later I finally sold the bed for $250. The next day I whipped up some TEMPORARY bedside mounts from an old bed frame, 5/8" square tube, and 1" square tube that was left over from a gate side-job. They are visible in a couple of these pics:

Early November 2015:

c0f01bae7412f00d5f267681c33eac4f.jpg


fa5a96aacc0dbfe3c5a0ae051ba0544d.jpg


b405d528f23550e20fc71d0b606e2c8b.jpg


b659b2df896062fa5ca83529dc6f2863.jpg
 
Cab cage summary
—————————
Total man-hours in the cage: 55
Total man-hours in the seat mounts: 9.5

Total length of tube used in the cab: approximately 83 feet
52.5 feet of 1.75"x0.095” 4130
7.5 feet of 1.5x0.095 (this might be DOM)
9 feet of 1.5x0.058 4130
14 feet of 1.25"x0.065” 4130

Cab cage weight: 118 lbs
 
Fast forward to April 2016.

The truck has sat in the driveway breeding black widows and discontent for 5 months.

I grew weary of working on our project by myself.

Co-owner was suffering from an acute case of Turboyota erectile dysfunction, or TED. The Turboyota just didn't do it for him anymore. He had a throbbing boat boner now.

The bromance was over. I didn't want to get any more embittered, so I said "Sooooo, I've noticed that you aren't interested in working on the Toyota anymore."

See how observant I am?

I asked if he wanted to be bought out.

We decided that it was fair to pay him half of what we could realistically liquidate the Toyota for at that point.

Lesson: I highly suggest steering away from joint projects. It's really fun to build shit with your bros. Splitting costs makes this shit way more affordable, but rarely are motivation levels and family responsibilities the same between two broskis.

I paid the man, and got back at it.

It's not my intent to complain or bitch, just lay it out as it happened.

I had the gusseted/trussed housing listed for sale for 5 months with lots of calls, but no follow through. Lots of fucking craigslist flakes. Without a viable wider rearend option, I decided to abandon the Z-link plan. Bummer. I was uber-pumped on the z-link idea. I had some Deaver F55s laying around, so I bought the Ruffstuff leaf spring hanger kit ($81) and started cutting shit off.

You can see my badass scrap steel bedside mounts in this pic:

75ce097a0e88c3d73b24eb39e9b1e11c.jpg


Cut all the bracketry off the frame.
I believe it was 29lbs total
It took 5 hours (and 12 beers) to cut and grind everything off. Fucking miserable--it was like 169 degrees too...

Closed out the back of the frame with 2" x 3" x 0.120" wall rectangular tube. 3/16" x 2" cold rolled bar laid on top.

Started mocking up the Deavers.

Late July 2016:

cf3be2c5218f8ef37ed9004efb548381.jpg


abb6a37654080cd1409237f804e8aa06.jpg


a7716318362ee3318a9468a12f98bc16.jpg


Planning the rear cagework:

beba8aceb0aad72abbcb083d06b3e4a5.jpg


5c2d430c349f5689f23e3a1f9f4a982c.jpg
 
Early to mid-August 2016

12" shackle fab:

3/16"x2" Mild steel bar
1.5x.120 4130 tube sliced in half on the bandsaw.

I inserted 1/16" shims under the middle of the shackle and clamped the pivot ends during welding. Since I was applying all the heat to one side of the weldment, I expected the the shackle to pull up on the ends and look banana-ish after 24" of weld.

Shims worked perfect. Shackles ended up straighter than a priest's dick after welding.

7 hours total.
I had all the steel on-hand.

201f842e2a4fffd1744d213aee01ea2a.jpg


8cece4baa2694d372b887c28bd0efc90.jpg


4cbffaf3a25a0bb68a20feca8c3c7746.jpg
 
Back
Top