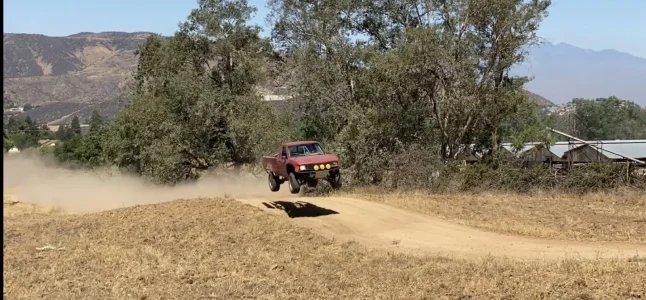
Local Legend Project: Tur-BRO-yota

Late August 2016

Started rear cagework.

Main down tubes off b-pillar: 1.75x0.095 4130 with bent sleeves in them that went into the stubs out of the back of the cab.

Each side of the bent tube splice had 4 rosette welds.

Vertical tubes are 1.75x0.065" 4130

Horizontal shock mount tube is 1.75x0.120" 4130 chromoly

Straight diagonal tubes are 1.5x0.058" 4130

Aft tubes and upper bumper tube are 1.75x0.095" 4130

Tubes that extend from horizontal shock mount tube to mid b-pillar are 1.5x0.095" DOM. If (when, let's be realistic) I link the truck I'll beef that area up substantially.

I made all the tubes and cab close-out plates before starting any welding. I decided to TIG weld the entire back of the truck. It was a real pain in the ass--it was windy so I had to bump up my gas pressure to ridiculous levels even though I used a gas lens.

d05904b1df7396e62ef7dd37a79d9f15.jpg


4882d93850b33b474a1ffd6be82b55c7.jpg


782f47457918eacb4ec02c25f5689023.jpg


1da18d28f8853e50449a80fc943cf600.jpg


I fully welded all joints before covering them up with the next tube.

97e094a119dd5b88c318df69c8339f1f.jpg


1919497c7eecd98ee80c1ba9972a936c.jpg


0820f4e939334bb60ee683cfa2c0a970.jpg


4324412276368ea2b7198fd7466a75dc.jpg


I didn't weld in the aft tubes yet because I didn't want to have to climb over them while welding the forward section and setting up shocks and bumps.

693c69a3fbea906f60b2da37e159aed1.jpg


b211978587d6eabfb8f8248ce5857d57.jpg
 
Early September 2016

Mounted Bilstein 2.65x17" 4 tube bypasses and Swayaway 2.0x3" bumps in the rear. I had these items in the shock pile in my master bedroom. My fiancé is a lucky girl.

08a0e152c4c6d7b82ff3011d2d9a4a86.jpg


f2e37973863e80b0fd7c3987c10c4332.jpg


Remember the machined upper shock mounts I was going to use with the Z-link? I cut those bitches in half and used them for the lower shock mounts.

69aa95968343fcdf7ee78a66943c976b.jpg


I was going to use 1 u-bolt & 2 bolts per leaf spring pad.

743e704fb49b343fc089d41388461d0c.jpg


f782c2e2e359c5c3fb481b4300832048.jpg


I didn't like how that looked, so I eliminated the inboard U-bolts. And plated the bumpstop mounts.

ce03a1a92b8bed68b18ad62c8df6076f.jpg


779ed97935cfc4213e98656fdde130e9.jpg


Fitting the big formed dimple die gusset:
Because I was mating it from a 1.75 to 1.5" tube, I have to cut a wedge out of it. The pic sucks, but you can kinda see it.

497b0adf7edc985907f02868210e9e0f.jpg


It was going to rain, so I primed everything with self-etching primer. The painters I know spoke highly of the primer and said to scotchbrite the primed metal before paint. Historically, my track record with painting stuff is piss-poor.

This is my typical routine:
1: rust
2: expletives & blasphemy
3: WD40
4: Beer
5: Scotchbrite
6: Beer
7: Beer

Rear/bed cage weight: 90 lbs
27 feet of 1.5" tube
25 feet of 1.75" tube
3.5 feet of 2x3" rectangular structural tube

This includes the 2" x 3" x 1/8" rear frame closeout tube, 3/16" plating, and spare tire mount. It does NOT include the diagonal tubes that will connect to the shackle hanger. I'll add those tubes AFTER I verify that I like how the truck handles. If I want to change the shackle angle, I don't want to cut those tubes out. Said tubes will weigh an additional 9 lbs.

Here is the hour count:
Cagework: 38.5 hours
Tig welding cagework: 13.5 hours (this is included in the 38.5 hours for "cagework")

Deaver setup, shock, and bumpstop mounting: 49 hours

which includes: Setting pinion angle, Welding leaf spring pads, machining shock heim spacers, u-bolt eliminator bolt sleeves, and making bump strike pads: 8 hours

And welded in:

73a265029ba1bbccc8e2a5f909d467c7.jpg


c6f9aaef217feb51f4a64c2ba448fed5.jpg


0676de95fcd2cd245ba8198a1f32bf72.jpg
 
Mid-October 2016

New forward fiberglass mounts:
0.050 4130 sheet welded to a tube clamp made from 1.75"x.120W 4130. The pinch bolt tube is 3/4"x0.188W 4130. 3/8 bolts. I made a fixture to make those clamps. Weld the pinch tubes to the main clamp tube, then cut in half on the band saw. Hit them on the 20" disc sander to clean up the bandsaw cut.

All materials for the forward bedside mounts from the scrap bin.

Hours: 3.5

I left the ghetto rear 'glass mounts. I want to make some aluminum mounts later.

d347c5d07b008ada12a1a66bc60b3c4b.jpg


7dfb4744298b7420dc293ef2126b4479.jpg


6fc3413e8a4be37ee8e0bf5141eea656.jpg


Got primer laid down just before the rain

4e5ed63a86ac441ef914bc5623735a50.jpg


Spare tire scheme

9ff213890838c144e75c17dab4a017da.jpg
 
Rearend stats:

Toyota 8"
57.5" WMS to WMS (Me thinks)
4.56 gears
Limited slip (not sure of brand... gear guy thought TRD)
New high-quality bearings
New rear wheel cylinders and rear brake shoes

I traded the Toyota 8" 4.56/posi third member for a mill boring head. So no direct costs there.

It needed new bearings, so I took it to Bill Thomas Enterprises in San Berdoo.
(909) 888-7949
He does excellent work, and his shop is curious: No signage, located behind a self storage place, smells like cat piss--Place is crawling with pussy! Aaaaannnnnnnd, every gear set box that he's ever installed is thrown in a massive 12ft deep pile that takes up at least half the 2000sqft shop. Going to Bill Thomas Enterprises is a wonderful adventure!

Third member setup/tuneup with new bearings and seals: $450
New drum brake componentry: $83
Brake lines and fittings from G&J in Ontario: $102
Getting fucked and finding a perfectly good, complete E-locker 4.11 Taco rearend the NEXT GODDAMN DAY for $450---PRICELESS.

I swear to sweet baby Jesus. I saw it on Craigslist the very next day.

Total time in rearend tuneup and brake lines that are P-clamped to the back of the housing: 5 hours

G&J Aircraft & Competition
http://gandjaircraft.com/

fd8fe45308a5a75d0b33ecd0bb8bf771.jpg


494c2e97f8e302ca21bc9c6561d6e012.jpg
 
Something to note, that axle eventually got sold and put on a red Toyota. The guy brought it to me to have the blingy shock mounts relocated, so I cut them off and made new mounts per his desired location. I held onto those mounts for a year or two before using them on my old tundra!
 
Something to note, that axle eventually got sold and put on a red Toyota. The guy brought it to me to have the blingy shock mounts relocated, so I cut them off and made new mounts per his desired location. I held onto those mounts for a year or two before using them on my old tundra!
Moises bought it, came to the DMC meat fest and flogged the truck, and also came out to Yucaipa and thrashed around our local hills with @h0runner and me.
F2CF8558-2B3C-43F9-8D04-9591CE3513A3.jpeg
 
Early November 2016:
Got some used 33x10.50 BFG All Terrains on Outlaw II's for $100. Tires are a little dry rotted. I really want AR-23's, but I like these better than the black wheels with BFG Bajas. I think they look more period-specific.

ddc1b1241f4738884a745805d5b93cb7.jpg

In the right of the picture, you can see my fatTrevor sitting on my F350 tailgate. He's smoking and drinking and being super-helpful. At least he's not taking a leak in the yard like in the earlier post…

6e55638b490c10128a77c901fb710a5a.jpg
 
Late January 2017:

I had been driving the Turboyota a lot during December & January.
I'm going to outline the positives & negatives of that experience right now:

Positives:
1. It's very fast
2. Economy isn't terrible @ 17-18mpg
3. I smile when I drive it

Negatives:
1. No windshield wipers
2. No defrost
3. No heat
4. Deafeningly loud
a. Exhaust dumps under the cab
b. Resonance is terrible
c. B-pillar holes in floor still open
d. Bypasses clicking through the cage
5. The combination of exhaust dumping under the cab and open holes in the floor at lower B-pillar sucks exhaust into the cab if I roll the window down.
6. Cage x-bracing limits rear view mirror visibility
7. El Salvadorian window tinting is damn near impossible to see through at night.
8. 33's rub inner fenders on hard cornering

That experience prompted me to put the dash in.

Defrost duct was a bitch, but got it in
Outside vents will need duct mods to work

Time: 10 miserable hours

60b08b95d385be4e17075ed7b5285a2e.jpg


d94179505ab65006bd9712097ca94eee.jpg


b2eba6ac6035447bb0bd2abd3a19dffa.jpg


5d6c567a09d59fa04639f310c57a735b.jpg
 
Battery mount pictures:

Late November 2016

There is still enough space between battery and cab for a 32 gallon fuel cell, but I'd have to move the battery aft if I use the JAZ jeepspeed cell.

6216274d65bb9eab9d6652c219717bfa.jpg


The battery cable was nice and tidy, but I had the cut all the zip ties that held it to the seat tubes to close the rear holes in the floor.

74cefa9b9b4d2ac37711787a1e4a829b.jpg


e5760f67ec49a3c270513e6be096cfa7.jpg


186ff4b0fc666d852f1450401d661c69.jpg


39faa21feeccecbb06965ad157114089.jpg


The battery mount weighed around 10lbs, and I used about 1.5 feet of 1.25x0.065" 4130 tube to brace under the battery.

Battery weight: 49.5 lbs
Battery mount weight: 10 lbs
1.25" tube weight: 1.25 lbs
1/0 battery Cable weight: 6 lbs

Total time to move battery to the bed including fabricating battery box brace tubes, running cable, and temporarily mounting the locking selector switch between the seats:

5.5 hours
 
The Turboyota was getting a new home.

If you were paying close attention to the build timeline, you may have noticed that I didn't accomplish dick on the Turboyota from November 2016 until late January 2017.

From November to December of 2016 We fixed up and sold my fiancée's house and moved her into my house so we could live in sin.

Shortly thereafter, we purchased a 3 acre property that had a view and 2400sqft shop. (There's a house there too, but who gives a fuck about that...)

1a371d5cf89ce5db166466f41c92577a.jpg


My time from November 2016 through March 2017 was almost completely consumed with fixing houses, moving, moving again, getting married, and then fixing/tuning up my house so I could sell it.

(I built and installed a long travel front end on BajaF150's MOBZA during that time, but that'll be a different thread)

The Turboyota was still getting daily driven, but I didn't work on it at all besides the fucking terrible, horrible, no-good, very bad dash install of late January 2017.

My new shop was awesome, but the electrical situation left much to be desired. On the left you can see the "panel" that was in the shop when I arrived. I installed the panel on the right and ran 220V outlets on dedicated circuits every 10 feet around the periphery of the shop. Thanks Dave!

dd8ef90f998535feac4a48d461e2a037.jpg


e4bf723f06d36fadef66bef9df7c097b.jpg


Bought materials--Turboyota chilling in it's new yard:

a80b463f3177b3282a3c41b09de8139b.jpg


Trenched in 350feet of 2/0 cable
Thanks Kyle, Matt, & Garrett!

72d8bc100b875c8136cce509d6258021.jpg


Now the shop was usable.

Late March 2017
I cut more shit off the Turboyota...

fa4e90d86a25efdff06a815da291d882.jpg


c164a0d94fbf6fcfe56d439aa88b07d7.jpg


fd469e842fde3084f980ce3143882788.jpg


3cd6f516c067180eb4a72cbb9a8aae0b.jpg


e0a3858678d91956ba38cf41ea52323f.jpg


Time to unbolt & cut off fenderwells and supports: 3 hours

Inner fenderwell & core support weight: 30lbs

Misc brackets & butyl from inside the cab: 10 lbs
 
Here's more from early April 2017.

Cut this bullshit off:

5244072c8b22829624cdb22a5741fa21.jpg


Started mocking up Sway-A-Way 2.5x10" shocks.

4bceac709f7d99c38c964ca2764b9cc7.jpg


And Radflo 2.5x4" bumps. I think they're a little too big...

897389fd10f89f5b3663e5911894b734.jpg


2bfcce9ba46bf669455c03943b1e95f4.jpg


Cutting off stock droop stops & shock mounts: 1.5 hours
Mocking up shocks/bumps: 1.5 hours

Assembled SAW coilover weight: 60lbs/pair

Cost: $187/pair from Clist(I had the springs & coilover hardware)

Removed stock Tokiko shocks and steering stabilizer: 8lbs
 
Early April 2017:

Cutting radiator hoop horizontal:

a99534ea475febe381873609a3e87dfd.jpg


One for my homies

204f1006ad59bd5eaf969d623db6aa5a.jpg


Knuckle clearance by disc sander. Made little Easter egg bulkheads for the miter joints from 0.06" 4130 sheet

5ed77536c76c2301fc461d8872374ddb.jpg


Made radiator hoop, doubler plates for behind new frame outriggers, and outriggers. Tigged radiator hoop. Migged outriggers and doubler plates. Started mocking up engine cage tubes:

6907d1824970158cb3662e482bf5d415.jpg


b068cbfecdcea96e221b25c2bf5788af.jpg


Frame doubler plates: 0.125" 4130 plate
Frame outriggers: 2x3x0.125" structural tube
Radiator hoop verticals: 1.75x0.095" 4130
Radiator hoop horizontal: 1.75x0.120" 4130 with keystone quench

Time: 4 hours
Cost: Keystone & some knuckle skin
 
Early-to-mid April 2017:

Made inner engine cage tubes that connect to stubs through the firewall. 1.5x0.120" 4130

7d1763da3d410066dfa1984a3e1a3d62.jpg


5b66b4db9e33185a721a3ff4141724d8.jpg


And started the outer tubes. 1.75x0.120" 4130.

How many rosette/plug welds do you guys usually do for a sleeved tube? I may be overdoing it... thoughts?

6ab61889411332483d592607f54cf575.jpg


3bf21242bc6637f6cda6092efa699bbf.jpg


7ae0465d0ad883523acf690da0e71901.jpg


Welded the joints that would be covered by other tubes:

5a1de438bca953c67e91348527014013.jpg


I made the radiator hoop nice and wide. I want to be able to fit a big (read: V8) radiator in the future without cutting out all the front cagework. I should have plenty of room...

9e0a5f86d9a2232b9a111a6bb56065f6.jpg


Fully tig welded

ee50ae1ad491f0ec79b55491efe95261.jpg


cabd990b5e67911d0e7c2ddf664ccc87.jpg


186172b2b16171351943189193b8d6b5.jpg


Total time to get engine cagework tubes in and welded: 8.5 hours
 
Here are the hours, weights, and costs thus far.

Total hours: 421
(I think I have approximately 130 hours left--that will include front suspension, finish engine cage, interior tune-up)

———
Final Cage weight(173 ft of tube): 273lbs

Total Weight added: 665 lbs
Total Weight removed: 567 lbs
Net gain: 98 lbs
———
Cost to date: $6905-$955(sold items)= $5950 Total
———
 
Spent 1.5 hours mocking up the front shock mounts. Coils clear the arm and stock master cylinder.

I plan to make the upper shock mount catch both tubes and route around the master cylinder so it can be (somewhat) easy to replace if needed.

Also, I think I'll French a bent half-tube into the strut arm where the pitman arm sweeps across and makes contact. I'll plate the front and bottom of the strut arm to strengthen it.

ad94f87996ab6f21e321806eed97dc20.jpg


7f26d5c94442305c9d2a5408d6401b9e.jpg


7bf53d841594d71ab151ac7be2139ed8.jpg


8cd1fa2debaea739fa8d8a8973b933ec.jpg


d8f41598f3b9fb4c7d42a174b6578d9a.jpg
 
Mocking up shock mounts

c779527787969683fce557597f767adb.jpg


6e280bde3eb5e3cae5338e5569cc7fca.jpg


Template for the passenger side. There is minimal clearance to the intake manifold and throttle cable assembly.

c3002b048560e009dc113adf12fe2e6b.jpg


1c0fc68e617998670a17e048b4196148.jpg
 
Templates for the driver's side shock mount. The master cylinder will be fairly easy to remove.

7a3d31ab01add7523cd723f60fc96030.jpg


158c6f7f7f5f9a63326b425d37ff8a53.jpg


I decided to do some PSC, (project scope creep) and clearance the firewall for 33's for now, and it'll clear 35's when I push the wheels forward.

0e94210f93543cb61bb3e1042207e51f.jpg


I figure this is plenty of steering angle at full bump:

7af02727af86a49b9c565f225c65af3b.jpg


caebef58039382bda121ebfd3729f224.jpg


Fenders will require trimming when I make longer arms:

9a288b6cbff68537c022fd17cde5f7d8.jpg
 
Back
Top