Baconcreekmetal
Active member
- Joined
- Mar 18, 2023
- Messages
- 169
The amount you space it out depends on your suspension geometry.
Fuck that they want almost 800 bucks to do the cut n turn only. I'm going to set the beams at ride height after I extend them, cut the BJ out then put the angle finder on it and just set the BJ where the camber is happy.Just buy solo cut n turn then do the rest of the fab lol
I know guys on here have done this lower BJ hole relocation. But it also varies depending on how much lift you have and if your beam brackets are in the factory location.
I think @the bodj and @85Yota have done this.
Pretty sure it was around 1/2”.
Also, any machine shop can make you one if you give them the factory tapered hole.
Yeah, I was mostly referring to the way he sliced it. I would adjust the way you mentioned earlier.My buddy did it that way but made both sides the same which isn't correct because the beam lengths are different in stock form.
Thank you for the help really appreciate it.The beams will be needed to be turned different amounts since they are not equal length. say 5/8" on one side and 3/4" or 1/2" on the other depending on ride height desired. Then you can use alignment cams to get it dialed in perfectly.
I also set the caster at 10 degree's back at ride height, it helps pinion angle and drivability too.


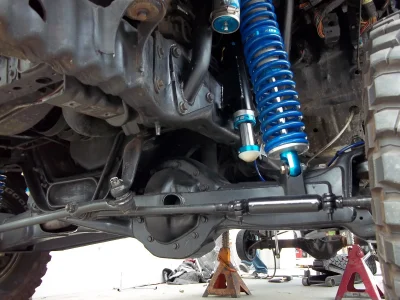
oh i see that now... makes sense. pretty cool you can do that.Solo Motorsports stock location beam pivots. If you look closely in the photos you can see how I cut the lower ball joint out and extended them 3/4" to correct the camber for the lift. 3/4" was just based on recommendations so far so nothing is fully welded in until it mock it up and cycle it.
oh i see that now... makes sense. pretty cool you can do that.
@85Yota I like the fixture. I wouldn't trust myself to weld anything on straight, so seeing this is pretty cool
They're beams nothing straight or matters with them really. If you weld one a little crooked the axle still goes straight from diff to u-joint then angle doesn't matter since that's where the tires turn. Camber/caster adjusters fix the rest within reason, which is why you cut and turn aka extend lower BJ to correct camber, and radius arms determine the majority of the caster.
You can widen the passenger side this way because the axle can float around in many directions. I always setup the 3rd, up right. wider axle and stub and make sure the snout can slide over it and steer before you weld anything! You don't know how many people have cut their beams apart to get it to align after they have welded everything and been screwed!I also got the 2" extension done to the driver side beam. I decided on 2" extensions because I've been told and read that you can fit 35's with stock fenders still. Also the "Tina Turner" build on GFB did a 2" extension and ended up on 37's with fiberglass and looked awesome this would be my plan down the road when funds permit. Everything is still heavily tacked together so I can cycle and check clearances before fully welding, plating and trussing the beams.
View attachment 25721
View attachment 25722
View attachment 25723