Local Legend "jolene" 1993 ford ranger

marcytech

Well-known member
Joined
Apr 6, 2022
Messages
225
bout time i brought the thread over to the new, hip, happenin spot eh?

im gona try to make this as painless as possible, without repeating the non necessary shit.


what we have here is my dream build ever since i was a wee little lad sitting with kevin (dialed shock prep) in his dads garage lookin at pics of plank/si/newline rangers
now, obviously im noone that can afford a true SI truck, BUT i did somehow manage to get all the important pieces! more on that later

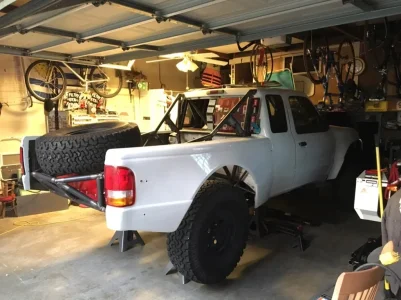
what we started with
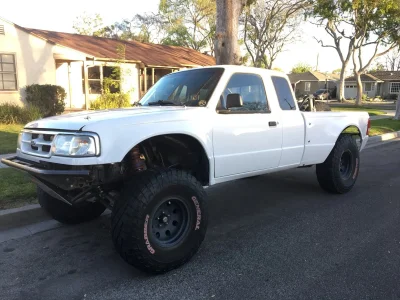
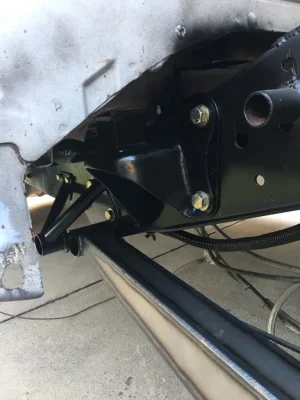
i went out and bought a truck with good bones. its a 1993 4.0 ohv manual trans ranger that had cut and extended beams up front with some 2.5 x 14 kings and a simple little engine cage
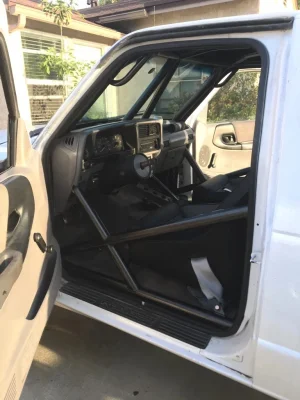
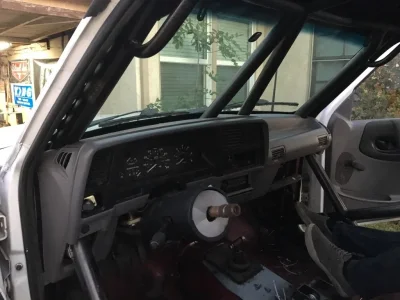
the inside was pretty gutted with a god awful dash BUT it had a 2" 4130 cage.
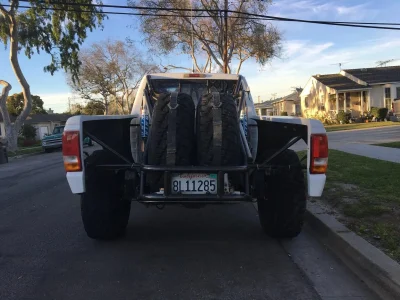
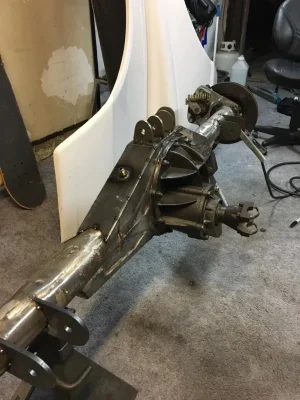
outback it sported a cool little bedcage, f31 deavers, king 2.5 x 16 bypasses and a ford 9" rear end that had a cool bottom truss built by morgan clarke wayyyy back in the day.

i got the truck for a good deal. knowing my plan this was a good place to start as i could sell/ re use alot of these parts to fund the actual build. also it allowed me to build the truck in stages over the summer time while still enjoying it in the dirt in the winter.

heres some pictures of what i bought
 

Attachments

  • b7f025c65aa44cdedc390686a8f30c09.jpg
    b7f025c65aa44cdedc390686a8f30c09.jpg
    252.7 KB · Views: 72
  • b473a8f2e1fd6f1614ff11882ec9089a.jpg
    b473a8f2e1fd6f1614ff11882ec9089a.jpg
    269.7 KB · Views: 74
  • d22e5b1210b1ed44b63355f36300cc97.jpg
    d22e5b1210b1ed44b63355f36300cc97.jpg
    355.4 KB · Views: 72
  • fda6d06b6b72dc202c405f961aed5616.jpg
    fda6d06b6b72dc202c405f961aed5616.jpg
    257.2 KB · Views: 77
  • ff841dcc0d596a3ca71f318c12095fad.jpg
    ff841dcc0d596a3ca71f318c12095fad.jpg
    387.4 KB · Views: 82
first order of business was tuning up the interior. i love stock looking interiors im trucks so i found a stock dash that was in decent shape and re fit that back in the truck along with its matching door panels! changed the manual windows over to power as well.
added new prp seats... lesson learned; yo back get sweaty in all vinyl seats... NEVER AGAIN.
oh ya, i repainted the cage too.

Heres some before and after pics
 

Attachments

  • b7f025c65aa44cdedc390686a8f30c09.jpg
    b7f025c65aa44cdedc390686a8f30c09.jpg
    252.7 KB · Views: 84
  • fda6d06b6b72dc202c405f961aed5616.jpg
    fda6d06b6b72dc202c405f961aed5616.jpg
    257.2 KB · Views: 70
  • 93f4828178f36d3a43ead3b29f725c83.jpg
    93f4828178f36d3a43ead3b29f725c83.jpg
    203.4 KB · Views: 67
  • 39374fa6c3766587f9fe41854ed52221.jpg
    39374fa6c3766587f9fe41854ed52221.jpg
    196.4 KB · Views: 70
  • b3f75841e4b53e1d432a79caed68d674.jpg
    b3f75841e4b53e1d432a79caed68d674.jpg
    226.4 KB · Views: 104
drove it once in the dirt and decided that was enough leaf sprung activities for me. time for links!
went down to SI motorsports and put in an order for his link kit. for anyone that isnt familiar with it its a fairly simple system. the lower link pivots are on a big plate that locates on the frame via the 4 holes for the rear body mount. the upper link is obviously on the inside of the frame and shares bolts with the outside lower link pivot. since the frame is sandwiched between the two you drill out the hole in the frame for the upper links misalignment to key into thus taking a lot of the load off the bolt! kinda neat
he includes all misalignments, upper and lower links, brackets, abs for the rear housing and of course some blue prints so you get all the measurements right.
pics
 

Attachments

  • 3cd40dec16d4da7b1cc5c1e5fe755553.jpg
    3cd40dec16d4da7b1cc5c1e5fe755553.jpg
    198.5 KB · Views: 106
  • 60b9c07e4ca8b830ca5f039a66474784.jpg
    60b9c07e4ca8b830ca5f039a66474784.jpg
    190.7 KB · Views: 105
  • 73cd57c11a751b4806b8155f75976d0a.jpg
    73cd57c11a751b4806b8155f75976d0a.jpg
    266 KB · Views: 103
  • 202b820bfa3d9818776231b0d8426fca.jpg
    202b820bfa3d9818776231b0d8426fca.jpg
    211.7 KB · Views: 96
now, since im building my own SI truck it was only right i kicked the frame up and copied his usual tube layout
this first required me to fill in the c notch that the previous owner cut into it. after the kick my frame ended up 7.5" higher than stock
this allowed me to get 24" of over all wheel travel and 14" of up travel from ride height. all of this work was done in my parents garage cuz i didnt have 220v at the place i was renting at the time.

847271e12041901006ca64ba65fcbfdb (1).jpg763ee87bb93b33b4aaf78bd8e29f93fd.jpg
bf6c576c6dff8aff7c1894c1649a8a83.jpgc65f6beb3212d742007bd65cf74be221.jpg
784851bc3cf6b543519eb4c80003227e.jpg
8e29b64c86872e95f178c59b32b8f9b7.jpge3189b31bc484ed41073eda7a160f66f.jpg
 

Attachments

  • 20c4091d92f2f398ada18df0ea4a154c.jpg
    20c4091d92f2f398ada18df0ea4a154c.jpg
    221 KB · Views: 59
now that the back was "done" with what i was gonna do here i turned the truck around to fix up a few minor things on the front

the front 2.5 coilovers were now on the back along with the 2.5 bypasses that the truck came with so i scored some 3.0 x 14" king race series and made them fit the front as well as some new 2.0 bumps
i knew all this was temporary and desert season was coming quick so i just made some shock mounts on the existing cage.
e6c14db7b01c8a87d2276daa48031c85.jpgca751422f303dc0d2721e28907818fe1.jpg379c0073c310f7175a473bd687d2987d.jpg

also cut out the inner fender structure and replaced it with a single tube and then built a new super tight bumper!
599ad0bef38fa602559e01492de303d5.jpg659f9002656921a50bd26651f87a69f4.jpg735bc54e859638a87253385d3d45f0c0.jpg

now it was time to get it towed back to my place where i would replumb the wholre truck and finish mounting a few things with my 110v tig welder
83805c64a25109c185aec4c152e45e6d.jpgf6d723c2d1efd1d74aec3b4db567b256.jpg
 
finally time to play! got it in the dirt and drove the ever living shit out of it. broke an beam in half in glamis and welded it back together with some scrap metal and a 110v mig welder lol
7c9c40b0d7213332c57496e81ba013c0.jpg6f6db3ae6b33ccf67d07a65298825a33.jpg


BAD LINES GOOD TIMES EH?
0f8a4f1dabcf1f154b93714f7df0a0ea.jpg2c4069a3a2f855931efce4b24a7e4d69.jpg56dd158c54d2623eefa25b614cc49a91.jpg
 
after 2 years and many miles it was time to upgrade the front.

i dont remember when but i found a pretty complete steering set up for the SI front end on craigslist of all places so i went up to phelan and bought that.
a year or two went by and tom from SI texted me and said he had a customer upgrading his beams and radius arms to the billett offerings and asked if i wanted his old stuff... uh duh! we worked out a deal for the used bits and new pivots for everything and i was finally ready to install it all. im super thankful he helped me out in the way that he did because without piecing it together in this way theres no way i coulda afforded a brand new kit
4d885ee68cf3dda1da2353f3649dc5b3.jpg

i built a complete new engine cage with added tubes comin through the firewall for more strengf. the shock angle forced me to switch to manual brakes which i actually really like alot better now.
also upgraded the wheels to method beadlocks (thanks steve!!!!!) because the new hubs were 5x5.5
1cbc0a4487e84570f4b44732135f2894.jpgc930d9ecfbbabad9252b4783350e5577.jpg2716f625771a81fdb75b8c718a3a3419.jpg864a7b9111824ed547eb9a09dec3aa23.jpg948c4479e6e7ecf5317295df030e821a.jpg4654cf8dd51709ac5007dcb83f31f789.jpgc9751457ed21b0f3d340bfbca6fac1d3.jpg1af64a1aea4cfeafaae818fa58c41ec4.jpga03769f0f32f6f611cbf60ee3deaa60f.jpga3e4c929b31cc7f0447db6930ba674bf.jpg
 
MOTOR SWAP TIME!
the 4.0 ohv was a absolute waste of fuel and effort so i ditched it for a 4.0 sohc. it was almost as easy as swapping in another ohv with a couple custom bits here and there but all in all it bolted right in and is ruinning on the original obd1 computer. i went and got it tuned and it made 180hp and 190tq (or around there i cant remember exactly)
to put that into perspective the ohv made 100 hp and 140tq lol
this engine completely woke the truck up and ive considered it done ever since! couldnt be happier

the engine needed a little work before i could put it in. it looked like it was a passenger in the titanic and upon inspection it had a few broken timing chain guids. so i rebuilt the timing assembly, resealed the whole engine and put in a melling high volume oil pump to hopefully get a little extended life out of the 75 timing chains that are in the engine lol. oh and i painted the fuck out of it too.
b2e69200564032667e3ffa2a31239f5b.jpgda2a480d56ba12527e4a3d1114c87c35.jpg9398975d26725a9c3304ffcec3ea8fe9.jpg

also my tweaker side got the best of me and i tried my hand at making a custom harness for it so that i can run all the wires through the valley and on the engine cage tubes. i think it came out decent!

a184e6175c05086f2c481d744a4ab0dc.jpg


9477f3368ea2acb174f7d4bae16240e7.jpg
 
I've always loved this build! Great job, Marcy
Thanks dude!

Next up for the truck is kind of a scary one. I’ve grown to hate the cage that’s in it. As some of you know I have a baby due pretty much any day now so getting a 3rd seat in the truck is priority but I’m not sure it’ll fit because of how the cage is built. Nothing was really tried to be tucked tight or anything. At minimum I want to cut the door bars out and more the seats forward to clear the be pillar and hopefully closer to the doors.
What will probably end up happening is cutting the b and c pillars out. Building the c pillar outside the cab and tucking the b pillar way tighter to the sheet metal.lol

Oh also I want to build a new exhaust from the headers back with a c pipe and two of these bad boys that I picked up from cookcraft
AE803D18-A2E8-4813-A82D-21BBF1A3CB5D.jpeg
 
Decided to finally give the shocks on my truck some love. Took em to Kevin at dialed shock prep for the full kit. Going with cerakoted bodies, re anodizing the aluminum bits and also adding a bump zone to my front 3.0 coil overs by moving the resi port down on to the shock body. I’m super excited to see how they all turn out!
77C153F1-C832-4532-9213-65771A03DB70.jpeg2D316ACF-947D-4AEF-9F04-C43AA0170874.jpeg

Also scored huge on some old school f350 spindles and cone hubs from Travis. The steering arms measured identical to mine so I knew they had to be a match. I took em over to SI and he confirmed that they were either built at planks shop back in the day or at newline suuuuuper pumped on that! He’s gonna church up the knuckles and snouts for me while I send the hubs to get re anodized in the classic cone blue and orange combo.
These snouts are MUCH bigger than the f150 ones I have on now so it’s gonna be a nice upgrade even though I’ve yet to have an issue with the f150 stuff.
89857FFF-8019-46D5-ADDD-C1672F6D8036.jpegF35F8700-A4C6-42F9-A395-87886BD080A9.jpeg

Here’s some pics of my turd at full bump for your amusement. The 35s push the tops of the bedsides up lol

07E5F89B-C397-43B7-A491-AE126466BD44.jpeg06857BD6-16E5-4BFF-9288-7C06598F3251.jpegB0E3A6AF-F249-42A3-B2B6-EDAD27A823C2.jpeg
 
love this truck so much. So clean and simple and seems like you are always having fun in it. Makes me miss my ranger, although mine wasnt near this cool.
 
love this truck so much. So clean and simple and seems like you are always having fun in it. Makes me miss my ranger, although mine wasnt near this cool.
Thanks dude. After having a truck like my crew cab which was my daily driver while being linked and caged it quickly became more of a stress than a toy so with this one The goal was to always keep it simple and as fun as possible. Smiles per mile kind of thing!!
 
Back
Top