1982 F250 single cab

2012SVTSC

Well-known member
Joined
Dec 24, 2023
Messages
364
Location
CA
Hey all!

This is my old ford project!

It's a 1982 F250, engine is a ford 400, it has a T18 4 speed aka 3 speed. Dana 60 rear and 44HD TTB front.

I really enjoy driving this thing! I wanted to rebuild it into something to chill with and cycle into a daily driver, it's nothing hard core just a build I am doing for fun.

Starting in the back.

Because of an abundance of raptor parts around my house I decided to do a rear raptor suspension conversion, I mean it's really just shocks and leafs so pretty much the exact thing it came with from 82.

First thing was getting the leaf springs set up
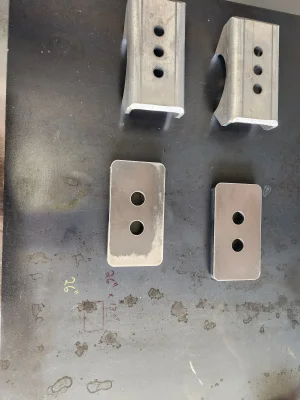
I got some fabricated leaf mounts from desolate. The rear I keept in the stock location lwtting the shackle do the location work. The front I had to move forward a bit to compensate for the extra leaf length.

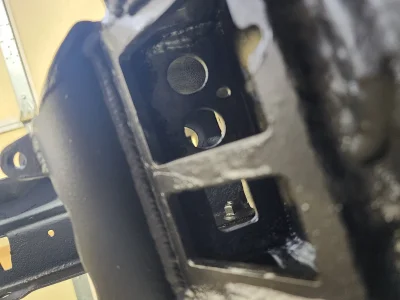
I made a doubler plate that will also serve to locate the fron spring mount. It locates off the OEM frame 3/4" frame alignment holes.
1000003657.webp
1000003658.webp1000003659.webp
1000003660.webp1000003661.webp

Then on the axle, I needed to convert it to a 2 pin leaf mount, I figured for sure the the pinion angles would be spot on form the two tucks so I based the sprin mount off the stock forged mounts on the axle even though they were in bad shape.
1000003653.webp
1000003654.webp1000003655.webp
1000003656.webp

Well that was dumb and didn't work. The pinion angle was not ideal plus I just thought it was sketch.

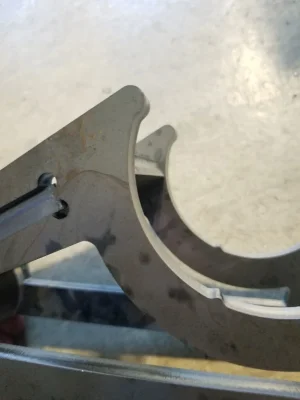
So I Haddadddd to grind off the dang spring pearch. I got a new 3" wide pearch from barns 4x4 and tossed on a 2 pin top, set the pinion angle and was gtg. (This was wayyy later after pretending the original set up was good to go).
1000002856.webp
1000002858.webp1000002859.webp
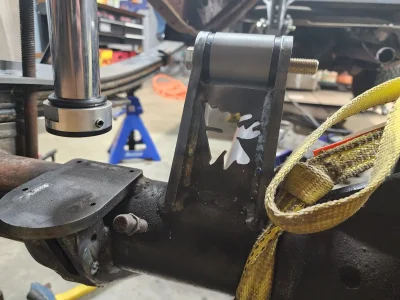
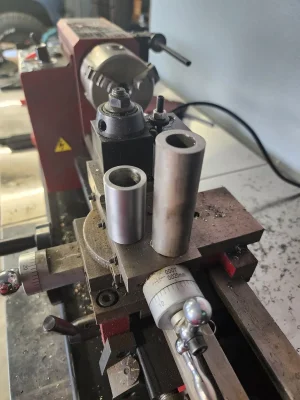
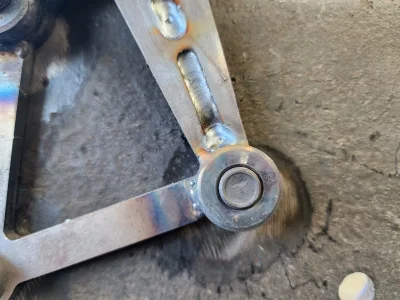
Mean while, I made a upper and lower shock mount. Now that I am confident in the spring cycle I locked in the upper location.
1000003689.webp
1000003664.webp

1000003686.webp1000003670.webp

1000003681.webp

More updates to follow!
 

Attachments

  • 1000002855.webp
    1000002855.webp
    363.2 KB · Views: 4
  • 1000003671.webp
    1000003671.webp
    113.6 KB · Views: 5
Next was the traction bar.

If you ever experienced a stock raptor leaf, you know the axle warp is super bad.

I based it off the ruffstuff kit but modified it a bit.

I know some of you may notice i was asking about setting up the leafs while also already have already setted up my leaf, I was ready to do rework if needed but seems like I will be just fine. So I am keeping this setup for now.

Basically this was the idea, but I changed it a bit:
1000003674.jpg
1000002863.jpg1000002862.jpg1000002865.jpg1000002864.jpg
1000003667.jpg1000003668.jpg1000002869.jpg1000003685.jpg1000003687.webp1000003666.webp


1000003672.webp
1000003673.webp

1000002860.jpg
 

Attachments

  • 1000002868.webp
    1000002868.webp
    224.7 KB · Views: 5
Pulled everything last night. Wired wheeled the frame and my wife helped me put some POR on the frame, I'll be doing some black frame paint on top as well once the front is ready.

20231228_180310.webp20231228_180321.webp
20231228_160142.webp
20231229_110439.webp
20231229_110448.webp
 
You didn't mention anything about the quarter elliptical leafs. What's your reasoning for adding those as opposed to just a heavier standard leaf pack? Looks interesting and I love out-of-the-box thinking.
 
You didn't mention anything about the quarter elliptical leafs. What's your reasoning for adding those as opposed to just a heavier standard leaf pack? Looks interesting and I love out-of-the-box thinking.

Oh yeah those, they are over load springs I went with that set up because I can change the preload on them with an adjustment bolt so if I need more load I can crank the bolt or if I'm unloaded I can take the preload out.

I will probably get deavers at some point but I want to keep a little extra overload.

The have a 650lbs carrying capability each and only engage in the last 4 inches (or more depending on the bolt adjustment) of suspension travel, in droop or normal driving once they come off the bolt they have no effect.20230819_203729.webp20230819_203702.webp

I have no idea if it will work! Haha more of a build first ask later type 😅
 
Started putting things back on, this is just a ladder frame bar, I POR'ed it and installed it wet. Painted the black oxide bolts with the por as well.
Not much but progress is progress.

Still waiting on the black frame paint.
1000004153.jpg

1000004155.jpg1000004158.jpg
1000004156.jpg
1000004157.jpg
 
Rear suspension substructure - locator plate? Finial Installation:
20240105_150329.webp
Welp, figured the paint is dry enough, I decided to install the locator plates for the rear suspension fame.

It's just a flat plate so not sure how hard I could make go on, here was the process:

I went with some RTV between the plate and the frame
20240105_150328.webp20240105_150618.webp
Sploched with the finger
20240105_150852.webp
Bolted up, the only two bolts that are finial installed are the massive 3/4" bolts that go though the frame jig holes, the others are just to keep things lined up.

Good thing I taped off some of the silver for my little moose buddy:
20240105_151534.webp
20240105_151529.webp
Big ol deformed nut with some red death just to piss off someones grand kids in 30 years.
20240105_151707.webp

I tigetend them as tight as i could with my longest breaker bars. Ill guess 300ftlbs
20240105_152719.webp
20240105_152724.webp
And POR on the head for because black oxide.
20240105_152843.webp

Yay! A part is actually installed!!!
 
Last update for now, one more part on.
Desolate Motorsports front hanger. I gave them a coat of steel-it but I am over steel-it two cans didn't even work out of the box. Even with different tips. Idk 🤷‍♂️ I'm probably going to look for a different high quality spray paint for now on.

20240105_162152.jpg
20240105_162801.jpg
20240105_163042.jpg
20240105_165908.jpg
20240105_165924.jpg20240105_170008.jpg
 
Hey another question.

I am setting up the fuel tank, on the top it has a hole 🕳 for the vent. Do I Neeeeed a vent right there with the filler vent still active? The filler vent would be below this one however.
20240106_103836.jpg

The reason I am asking is that I want to use that hole for a level sensor, but I can easily drill a new vent hole if needed. (Perfer not to)

20240106_103520.jpg

Thoughts???
 
Started doing some of the fuel line build up,

I will be using just two fuel lines, a feed and return (duh)
They will be -6s
So I made these little brackets here:

20240106_141224.webp
They are made so that -6 fittings can fit through, but then a grommet cam be used to secure the line from movement:
20240106_141357.webp
20240106_141359.webp
20240106_141420.webp
20240106_141628.webp
The same set up goes through the bump stop mout to get to the tank. The small line is for a brake line, but it will need to be built on the truck, the fittings will not fit through the grommet holes for that.

I am building everything for the back off bulkhead connections that will start here:
20240106_141634.webp
Screenshot_20240106_142703_Brave.webp
 

Attachments

  • 20240106_141717.webp
    20240106_141717.webp
    141.5 KB · Views: 7
Dang!
Nice build so far.
Thanks I've been side tracked trying to get the craptor back together and I already missed a trip with my friends because if it.

But I did get the rear suspension substructure all painted and bolted in also got a sweet rear bumper from Desolate.

Cromo back plates for the rear mount.
1000004409.webp

1000004650.webp
1000004649.webp

New bumper chilling
1000004648.webp

The reason some bolts are inboard, and some are facing outboard is because on the mount there is actually threads on some holes for absolutely zero possibility of movement, so the structure is bolted to the frame without nuts in 8 locations, then the deformed nuts are back up... if that makes sense.
 
That hole on the top of the tank is for the rollover valve, which many people gut so they can fill the tank without the nozzle kicking off all the time. Last time I messed with the tanks on my Bullnose I used some brass PEX? fittings that fit the grommet, Y'd them together and installed a filter on the end. If you use that for the send I'd add another vent somewhere at the very top of the tank. FTI there is a factory tank for the rear that holds like 40 gallons. Google F26 tank swap.
 
Back
Top