1987 K5 Daily Driver and trail build

gtrainor21

Active member
Joined
Feb 8, 2023
Messages
143
Location
AZ
Taking a break from being employed for a bit so I took on a project for my cousin.

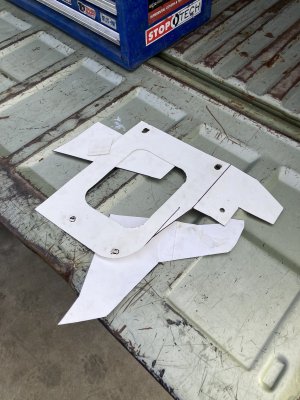
So here it is, 1987 K5 blazer. Showed up here with a half installed lift kit, hydrolocked small block, a dead mouse or two, and some minor fire damage under the hood…
IMG_5837.jpeg
IMG_5836.jpeg
IMG_5838.jpeg
IMG_5839.jpeg

The goal is simple. Put something together he can drive everyday and take out on the weekends and enjoy. We’re staying ORD custom leaf springs on all 4 corners to keep the cost down, dropping a LQ9 in it, crossover steering, true-tracs front and rear, and 4.10 gears. The 10 bolt rear is going away in favor of a 6 lug semi-float 14 bolt out of a mid 90s Chevy. There’s quite a few things to hash out yet but for now I’m in full blown tear down and clean up mode to make way for the 6.0.
 
So far I’ve got all the drivetrain out, interior gutted, and I’ve started the process of cleaning up 36 years of grime… the thing has solid bones for it’s age! If anyone needs a TBI 350/700R4/NP208 combo for cheap let me know!
IMG_5926.jpeg
IMG_5893.jpeg
IMG_5894.jpeg
 
Still grinding away on this K5. More cleaning than anything at the moment. Even though this isn’t a restoration by any means I still can’t leave anything dirty. I patched up the floors under the seat mounts and now I’m prepping to repaint the firewall because of a previous engine fire. Interior is cleaned up as well and ready for a layer of Dynomat…
IMG_5951.jpeg
IMG_5952.jpeg
IMG_5945.jpeg
IMG_5944.jpeg
IMG_5954.jpeg
IMG_5958.jpeg

Also the owner provided his own LS swap for this so I went and picked it up this last weekend.
6.0 LQ9…. 👍🏼
Paired to a 4L65E 👎🏼
He’s wanting to keep the 6.0 stock so I’m hoping the trans will be fine. The 6.0 will go on the stand next week for a reseal and whatever else I might find wrong
IMG_5960.jpeg
I also found a passenger drop electric speedo 241 to finish off the LS conversion. New seals and a slip yoke eliminator kit are on the way for it 🤙🏼
IMG_5959.jpeg
 
Update!
quite a bit has happened this past week in the interior and that part is pretty much done as far as I can go until the engine is in and I can start wiring everything up.

I laid down a layer of Kilmat in the floor and bed sides, installed new carpet, a Tuffy console, put the side panels in, and got the seats back in. My cousin plans on getting everything reupholstered once the truck is back together. Initially this was supposed to be just mechanicals but after fixing the floors the interior part just kind of happened…

Sound deadening in
IMG_5976.jpeg
IMG_5979.jpeg

I carved up a chunk of 4” flat strap and made the mount for the Tuffy console. This mount makes it 100% bolt in to the location of the stock console
IMG_5990.jpeg
IMG_6001.jpeg

The radio will be moved to the single din slot in the Tuffy console so I built an extension harness from the stock radio location to the console. The plan is to leave the dash in tact and mount a small switch panel in the stock radio hole with a nice ABS plastic bezel.
IMG_6002.jpeg
IMG_6003.jpeg

New black carpet to help offset all the red… console location came out 👌🏼
IMG_6004.jpegIMG_6007.jpeg
IMG_6011.jpeg
IMG_6010.jpeg
 
Any plans to strengthen the frame around the steering box, or add some bracing to the front of the frame?
 
Any plans to strengthen the frame around the steering box, or add some bracing to the front of the frame?
I’ve got a winch mount kit from Engineered Vintage that will really stiffen up the frame horns and the front half of the steering box. I’ve also got an ORD steering box brace that will grab the back half of the steering box to stiffen it up. The frame on this one is still solid around the box too so after those components are in he should never have to worry about it.
 
It’s been a busy few days, I forgot to get pics of the progress before I tarped the truck up tonight but I figured I’d share the winch mount that I installed. Super trick piece from Engineered Vintage. Might have to get one for my Jimmy!
IMG_6026.jpeg
 
Try to get up to date on this K5 from the past weeks worth of work! I really need to be better about taking pics but I’ll share what I have so far.

So for starters the firewall got repainted to eliminate what was left of the fire damage under the hood. Then I got the passenger drop NP241 resealed and a fixed yoke kit installed from JB conversions. Once that was done I got the 4L65E set into place and the transfer case mated to it in the truck.

IMG_6041.jpeg
IMG_6038.jpeg

Then it was on to getting the engine checked out and resealed. Unfortunately it had a bad head gasket and sat for a while with water in the bottom end. We opted to reseal it and resurface the heads and run it until he decides to get another 6.0 built for it. Nothing was bad enough inside to not run it but at the same time why just slap a few new parts in an already half worn engine? So the LQ9 got sealed up and dropped in

IMG_6057.jpeg

We used Dirty Dingo engine mounts with an Offroad Design engine crossmember. The pan was uncomfortably close to the crossmember and the transfer case really close to the tunnel as well. So I used some 1/4” plate to space up the engine mounts and space down the transmission crossmember. That gave me good clearances around ever and should make driveline angle a little better in the end all while keeping the engine as low and as far back as possible.

IMG_6066.jpeg
IMG_6068.jpeg
IMG_6074.jpeg
IMG_6069.jpeg

Had a couple bad weather days to prep accessories so as soon as the drivetrain was secured in its final home I went straight to getting the HVAC equipment in and the rest of the engine together. New P/S pump, water pump, Dirty Dingo Sanden 508 compressor brackets, intake, etc. Also got the PSI stand alone harness routed and hooked up on the engine side so from here it’s plumbing and wiring 🤙🏼

IMG_6064.jpeg
IMG_6067.jpeg
IMG_6073.jpeg
 
UPDATE… So I took like a month off from this project. Literally wasn’t home for over three weeks between KOH, Glamis, and hanging out in Havasu. It was great, but the party is over and I’m back to work on this thing.

First off before I left I had completed the majority of the wiring under the dash. ECM mounted, stand alone fuse block mounted, DBW pedal mounted, and the TAC module mounted. So here’s some pics of how that all came out. It was a trick getting that newer GM ECM in the factory location and still get everything to clear between the glove box door and HVAC controls

Also pictured above the throttle pedal is the original horn relay and hazard flasher that had to get relocated up in the process of mounting the pedal.
IMG_6087.jpeg
IMG_6088.jpeg
IMG_6090.jpeg
IMG_6091.jpeg
 
There were a couple other boring things that got knocked out before I left for hammers that I won’t bore you too much with. Of that was getting the core support, grille, and bumper back on. Before the bumper went on I got it cut for the fair lead mount since it’ll have a winch behind the bumperIMG_6085.jpegIMG_6086.jpeg
 
Now for all the post KOH work. I started with getting the air box and coolant recovery bottle mounted in the truck. This is where I wish I had more tools for making stuff like this. But with patience anything is possible, same outcome just not as clean as if I had a plasma table and a brake.

Most of these parts getting fitted in here are for an GMT800 era half ton. So, S&B intake, and coolant bottle since the radiator won’t have a cap in it…. Basically shooting for it to be an 05 Silverado under the hood.

Card stock for the win 👌🏼
IMG_6278.jpeg
IMG_6262.jpeg

Also the harbor freight nut-cert tool is super handy
IMG_6265.jpeg

The GMT800 coolant bottle hooks into the fender from the factory with just a couple mounting bolts. So I whipped up a quick tab to stand off from the fender to replicate how it mounted in the newer trucks
IMG_6272.jpeg

And final install
IMG_6275.jpeg
 

Attachments

  • IMG_6278.jpeg
    IMG_6278.jpeg
    347.4 KB · Views: 1
And this is where I’m at as of yesterday. Just got the 05 Silverado radiator and electric fans mounted. I started off by mocking everything in place and piecing together a lower mount for the assembly. Once it was set in place I made up the upper mount. Again, not the cleanest fab work out there, but it works.

Lower radiator and fan saddles
IMG_6256.jpeg
IMG_6257.jpeg
IMG_6279.jpeg

Than the upper mount. Since I don’t have access to a brake I literally hacked up a piece of 3.5” box tubing to make this.
IMG_6282.jpeg

Everything I’ve done so far is bolt in. This utilized optional factory radiator mounts on the back side of the core support
IMG_6285.jpeg
IMG_6286.jpeg
 
Well… it runs now! Before I went back to Glamis last week I finished up the wiring and gauges to get it fired up. The only issue I had on the first start was it kept blowing the fuel pump fuse. My guess is the newer fuel pump has a higher amp draw than the original TBI pump? The original fuse was sized at 10A and it would only blow when the pump would shut off. It has 14 gauge wire going to the pump so I put a 15A fuse in and it’s been fine so far.

So really all it needs now to finish off the LS swap is exhaust but I’ll do that after I get Suspension and axles done so it doesn’t end up in the way. Hell I even got the A/C charged up and it blows ice cold 👌🏼

Dakota Digital HDX gauges… these things make the LS swaps too easy these days
IMG_6321.jpeg
IMG_6300.jpeg

Spent a little time in the wiring in this thing. I put together a little power distribution center on the inner fender to keep everything tidy and fused. The small fuse center down low protects everything in the cab and the two upper fuse/relay centers. The front PDC is for the fan relays, and the rear PDC is for adding accessories like lights and what not. Accessories are prewired to switches on the dash and leads are tied up behind the box for when the time comes to tap into them.

IMG_6297.jpeg
IMG_6298.jpeg
IMG_6299.jpeg

Utilized the original radio hole in the dash for the prewired accessory switches. Mounted everything in ABS so nothing got cut on.
IMG_6323.jpeg

Also the owner had the dash upholstered. Came out decent…
IMG_6322.jpeg
 
Really excited for the next half of the project now that the LS swap is done though. I’ve got a move happening in the near future so this may go on hold for a bit since I can drive it on and off a trailer now. But the next step is for it to go into hovercraft mode. Then axles will get put together, new leaf springs will get cycled, shock mounts built, drive shafts done, and crossover steering put together 🤙🏼
 
Back
Top