The Turbo Glue Factory: Boosted Colt Build

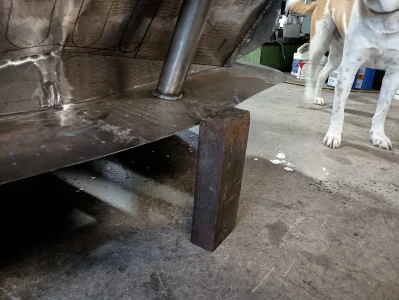
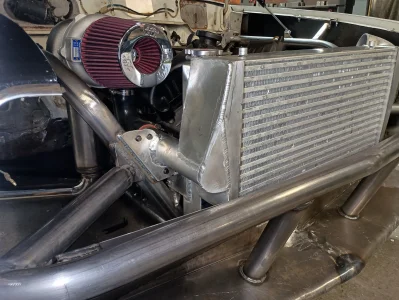
I think I am going to make a dolly to form the lip of the lower part of this monster
Like a 3/4" radius
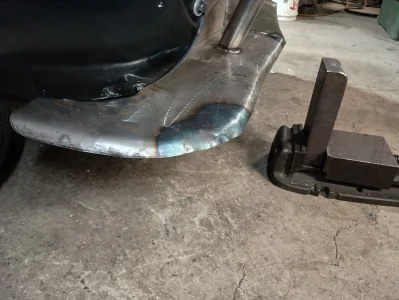
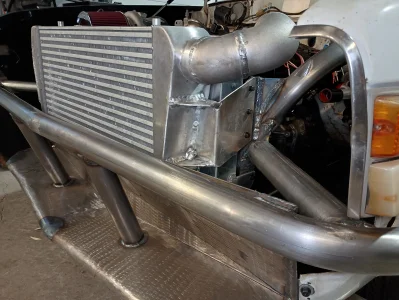
imagine how solid this will be backed on the 10" slab of concrete
the car will hold the bumper and then ill just walk around it a million times with a hammer
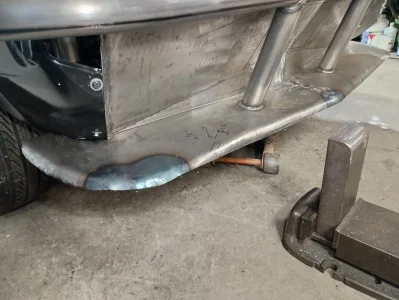
 

Attachments

  • IMG_20251116_124727916.jpg
    IMG_20251116_124727916.jpg
    2.2 MB · Views: 48
Got the intercooler done
 

Attachments

  • IMG_20251122_140113957.jpg
    IMG_20251122_140113957.jpg
    2.3 MB · Views: 12
  • IMG_20251122_140125133_HDR.jpg
    IMG_20251122_140125133_HDR.jpg
    1.8 MB · Views: 10
  • IMG_20251122_142819694.jpg
    IMG_20251122_142819694.jpg
    1.3 MB · Views: 10
  • IMG_20251122_164807257.jpg
    IMG_20251122_164807257.jpg
    2.7 MB · Views: 10
  • IMG_20251122_164837968.jpg
    IMG_20251122_164837968.jpg
    2.1 MB · Views: 11
Wait, water pump & belt is at the back of the motor? Where is the alternator? Power steering?
 
yes, it is a powerful speed hack! you put the water pump on the rear for better weight transfer.
with the bellhousing being completely in the engine bay i imagine there is no need for a scatter shield
the alt and steering pump are going low on the frame.
alternator will be here soon

after i get some more trimmings done i will start the front suspension $$$
 
Last edited:
man, the 4 piston 4runner calipers are just way to massive on the other side of the rotor to use with my wheel combo. defaulting to basic explorer calipers as i am using the hubs and rotors already....

2004 caliper is kind of chucky in height for the mounting bolts but the 2008 is nice and compact in the wheel. i found this style to be much more helpful in packaging when i did the same thing on the montero.

1764264943233.png
 
Last edited:
Machines out another mustang 5.0 throttle body plate. Got the front and rear perimeter done. Now to make the floor and drop in the runners
 

Attachments

  • IMG_20251127_171212151.jpg
    IMG_20251127_171212151.jpg
    2 MB · Views: 9
  • IMG_20251127_171218405_HDR.jpg
    IMG_20251127_171218405_HDR.jpg
    1.9 MB · Views: 10
  • IMG_20251127_171223256.jpg
    IMG_20251127_171223256.jpg
    2.4 MB · Views: 13
Love it! Making an intake from scratch is fucking sweet

Did you find files for that flange you machined or did you lay it out and CAD it?
 
Are you doing anything special to seal the throttle body/throttle body bolts to keep them from leaking boost or just gonna slaz it up with RTV?

I am not sure what SOP is for that setup.

Sean
 
I am boldly/foolishly going to say the hard part is over!
time for lunch
 

Attachments

  • IMG_20251128_105324251_HDR.jpg
    IMG_20251128_105324251_HDR.jpg
    2.5 MB · Views: 5
  • IMG_20251128_105329597_HDR.jpg
    IMG_20251128_105329597_HDR.jpg
    2.6 MB · Views: 5
  • IMG_20251128_105344200_HDR.jpg
    IMG_20251128_105344200_HDR.jpg
    2.5 MB · Views: 6
  • IMG_20251128_112712658_HDR.jpg
    IMG_20251128_112712658_HDR.jpg
    2.1 MB · Views: 6
First two ribs in, time for a beer
ill do a little more blending on the first 2 ports when the air catches up and then start the third rib
 

Attachments

  • IMG_20251128_122158853.jpg
    IMG_20251128_122158853.jpg
    2.4 MB · Views: 6
  • IMG_20251128_122215368_HDR.jpg
    IMG_20251128_122215368_HDR.jpg
    2.2 MB · Views: 5
  • IMG_20251128_132900755.jpg
    IMG_20251128_132900755.jpg
    2.3 MB · Views: 5
  • IMG_20251128_132913203_HDR.jpg
    IMG_20251128_132913203_HDR.jpg
    2.2 MB · Views: 4
  • IMG_20251128_132920425.jpg
    IMG_20251128_132920425.jpg
    2.5 MB · Views: 4
Yup, it took about 1 hour of swapping tungsten, cups and settings to get the dam thing to make a clean puddle!
stupid mother fucker wasting my time always
1 hour to weld about 8" piece
 

Attachments

  • IMG_20251128_145349108.jpg
    IMG_20251128_145349108.jpg
    2.5 MB · Views: 6
  • IMG_20251128_145355596_HDR.jpg
    IMG_20251128_145355596_HDR.jpg
    2.2 MB · Views: 6
  • IMG_20251128_145410421_HDR.jpg
    IMG_20251128_145410421_HDR.jpg
    2.1 MB · Views: 6
Back
Top