troysladeck
Well-known member
Slow days at work means that I should start up my build thread!
My first offroad truck was a Jeep XJ. And while I love it, its certainly limited when it comes to high speed desert situations. I wanted something that could handle whoops a little better but still have 4wd, trunk space, and 4 seats. Thats when the 1st gen explorer platform caught my eye. TTB, Plenty of aftermarket support, and a very capable truck with relatively little mods / money. After about 8 months of looking, I found one that looked to be a perfect starter for a project in December 2023.

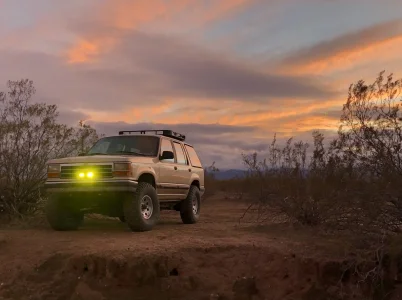
1993 Ford Explorer Limited, 4.0 V6, 4wd. Bone stock, 153k miles, and owned by an old Lady that named her "Pearl". I met her at Fast Auto Loans and paid her $1500. Slight damage to the front right fender but otherwise exterior is in really good shape. The paint is all there and will shine up nice. Tranny was supposedly recently rebuilt. All the leather looks perfect except for the front two seats. Drove an hour home no problem!

First mod was some 32" BFG's I had laying around. The truck looked really good at stock height and big tires. Bonus was it didn't rub at all because of the stock wheels. I went ahead and changed all the fluids and refreshed the cooling system just to ensure everything looked good. New battery and some seat covers for the front. Got the transfer case motor fixed so that way 4x4 worked. Ready to rip!

Went for a weekend camping trip out in Wickenburg. If you haven't been, its a rad experience. Some technical trails, but the main attraction is a 4 mile long river bed that you can drive up. In the spring the creek flows pretty good. You can camp pretty close to the creek.


We got home from Wickenburg and had a trip planned the following weekend to Sedona. I had some parts collecting in the garage so I figured I should get them on before going. Of those parts were cheap ebay front 2" spacers, extended shackles, and front bilstein shocks. Got everyhting on fairly quickly, but had to make custom mounts for the Bilsteins on the radius arm. Really ghetto fab but got the job done in the meantime. This stage was just a cheap way to get by and have a little more travel than stock, and still have a stock feeling ride.


Did surprising well in Sedona. The trails were slow and rocky but the ride was pretty comfy. I even led the way in front of my Bronco buddy. I haven't been able to get my 4Low to work so that sucks, but it still did fine.
Truck stayed like this for a couple months. Wasn't that impressive but had a bunch of little issues that needed addressed and thats what I focused on. Got the heater working, the AC working, had ignition issues and some vacuum leaks that I figured out. Did new ball joints, wheel bearings, spindle bearings, axle seals, and manual hubs. Just wanted to make it as reliable as possible.
Some cash was burning a hole in my pocket and I decided it was time to start collecting parts to put some actual decent suspension on the rig. First off was some rear shocks.

Found some beat to shit raptor shocks for $50 on marketplace and swooped them. Rusted pretty bad, but the shafts were clean and the internals looked good. Took them apart, had the outers sandblasted, hit em with a can of Alloy armor, new seals and oil, had Kevin @ Dialed Shock Prep work his magic on the shim stack and I put them back together. Final product below. I ended up taking off the shaft bump because it was not needed after all.

Ended up buying a Cookcraft rear shock mount from Ryan, some Solo radius arms from GFE, 2" lift skyjacker springs, and some new axle pivot bushings to get the front end tight and right.

First up was the front end. Stripped everything down, removed the old radius arm crossmember, and started lining up the new radius arms.

Welded on the lower shock mounts and hit it with some allow armor


Got both beams pushed forward slightly and cycling real nice. New bumps stops also, just universal ones from Prothane.

It flies!

Next up was the rear. Got it knocked out in 1 day. The hardest part was busting out the factory shock crossmember rivets. The process that worked for me was grinding down the bolt head, then punching out the remainder with an air hammer. Still took forever though. Once those were out the Cookcraft mount just about slid in. Highly recommend

A lot of work for it to look exactly the same as it did before LOL
My first offroad truck was a Jeep XJ. And while I love it, its certainly limited when it comes to high speed desert situations. I wanted something that could handle whoops a little better but still have 4wd, trunk space, and 4 seats. Thats when the 1st gen explorer platform caught my eye. TTB, Plenty of aftermarket support, and a very capable truck with relatively little mods / money. After about 8 months of looking, I found one that looked to be a perfect starter for a project in December 2023.
1993 Ford Explorer Limited, 4.0 V6, 4wd. Bone stock, 153k miles, and owned by an old Lady that named her "Pearl". I met her at Fast Auto Loans and paid her $1500. Slight damage to the front right fender but otherwise exterior is in really good shape. The paint is all there and will shine up nice. Tranny was supposedly recently rebuilt. All the leather looks perfect except for the front two seats. Drove an hour home no problem!
First mod was some 32" BFG's I had laying around. The truck looked really good at stock height and big tires. Bonus was it didn't rub at all because of the stock wheels. I went ahead and changed all the fluids and refreshed the cooling system just to ensure everything looked good. New battery and some seat covers for the front. Got the transfer case motor fixed so that way 4x4 worked. Ready to rip!
Went for a weekend camping trip out in Wickenburg. If you haven't been, its a rad experience. Some technical trails, but the main attraction is a 4 mile long river bed that you can drive up. In the spring the creek flows pretty good. You can camp pretty close to the creek.
We got home from Wickenburg and had a trip planned the following weekend to Sedona. I had some parts collecting in the garage so I figured I should get them on before going. Of those parts were cheap ebay front 2" spacers, extended shackles, and front bilstein shocks. Got everyhting on fairly quickly, but had to make custom mounts for the Bilsteins on the radius arm. Really ghetto fab but got the job done in the meantime. This stage was just a cheap way to get by and have a little more travel than stock, and still have a stock feeling ride.
Did surprising well in Sedona. The trails were slow and rocky but the ride was pretty comfy. I even led the way in front of my Bronco buddy. I haven't been able to get my 4Low to work so that sucks, but it still did fine.
Truck stayed like this for a couple months. Wasn't that impressive but had a bunch of little issues that needed addressed and thats what I focused on. Got the heater working, the AC working, had ignition issues and some vacuum leaks that I figured out. Did new ball joints, wheel bearings, spindle bearings, axle seals, and manual hubs. Just wanted to make it as reliable as possible.
Some cash was burning a hole in my pocket and I decided it was time to start collecting parts to put some actual decent suspension on the rig. First off was some rear shocks.
Found some beat to shit raptor shocks for $50 on marketplace and swooped them. Rusted pretty bad, but the shafts were clean and the internals looked good. Took them apart, had the outers sandblasted, hit em with a can of Alloy armor, new seals and oil, had Kevin @ Dialed Shock Prep work his magic on the shim stack and I put them back together. Final product below. I ended up taking off the shaft bump because it was not needed after all.
Ended up buying a Cookcraft rear shock mount from Ryan, some Solo radius arms from GFE, 2" lift skyjacker springs, and some new axle pivot bushings to get the front end tight and right.
First up was the front end. Stripped everything down, removed the old radius arm crossmember, and started lining up the new radius arms.
Welded on the lower shock mounts and hit it with some allow armor
Got both beams pushed forward slightly and cycling real nice. New bumps stops also, just universal ones from Prothane.
It flies!
Next up was the rear. Got it knocked out in 1 day. The hardest part was busting out the factory shock crossmember rivets. The process that worked for me was grinding down the bolt head, then punching out the remainder with an air hammer. Still took forever though. Once those were out the Cookcraft mount just about slid in. Highly recommend
A lot of work for it to look exactly the same as it did before LOL
Last edited:


")