'93 Explorer Prelanding Camper

KaiserJ

Active member
Joined
Mar 26, 2023
Messages
42
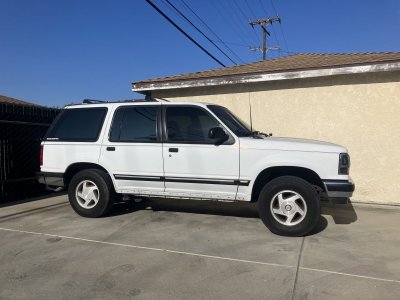
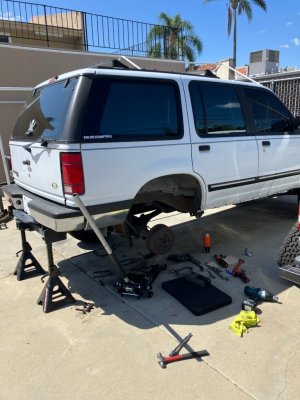
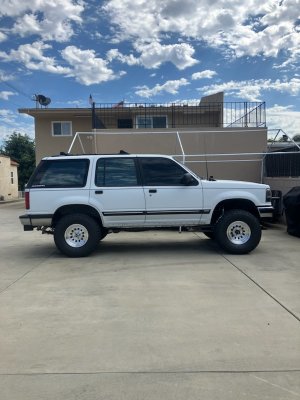
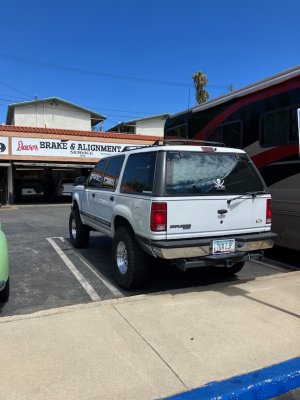
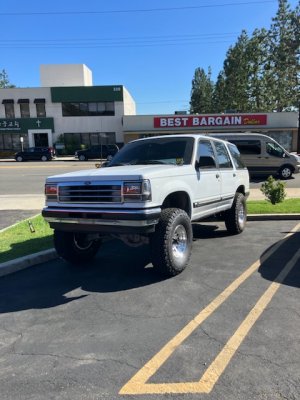
Prologue: Figured I'd finally post some pictures / updates of this explorer my lady and I bought awhile back. (Actually, its hers.) For a few years now she's been really wanting a bronco. When we met 10 years ago, she hadn't ever been camping in the desert or offroad really of any kind. I'm pleased to have had somewhat of an influence on this build after having her out with me a few times in the last decade. So anyways, we've been keeping our eye out for a solid bronco to build on the weekends and after work, but as we all know they are just ridiculously expensive these days and it just didn't make sense for our budget. We ended up compromising slightly on another 1st gen Explorer and for many reasons, I'm glad that we did. The explorer was less than half of what a decent bronco cost, gets substantially better MPG, and they seem to be growing in popularity as of late. We missed my old 1st gen from a few years back and figured they are just a perfect candidate for what we intend to do with it. Including but not limited to, road tripping to cool camp sites in CA, AZ, UT and CO. Still meeting up / car camping in the local deserts for events and races, visiting our family cabin up in Idyllwild in the snow and the list goes on. We just want to get out there more often, more comfortably, and more simply. Load the car up after work during the week and just high tail it out of the big shitty for a night to catch a break from the rat race. Found this clean stocker on FB marketplace and within an hour we were proud owners of another 30-year-old Ford pile of junk!

To the Point:
  • 1993 Ford Explorer, Auto trans, 4x4 w/ auto transfer case
  • Solo Motorsports Stage 1 Cut N' Turn D35 TTB kit (came with the car uninstalled)
  • Deaver F31's prepped and leafs added by Deaver (gifted by my buddy Mr. Cookcraft, thanks again Ryan!)
  • Offer-Up special Gen 1 Raptor rear shocks (to receive the Dialed Shock Prep treatment)
  • American Racing Outlaw II's
  • 33x10.5x15 BFG A/T KO2's
  • Mile Marker Manuel locking hubs
  • Rebuild engine (less than 1,000 miles on it at the time I bought it)

more pics and updates to follow....
 
Last edited:
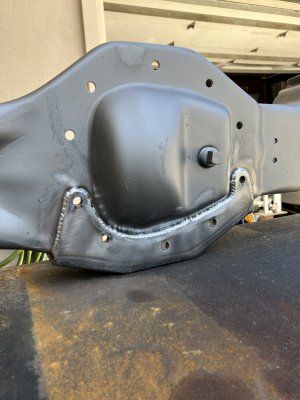
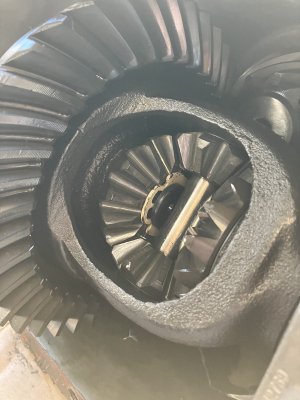
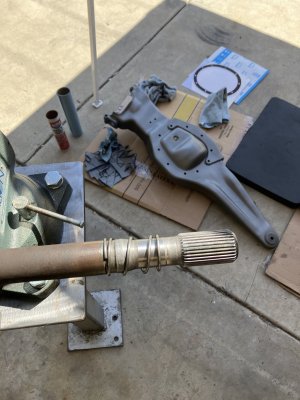
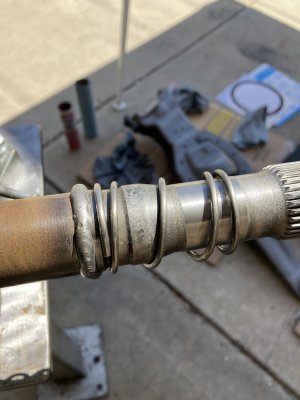
Before getting started on this front end install I did quite a bit of research on the D35 TTB since I've never taken one apart or anything before. I was sure I'd run into some unforeseen issues, so I wanted to try and be prepared. One of the neat little mods I found while going down this rabbit hole was the C-clip eliminator for the front axle assembly. (Passenger side axle assembly). There are a ton of write-ups out there on this already, and a couple different ways to accomplish this, but basically, I chose to do an external spring with a weld-bead. I felt for what we do, this is the most reliable version of this mod. I thought it was a pretty clever solution to making this front end a little more user-friendly when it comes to having to replace u-joints, or even a broken axle itself.

All you do it remove the diff from the driver beam, remove the c-clip that retains the passenger side stub axle in the diff and throw it away.

IMG_7327.jpeg

Then, take this Echo Chainsaw spring (Echo / Shindaiwa 69621655730 Spring) and slide it over the male splines of the pass side axle. (This was kind of a bitch, but it does fit with some persuasion. A solidly mounted vice helps a lot.

Link to spring: Amazon product

IMG_7356.jpeg

Weld a bead or use a hose-clamp or shaft collar etc. to keep the spring seated.

IMG_7358.jpeg

Ta da, you’re done! Grease up the splines of the slip really good, slide the grease boot back over the slip and set the axle aside. See, how easy was that? I’ll post photos of the final assembly soon it’ll make more sense if anyone is still wondering what the point of this mod was.
 
Last edited:
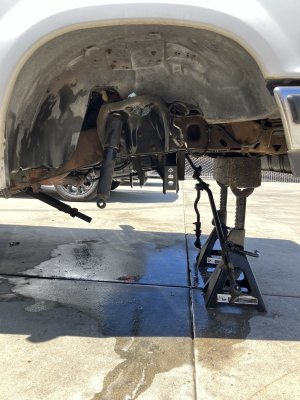
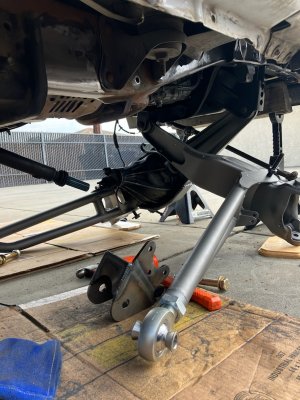
Couple shots of the front end install. Big lesson learned on this front end was you NEED to have a 1/4" drive, 12-point, 6mm deep socket. I didn't have one when I started on the tear down and it held me up for a day while I waited for one ordered online. The bolt that holds the ABS bracket to the knuckle covers the edge of the spindle, and without being able to remove that bracket, you can't pull the spindle to pull the front axles. I ordered two of these sockets, one for home and one for the tool roll that'll go with us whenever we head out into the unknown.

Anyways, more pics!

714100754.jpg

IMG_7410.jpg713548920.jpg
714956378.jpg
IMG_7522.jpg

Front end all buttoned up!
 
Last edited:
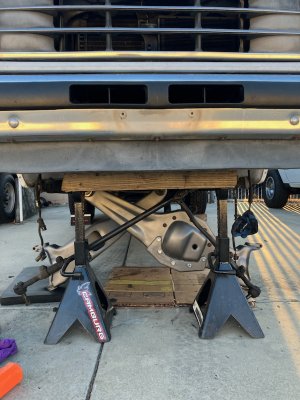
Next, I got the leafs and shackles on the rear, ditched the factory rear sway-bar, and installed a Ruff-Stuff diff cover for extra beef and swag points. +10 horse power for the 12pt hardware. 😤

IMG_7722.jpgIMG_7727.jpg

IMG_7736.jpgIMG_7737.jpg

IMG_7734.jpg
IMG_7745.jpg

Sitting pretty perfect with a full-size spare in the cargo area. Got it aligned yesterday and she's cruisin'! Rides pretty damn good! Just need to get the Gen 1 Raptor rear shocks on the back of this thing next, and probably need an extended rear brake line / some limit straps front and rear.

Here are the alignment numbers for anyone wondering.

IMG_7756.jpg
 
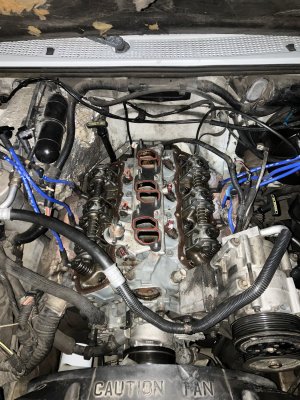
Little update, kind of a lame one but blew a head gasket on the Explorer over the weekend, found a few things wrong with it last night.

Before the head gasket issue, it was pinging and seeemed to be getting worse (with 87), I talked to a few people the common consensus was to try a few cans of sea-foam through the top end to de-carbon and try switching to 91 octane. It seemed to help a bit and overall response seemed to improve, but ultimately the thing over heated and started running like shit before I could burn up a full tank of gas.

Checked the dipstick the next morning aaaaaand milky oil (it was just changed 3 days prior).

Last night, i started pulling accessories, wiring harness and air intake plenum and found the EGR tube nut was finger loose.... had to be a huge vacuum leak there. Kinda mad at myself that I didn't find that one sooner, maybe would've solved the pinging issue (??) But, oh well too late. Lol.

Question for anyone that may know, some of the retaining clips on the wiring harness are all jacked up, namely on the injectors. I see rock auto has replacement connectors, but I'm wondering if it would be ok to cut the old ones off and use butt connectors and heat shrink to repair this harness? Or do they need to be soldered? I haven't soldered anything before nor do I want to attempt to on this harness, but I do want to clean up the entire harness and replace any broken plugs on it, especially as this thing will be bouncing around on trails. I don't want to have to track down a loose plug out in the dirt while my beer gets warm!

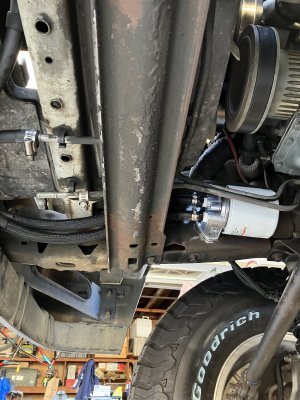
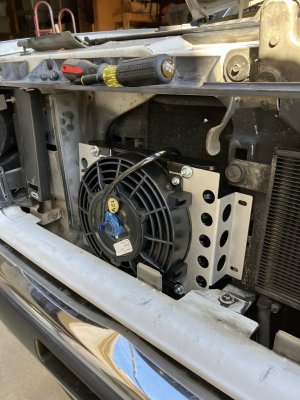
Also, I added an additional tran fluid cooler w/ fan in series to the stock cooler, and an external filter on the trans fluid outlet line before the stock heat exchanger in the radiator. Just trying to keep this auto trans cool and alive as long as possible. Pics to come.
butt connectors are fine then heat shrink. when I was with ford I never soldered wires. over time they will become brittle and break. a lot of manufactures actually don't recommend it.
 
butt connectors are fine then heat shrink. when I was with ford I never soldered wires. over time they will become brittle and break. a lot of manufactures actually don't recommend it.
Good to know! Thanks for the reply. Maybe you could answer this one for me: I broke one of the tips off the smaller vacuum tubes that attaches to the fuel pressure regulator, its pictured below the wiring harness I posted above. Anyone know what size that line / barb is? Looks like a OEM replacement for that tiny tube is pretty much non existent.
 
so you broke the line or fitting. do you have a better picture. if its the hose you should be able to use washer fluid hose. don't know off the top of my head the side. have you tried pick a part. or I think there is a all ford junkyard out there by you. might give them a try.
 
The only time I found soldered wires on OEM Toyota it has heavily potted with a thick RTV-like rubber and ended up .5in diameter and 3in long. I would crimp with uninsulated ferrules and cover with adhesive shrink tube. In fact I have a few like that to do now.
 
so you broke the line or fitting. do you have a better picture. if its the hose you should be able to use washer fluid hose. don't know off the top of my head the side. have you tried pick a part. or I think there is a all ford junkyard out there by you. might give them a try.
There is a 94 explorer at LKQ near me, I'm gonna try to see if it has what I need on Friday, but I broke the little robber hose that attaches to the barb fitting on the FPR. Worst case I'll take the FPR off and run it down to O'Reilly and buy whatever hose fits snug. Knowing Ford its probably some oddball 3.69MM hose lol
 
Ya with ford it’s obsolete and trying to find a good dealership to tell you the exact part is hard to come by now a day. Dealerships are almost as bad as autozone now a days with there employees. If the one at lkq doesn’t have it cut a little piece of vacumm line and slide it over. You can put some rtv over the ends to seal it but it’s not needed. Vacuum is so minimum it will be fine we use to fix raptors that way when the lines would crack causing the front hubs to keep trying to engage. If you need any help or other questions let me know.
 
Ya with ford it’s obsolete and trying to find a good dealership to tell you the exact part is hard to come by now a day. Dealerships are almost as bad as autozone now a days with there employees. If the one at lkq doesn’t have it cut a little piece of vacumm line and slide it over. You can put some rtv over the ends to seal it but it’s not needed. Vacuum is so minimum it will be fine we use to fix raptors that way when the lines would crack causing the front hubs to keep trying to engage. If you need any help or other questions let me know.
Sounds good, thanks dude! Hoping to have the heads off this week and maybe driving before Thanksgiving 😅
 
Checkout Ballenger Motorsports, you can probably get the oem connectors and just replace the connector housings without touching the actual wiring at all. They have a ton of oe stuff. Im in the process of doing that on my tundra right now.

Sean
 
Back
Top