Toyota T100 Driveway Build

IanDirte

Member
Joined
Mar 15, 2024
Messages
16
Hello BLGT folks! How are ya? I decided I’m finally ready to post a little build thread on my truck now that the rear suspension is “done” for now.

It’s a 1996 Toyota T100 4x4 5 speed
I got it fall of 2019 and wanted to keep it stock and reliable. Here’s how I got her, photos are from the Craigs list post. Truck was from Salt Lake City so it had some rust but was overall pretty clean. Got it for 2k. IMG_3295.jpegIMG_3309.pngIMG_3303.png
So for the first year I owned it I just got caught up on maintenance.
The following was replaced year one:

Timing belt
Water pump
Spark plugs
Plug wires
Air Filter
LED Headlights
Radiator
Starter
Carrier bearing
All fluids
Battery

Next fall of 2020 I replaced the shocks with some KYB units off eBay. I then installed ball joint spacers up front to help clear some take off 4runner wheels I bought on FB marketplace.
IMG_6623.jpegFullSizeRender.jpeg
The 285/70-17’s fit well and I was happy for about a year and a half. I moved 6 hours north and this truck hauled all our junk flawlessly.

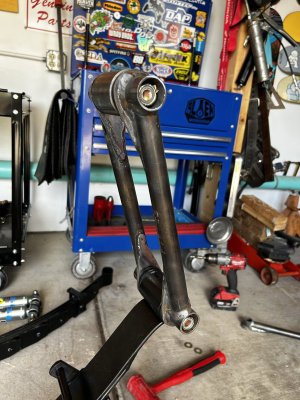
In summer of 2022 I was out exploring the desert with the dog and broke my right front c/v axle. It pinned me next to a rock wall on the drivers side with a small water fall behind me. I had to Austin powers for like 30min to get out of that situation. That sparked the build as it is now. IMG_3525.jpeg
 
Step one was saving up, purchasing and installing a JD fab long travel kit with some King coil overs. I installed this kit on a long 3 day weekend. IMG_3543.jpegIMG_3542.jpegIMG_3556.jpegIMG_3557.jpegIMG_3560.jpegIMG_3561.jpegIMG_3562.jpeg
The install went well other than smoking the drill bit I needed to drill out the knuckle with. I went to Home Depot and purchased another. Proceed to smoke that drill bit as well. Went back again and bought their last one. That one completed the job 😂.

After the install was complete I went on a test drive down the street to an open field and proceeded to get stuck in the mud with maybe 3/4mile on the new setup 😅 had to call the wife to pull me out. She was stoked…IMG_7102.jpeg
 
Last edited:
Next thing I tackled was building my own steering. I got my parts off ruff stuff and eBay. I used a swing out tire carrier spindle as a starting point for my idler arm. I got some bearing cups from kartek for the Pittman and idler. I then built some double shear tabs out of 3/16”. I will use 1/4” plate next time but this still seems good enough for now. IMG_3844.jpegIMG_3883.jpegIMG_3896.jpegIMG_3902.jpegIMG_3905.jpegIMG_3904.jpegIMG_3907.jpegIMG_0952.jpeg
 
So I rocked just the front setup for about a year then I decided to sell my dirt bike and further the truck project.

First I purchased some PRP seats. These are the daily driver series with some grey suede I picked out. IMG_1160.jpeg
Those took about a month to arrive. While waiting for them I was collecting parts to build the rear suspension. I originally adapted the stock seat sliders to the PRP seats but I didn’t like how it looked. I saw Dave Chapelle build a cool seat frame on his you tube so I stole his idea and applied it to my truck.
IMG_1161.jpegIMG_1251.jpeg

They don’t slide but that’s fine there is plenty of room to get in the back through the middle. Now I’m the only person who fits in the drivers seat perfectly 🤷‍♂️.
 
Moving to the back I started building some knock off TC 12” shackles while all my ruff stuff parts were piling up on the service cart. Not seeing any 3 day weekends in my future I wanted to have everything built and ready to install on the truck in a 2 day weekend. IMG_1233.jpegIMG_1252.jpeg
IMG_1263.jpegIMG_1264.jpegIMG_1279.jpegOnce I got the deavers and temporary bilstein shocks it was almost go time. IMG_1268.jpegIMG_1281.jpeg
I welded up and test fit everything off the truck first.
IMG_1282.jpeg
It’s not professional quality like TC or anything but I’m ok with how it all turned out. I learned a lot and had fun doing so.
 

Attachments

  • IMG_1282.jpeg
    IMG_1282.jpeg
    333 KB · Views: 0
I pulled the bed the day before and drove to work like that. The old dudes I work with were confused when they saw me pull into work. Once I got home I immediately pressure washed the whole back of the truck. Ate some dinner and pulled it into the garage.
IMG_1304.jpegIMG_1296.jpegIMG_1297.jpegGot everything cut off and still had daylight so I just kept going.IMG_1299.jpegIMG_1300.jpegIMG_1301.jpeg
As for setting axle location I just marked where the axle lived stock at ride height on the frame. I basically just kept the axle in that spot and kept building. After some squaring and cycling I decided to move the axle about 1/4” back because at full droop the slip yoke on the driveshaft was close. IMG_1302.jpegIMG_1305.jpegIMG_1306.jpegIMG_1308.jpegOf course it rained the weekend I was set on doing this project. I thought I had a break in the weather to get painting. Nope rained on my fresh paint. IMG_1310.jpeg
I did a couple welds that didn’t suck ass 😂
IMG_1311.jpeg
IMG_1312.jpegIMG_1314.jpegIMG_1316.jpegIMG_1317.jpegIMG_1318.jpeg
 
Weekend day two I got the bed back on, and started working on the shock mounts. I was pretty burnt out so I forgot to take progress pictures. IMG_1320.jpegIMG_1324.jpegIMG_1336.jpegIMG_1375.jpegI wanted to retain the ability to carry 4x8 sheets of plywood flat in the bed so I built the bed cage to be very minimal. I plan on adding tube connectors and a few more tubes or gussets later on. IMG_1376.jpegSo the stock offset 4runner wheels rubbed the shocks a little bit when flexing so I had to go from 1.5” to 2” wheel spacers out back. I’ll have to get more off set wheels before I get bypasses out back. Anyway this is how she sits currently and it’s good. The rear is awesome. I can crush speed bumps at the mall like nobody’s business.
 
Last edited:
I had to cut the wheel wells a lot more than they already were. I also took some preload off the front coils and it evened out the height and feel of the truck. Overall I’m stoked and can’t wait for the next phase. IMG_1326.jpegIMG_1353.jpegIMG_1346.jpegI’d like to thank Salty Methods for posting his T100 build. It was like a cheat code for setting up my deavers.

Thanks for reading! See ya in the dirt..
 
Last edited:
4x T100's have always been a favorite of mine. Good suspension (80/90's suspension), Strong steering (4x means no rack and pinion), And good motor (not the old 3.0 but the 3.4)
 
4x T100's have always been a favorite of mine. Good suspension (80/90's suspension), Strong steering (4x means no rack and pinion), And good motor (not the old 3.0 but the 3.4)
Yep exactly, I love this truck for those reasons!
About the only down side so far has been the thin rear axle housing cracking and leaking.
 
Last edited:
Back
Top