Another Bronco Build

LPR_Bronco

Member
Joined
Oct 11, 2023
Messages
17
Location
Vegas
Since I'm going to be a bit lazy on a Sunday, I'm transferring my build from the Bronco forum 🤷‍♂️ Also, shameless plug, if you don't already, be sure to follow @luxuryprerunner on the gram and @LPR_Bronco

Now lets get to the truck.

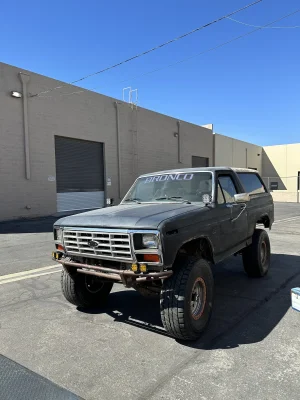
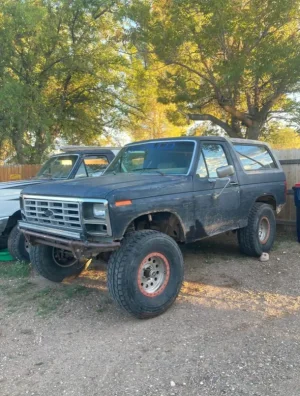
I purchased an 86 Eddie Bauer Bronco with a 351w/C6 from a guy in Arizona. It was the cheapest clean title "running" truck I could find, and it came with added extra's that made the price justifiable. I bought the truck sight unseen, and took the sellers word on a lot of things that later I found out to be untrue, such is life.
IMG_2087.PNG

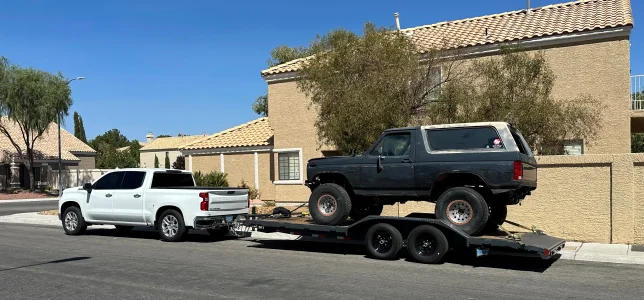
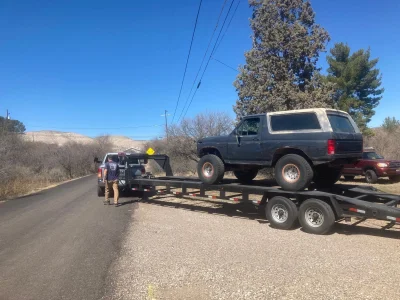
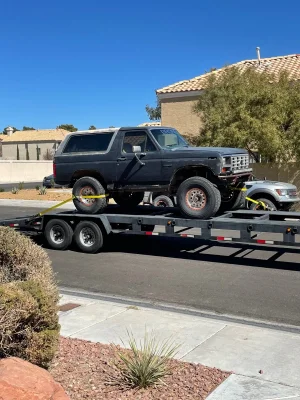
After making the deal, wired some money over, and got a transport lined up, it was on its way to me.
IMG_9861.jpg
IMG_9870.jpg

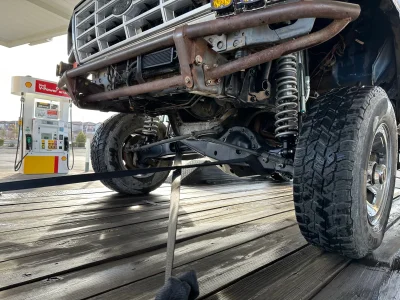
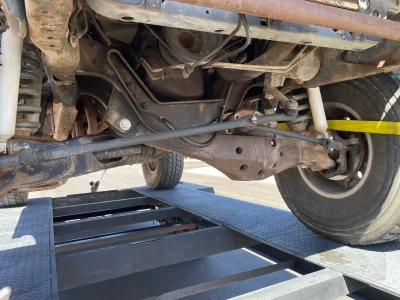
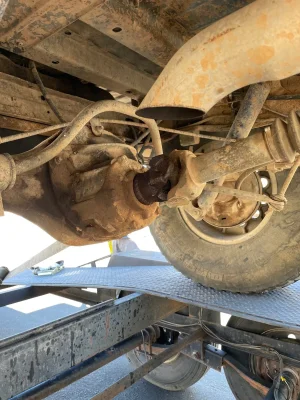
One of the main selling points were the 37" Baja TA's, beadlocks and the beefed up cut and turned ttb's/ radius arms. Albeit, everything looks in rough shape.

IMG_9872.jpg IMG_9873.jpg

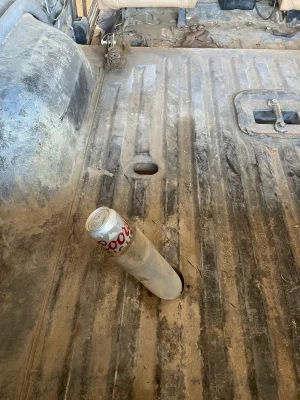
This is when I noticed everything was pretty bad. This truck was marketed and sold as "no leaks" to which I quickly found out was not true. One of the biggest head scratchers was the fuel tank inlet. Still to this day, I can't make sense of it. In his defense, it did seal the fumes in quite well.

IMG_9903.jpg

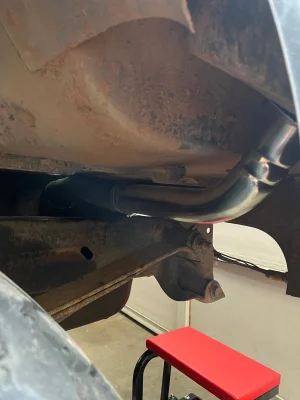
This was one of the first things on my list to fix, so I put in an order to Bronco Graveyard and got a new fuel neck.

IMG_9951.jpg

From here, it pretty much sat. After discovering more issues, I lost interest in fixing them and frankly did not have the time to put into the truck. It sat for about a year untouched and having me second guess my purchase and plans for it.
 
Now that I got a second wind, and sold my other desert truck, it was time to get this project back up and running.

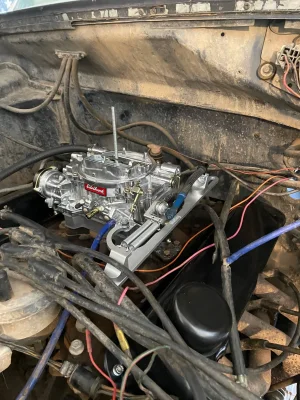
First things first, order a new carb. The factory Holley leaked everywhere, and I wanted to get a carb that would eliminate the smog components (PO halfway deleted the smog systems) so I ordered an Edlebrock 1406 with a Holley throttle bracket.

Other things replaced that I don't have pictures of: water pump, power steering cooler, headlight switch, and replaced the rear window switch that was faulty.

The Edelbrock will be up for sale soon if anyone is in the market. Has about 1 min worth of idle time on it.

IMG_2059.jpg

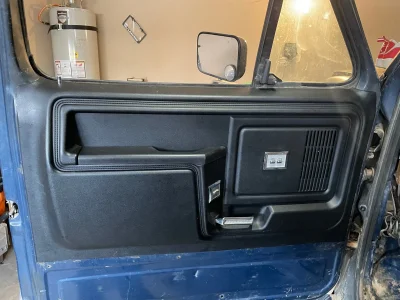
The truck didn't come with a full interior, so new door panels were ordered from LMC.

IMG_1541.jpg
 
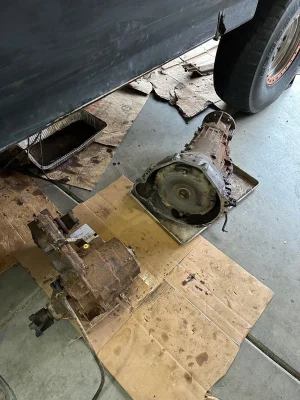
Before Christmas, I pulled the transmission and transfer case out to have rebuilt. The transmission was leaking from every crack, and according to the builder, had a lot of clutch material in the pan. The band was also in rough shape, and looked like the transmission had a lot of moisture/water inside of it. Would have made for a bad day if it went out while out on a trail.

IMG_3205.jpg

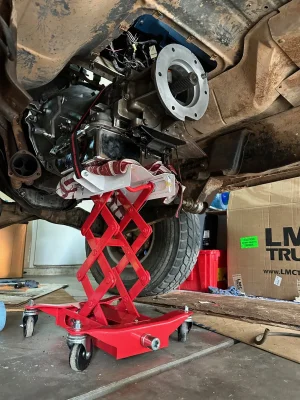
This weekend I was finally able to get the transmission back into place. I picked up a cheap Harbor Freight trans jack that has questionable welds, but did it's job.

IMG_3442.jpg
 
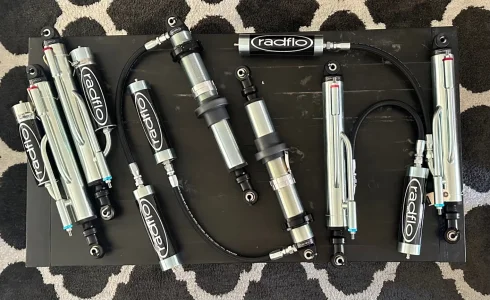
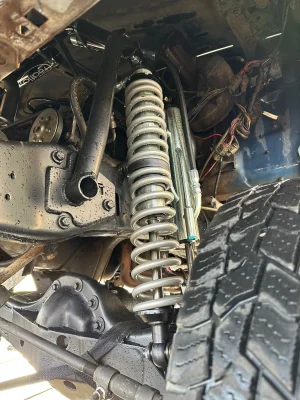
Now on to the good stuff. The piece de resistance. I gave a call to Radflo to get shocks ordered as they are some of the highest quality shocks on the market, and don't have year long wait times.

IMG_2363.jpg

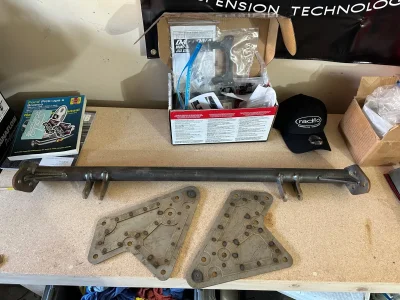
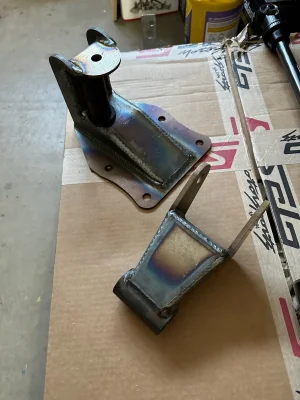
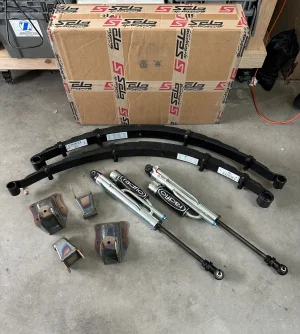
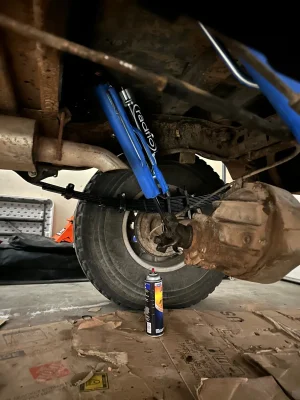
I paired the rear bypass shocks with Threat Motorsports rear end that comes with a new shock mount, shackles, hangers, and Deaver Q80's. To complete the package, a Solo Motorsports engine cage was ordered as well.

IMG_2698.jpg IMG_2579.jpg IMG_2621.jpg
 
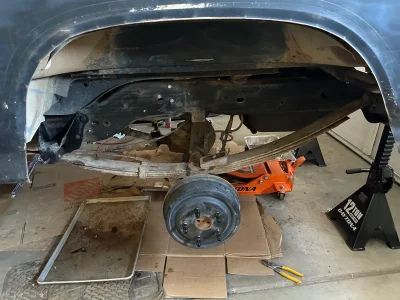
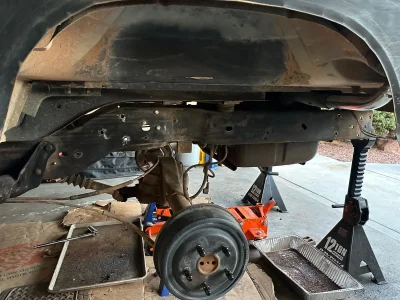
First things first, pop off the shocks and get rid of the U-bolts.

IMG_2629.jpg

Get rid of the leaf springs, factory shackles and hangers, then cut and punch the factory rivets.

IMG_2878.jpg

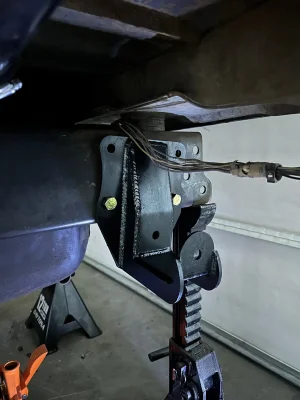
You have to drill the holes out a bit to fit the new hardware, then everything lines up as it should. Installed the rear hangers after a quick paint job. Don't pay attention to the wire loom, still need to re-wire and tuck everything.

IMG_3001.jpg

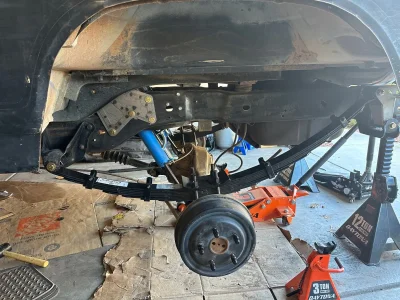
The shock mount was a PIA to get on with how tight the tolerances are, but that's never a bad thing. The shocks, springs and shackles were bolted into place. Everything was torqued, anti-siezed, loctite and then paint marked.

IMG_3074.jpg IMG_3103.jpg

Yes, my pinion seal still needs to be replaced 😅

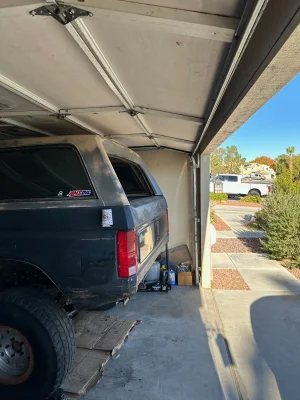
Once everything was installed, and back on it's own legs, I realized I had a slight problem....

IMG_3114.jpg
 
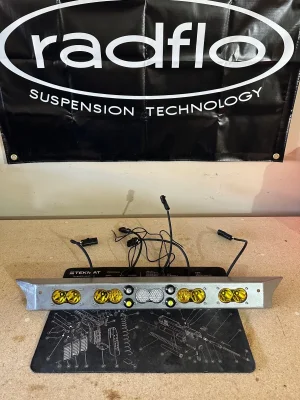
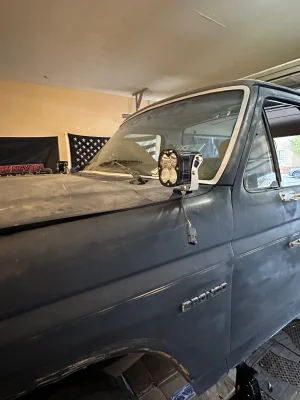
While waiting on more parts to arrive, I was able to secure a new rear chase light from SacFab with the best lighting company on the market, Baja Designs. I also repurposed a set of XL80's that I took off of my Raptor when I sold it.

IMG_3198.jpg

The brackets for the XL80's are meant for the 92-96 body, so there will be some massaging to have them fit properly with the stock Bullnose fenders. I'm not as concerned since it will be getting fiberglass fenders down the road.

IMG_2318.jpg
 
Since I'm going to be a bit lazy on a Sunday, I'm transferring my build from the Bronco forum 🤷‍♂️ Also, shameless plug, if you don't already, be sure to follow @luxuryprerunner on the gram and @LPR_Bronco

Now lets get to the truck.

I purchased an 86 Eddie Bauer Bronco with a 351w/C6 from a guy in Arizona. It was the cheapest clean title "running" truck I could find, and it came with added extra's that made the price justifiable. I bought the truck sight unseen, and took the sellers word on a lot of things that later I found out to be untrue, such is life.

View attachment 20030

After making the deal, wired some money over, and got a transport lined up, it was on its way to me.
View attachment 20031
View attachment 20032

One of the main selling points were the 37" Baja TA's, beadlocks and the beefed up cut and turned ttb's/ radius arms. Albeit, everything looks in rough shape.
View attachment 20033 View attachment 20034

This is when I noticed everything was pretty bad. This truck was marketed and sold as "no leaks" to which I quickly found out was not true. One of the biggest head scratchers was the fuel tank inlet. Still to this day, I can't make sense of it. In his defense, it did seal the fumes in quite well.
View attachment 20035

This was one of the first things on my list to fix, so I put in an order to Bronco Graveyard and got a new fuel neck.
View attachment 20036

From here, it pretty much sat. After discovering more issues, I lost interest in fixing them and frankly did not have the time to put into the truck. It sat for about a year untouched and having me second guess my purchase and plans for it.
At least you got a free beer in the deal! Beams look well constructed. Cool Build.
 
I haven't updated this thread in awhile so I figured I'd give a little update.

The EFI kit finally showed up and will be installed here in the next few weeks.

I went with the Aces Killshot Mater Kit. It includes the TBI unit with an external ECU, 5" display screen, electronic fuel pump, new distributor, ignition coil, and all of the accessories needed to install. This unit will support up to 650hp which is more than enough for my plans, even with a stroker build down the line.

Gadget Audio equipment Auto part Fashion accessory Font


Rectangle Gas Electronic device Toolbox Automotive exterior
 
Haven't spent much time working on the truck lately with it being tax season. So I spent a little time working on wiring the Switch Pros. I ordered a universal standoff mount from PowerTrays, they were reasonably priced and saved me time trying to make my own mount.

Circuit component Electrical wiring Computer hardware Audio equipment Electronic engineering


I have no real estate in the engine compartment since I no longer have fender liners, and the new coilover conversion will take up a lot of space, so I decided to mount it inside the cab. I drilled a few holes in the trans tunnel cover as the mount fit the space well. At some point I will be building a center console that will hide all of this.

Kitchen utensil Bumper Gas Font Automotive exterior


Automotive tire Audio equipment Sleeve Font Gas


This is the temporary finished product. Depending on how long the wire harness is for the Aces EFI, I might mount the ecm to this plate as well.

Automotive tire Hood Vehicle Motor vehicle Steering wheel
 
I owned this bronco almost 20 years ago. I put the beams on and steering shaft and made that bumper .

FYI the frame had a small crack behind the steering box I plated over.

Beams are Scott strong and radius arms are super lift that were boxed in. I fixed the cut and turn and finished boxing and clearancing the beams to clear the shafts. At one point it had d50 running gear and a d50 third.

Highly recommend swapping the bushed pivots to uniballs, as those radius arms give you about 10+ degrees of caster at ride height.

I also have a ton of factory manuals and wiring schematics from Dearborn ford I was able to buy when the plant closed.

I saw this thing all over the place after I had it, and I think Willis owned it at one point .
Small world. Would love to see some pictures of it from back in the day if you have some. I've been trying to figure out who built these beams since I've owned it ha.
 
I always love seeing those old ultra beadlocks took me about 2 years to find 6 of those and I have a feeling this bronco will party well when she’s running
I've been trying to track down one or two more for spares. If you ever part ways with yours, let me know.
 
I haven't updated this thread in awhile so I figured I'd give a little update.

The EFI kit finally showed up and will be installed here in the next few weeks.

I went with the Aces Killshot Mater Kit. It includes the TBI unit with an external ECU, 5" display screen, electronic fuel pump, new distributor, ignition coil, and all of the accessories needed to install. This unit will support up to 650hp which is more than enough for my plans, even with a stroker build down the line.

Gadget Audio equipment Auto part Fashion accessory Font


Rectangle Gas Electronic device Toolbox Automotive exterior
Nice. Interested in how this works out.

I've watched some of their vids, Looks pretty decent for the price.
 
While waiting on more parts to arrive, I was able to secure a new rear chase light from SacFab with the best lighting company on the market, Baja Designs. I also repurposed a set of XL80's that I took off of my Raptor when I sold it.

View attachment 20051

The brackets for the XL80's are meant for the 92-96 body, so there will be some massaging to have them fit properly with the stock Bullnose fenders. I'm not as concerned since it will be getting fiberglass fenders down the road.

View attachment 20052
Where did you source that rear chase light? I need one for my bricknose build! I searched for SacFab with no success.
 
Slow progress on the build as it's been 100 + degrees during the summer, and I've been swamped at work.

I pulled it out of the garage for the first time in what feels like forever, and took it to Nefarious Kustoms to get some things ironed out. This is also the first time I've towed with the baby diesel and it handled the trip surprisingly well.
 

Attachments

  • IMG_4886.jpg
    IMG_4886.jpg
    2 MB · Views: 17
  • IMG_4880(2).jpg
    IMG_4880(2).jpg
    1.8 MB · Views: 17
Back
Top