99 XLT Ranger - Baja Betty

BlazeOrange3

Member
Joined
May 3, 2023
Messages
31
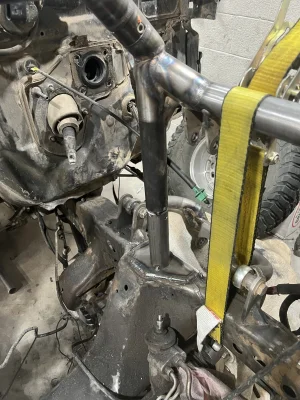
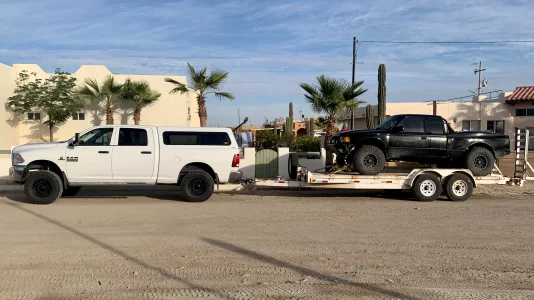
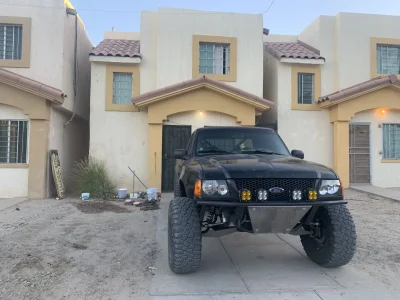
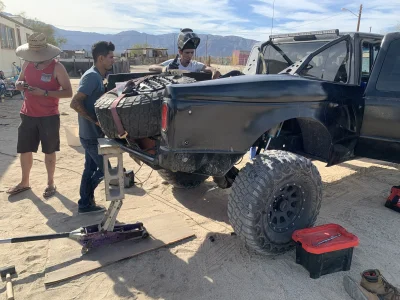
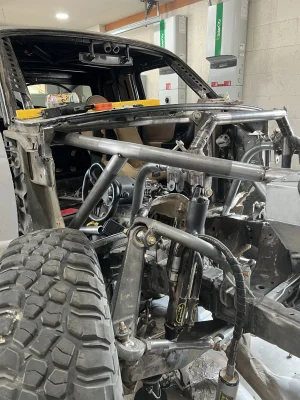
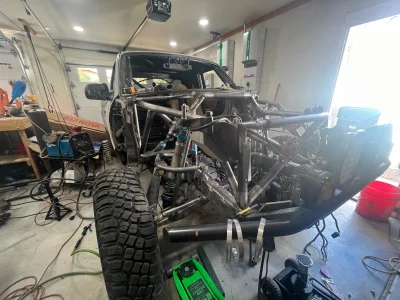
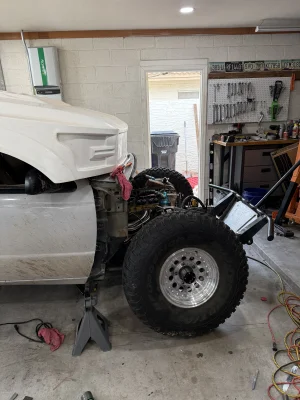
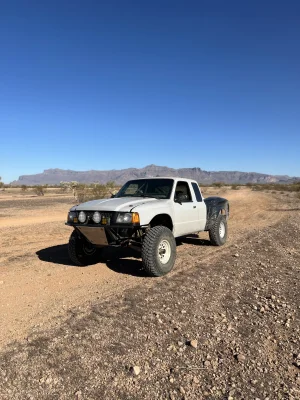
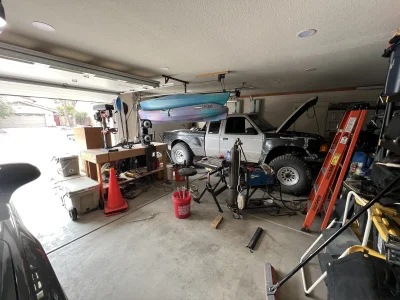
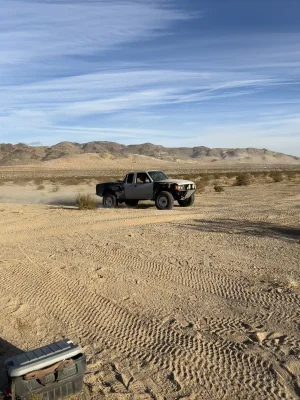
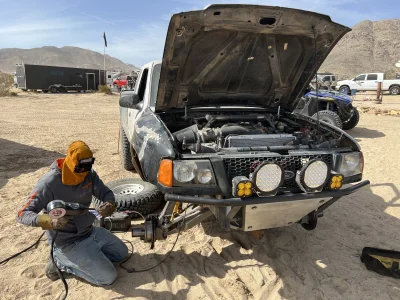
Havent been on here in a while, but I finally moved to a place that gives me more space to work on my own stuff - definitely an upgrade from a single-car garage at a condo. I was able to prep the truck and make it to Hammers, but I ended up ripping part of my engine cage off when removing the coil bucket. Luckily, I managed to get a trail fix in, met new friends, and still had a great weekend.

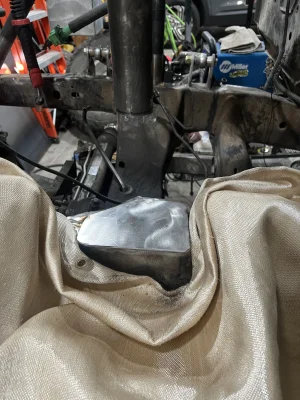
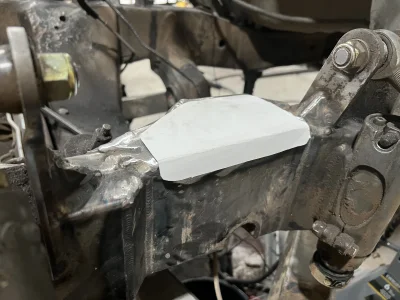
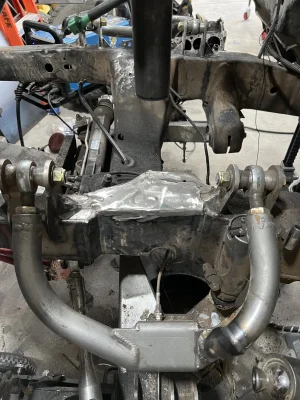
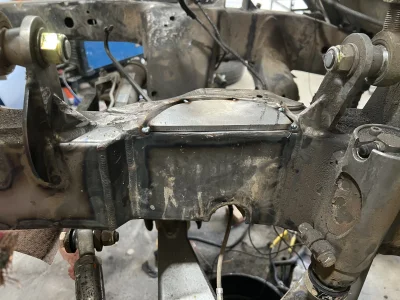
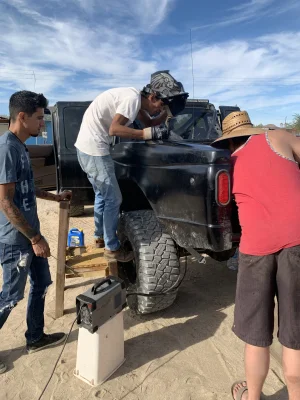
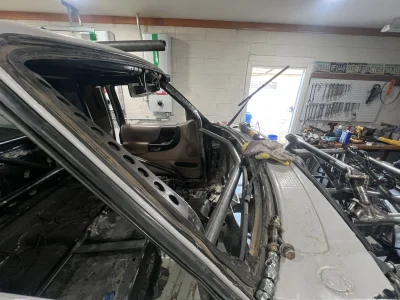
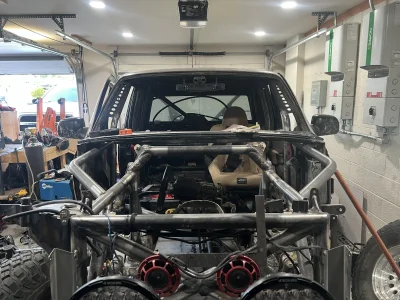
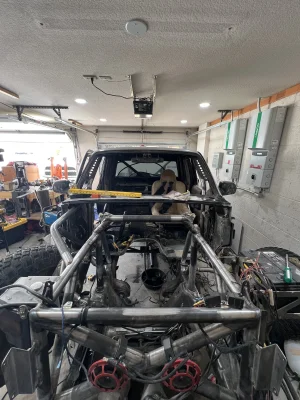
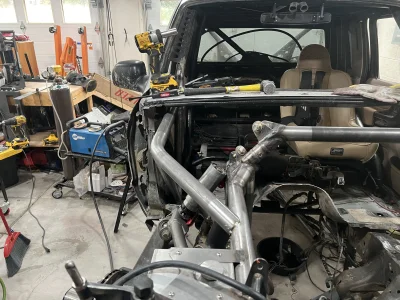
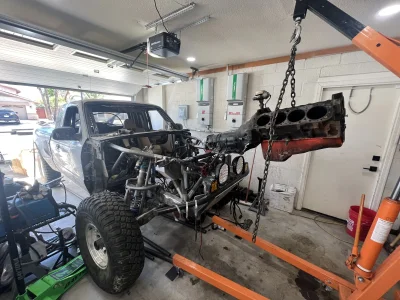
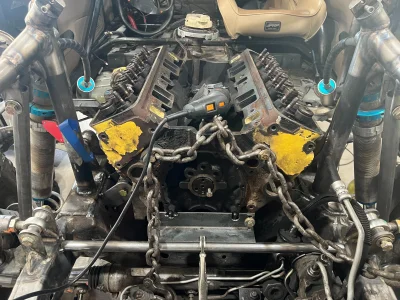
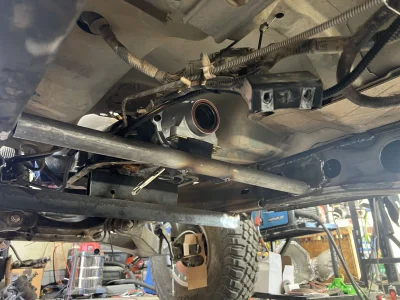
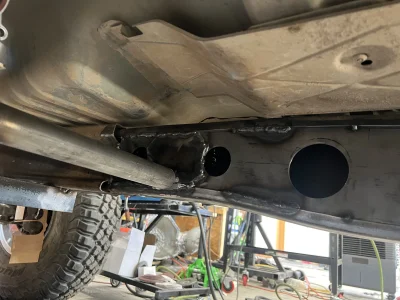
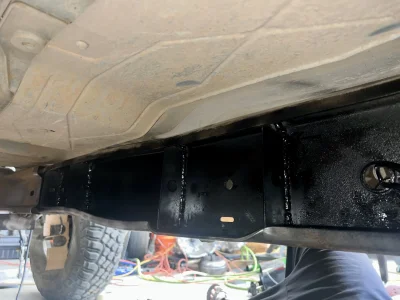
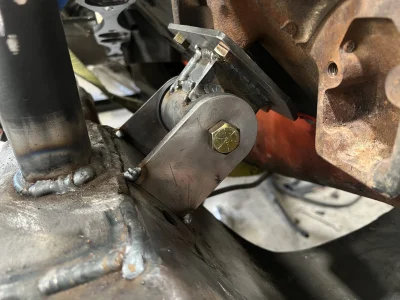
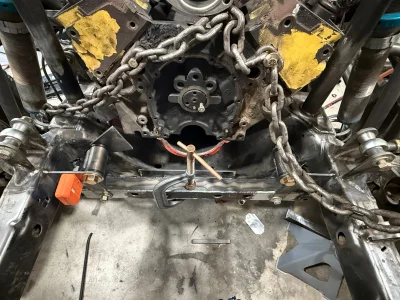
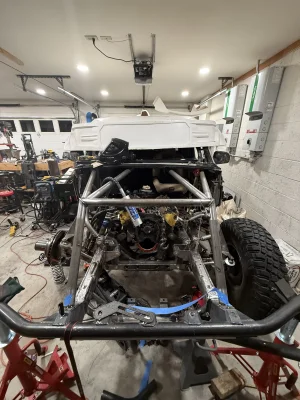
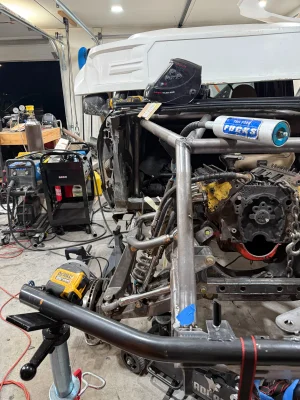
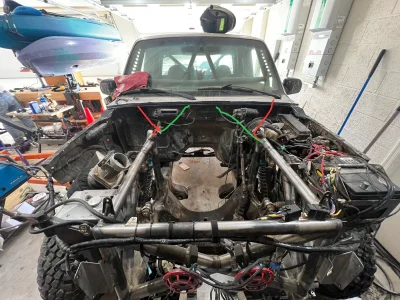
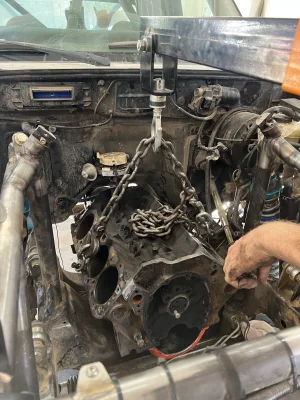
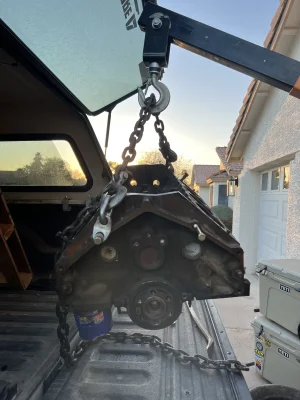
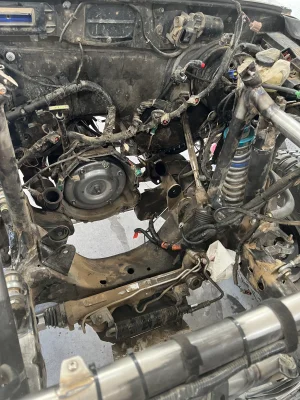
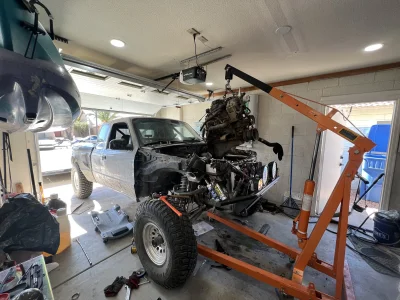
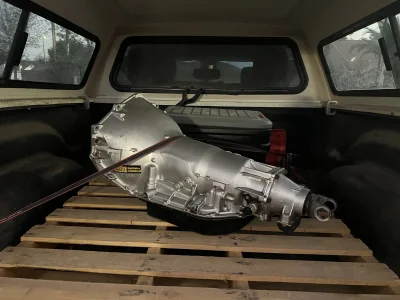
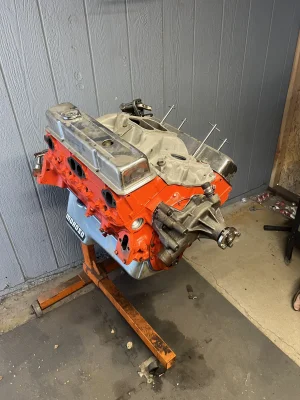
Once I got home, my brother-in-law helped me pull the engine so I could repair the frame and install overlay plates. After pulling the engine, he mentioned that he had a 350 SBC I could have. I jumped on Marketplace and found a rebuilt TH400 transmission from a reputable local rebuilder for $500. I also picked up a $100 block and borrowed a friends TH400 core to mock it up and confirm fitment before moving forward with the engine cage repair.

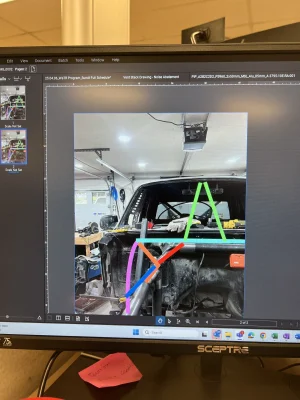
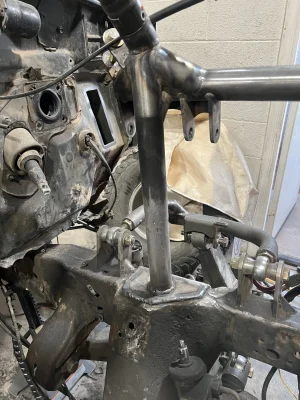
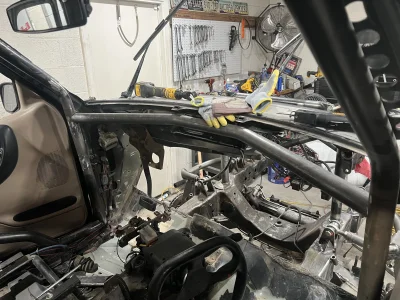
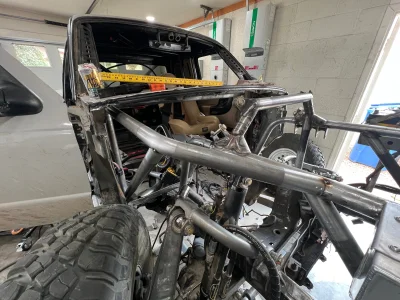
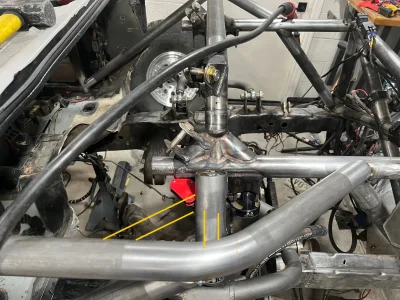
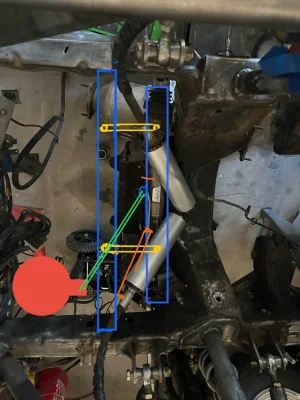
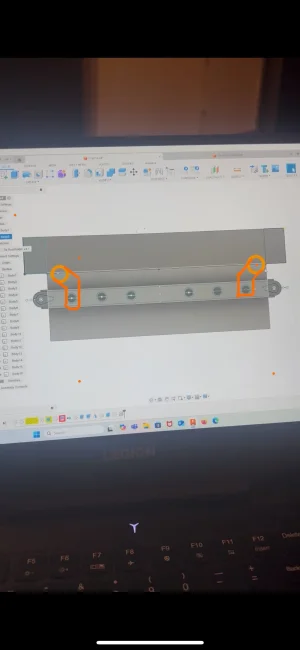
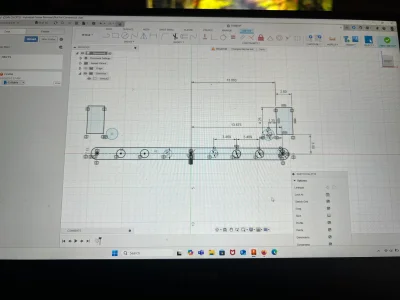
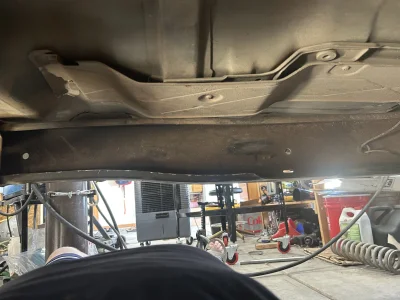
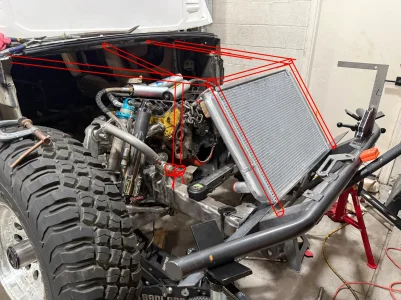
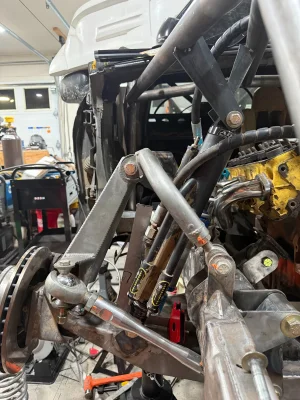
Like most projects, the scope is expanding. Im now planning to remove the dash, lower the horizontal dash tube, and redo the down tubes and cage tie-in points & reinforcement before building the engine and transmission and shifter mounts. Swing steer may be in order as well. Class 2000 has been catching my eye, so I might start looking into leaf spring upgrades for the rear. More to come!

Suspension:
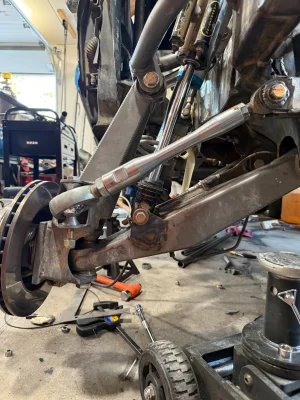
Front: Camburg XLT LT Kit, 2.5x10 CO/BP and 2x2.5” bumpstops

Rear:F30 deavers w/ 2.5x16” bypass and 2x2.5 bumpstop
 

Attachments

  • IMG_9334.webp
    IMG_9334.webp
    2 MB · Views: 184
  • IMG_9648.webp
    IMG_9648.webp
    528.9 KB · Views: 122
  • IMG_9646.webp
    IMG_9646.webp
    1.2 MB · Views: 82
  • IMG_9618.webp
    IMG_9618.webp
    1.1 MB · Views: 76
  • IMG_9569.webp
    IMG_9569.webp
    1.5 MB · Views: 78
  • IMG_9568.webp
    IMG_9568.webp
    1.5 MB · Views: 75
  • IMG_9544.webp
    IMG_9544.webp
    1.2 MB · Views: 74
  • IMG_9590.webp
    IMG_9590.webp
    889.8 KB · Views: 72
  • IMG_9502.webp
    IMG_9502.webp
    1.2 MB · Views: 66
  • IMG_9495.webp
    IMG_9495.webp
    2 MB · Views: 65
  • IMG_9493.webp
    IMG_9493.webp
    1.4 MB · Views: 68
  • IMG_9477.webp
    IMG_9477.webp
    1.1 MB · Views: 67
  • IMG_9478.webp
    IMG_9478.webp
    1.5 MB · Views: 69
  • IMG_9579.webp
    IMG_9579.webp
    1.8 MB · Views: 70
Cool build. What is the Tire/Wheel size combo your running? I'm digging the small wheel, larger tire, not so wide stance of your set up.

thanks.
 
Cool build. What is the Tire/Wheel size combo your running? I'm digging the small wheel, larger tire, not so wide stance of your set up.

thanks.
Thanks appreciate it. Tire is a BFG KM3 UTV in 35x11 on a 7.5” wide wheel, ~30% lighter than the 35x12.5 on a 16x9.

35x11 w/ wheel 70lbs
315/75R15 w/ wheel 100lbs

Makes a big difference with a small motor!
 
Last edited:
Fixed some shoddy cage construction where original owner chose to box out part of the tube clear the fuse panel with some 1.5” .120 sleeves and a section of 1.75” .120. Holes have been drilled on new and original tubes for rosettes.

Now I’m onto the getting the frame fixed from hammers, I started on the drivers side and cut out the original plate that ripped out with the engine cage, put 1/4” back in. Then capped with a 3/16” plate. Next I used a ratchet strap to get the shock mount and cross over bar level with the chassis and fit up another sleeve and tube section. Going to go ahead and do the passenger side as well for good measure.

Following that I’ll start on dash bar and engine cage to cab cage tie ins and intrusion tubes and relocating bumps to upper arms.
 

Attachments

  • IMG_9864.webp
    IMG_9864.webp
    1,003 KB · Views: 45
  • IMG_9954.webp
    IMG_9954.webp
    1.4 MB · Views: 45
  • IMG_9952.webp
    IMG_9952.webp
    1.6 MB · Views: 43
  • IMG_9951.webp
    IMG_9951.webp
    1.6 MB · Views: 45
  • IMG_9932.webp
    IMG_9932.webp
    1.6 MB · Views: 43
  • IMG_9931.webp
    IMG_9931.webp
    1.3 MB · Views: 40
  • IMG_9923.webp
    IMG_9923.webp
    1.1 MB · Views: 43
  • IMG_9901.webp
    IMG_9901.webp
    1.3 MB · Views: 56
Last edited:
ya know... if you call her Baja Betty - you're gonna have to actually take her to Baja.
progress looks good!
She’s been down a few times… First trip was a 1500 mile round trip with a friend 1 year into ownership after having issues getting it to run for 20 minutes. Hit zoo road in SF and immediately destroyed the rear limit straps and started on adventure to get it fixed in Ensenada before going to Ojos for the start of the 1000. A locals friends brother stick welded the limit straps mount on for me.

There’s a couple more San Felipe trips driving it down in the books but I eventually started towing it after having a throttle body sensor go bad and lead to a crank no start that delayed leaving for the border for 3 hours.

Cant wait to get it back down there, beat on it some more, and adventure more in Baja.
 

Attachments

  • IMG_1204.webp
    IMG_1204.webp
    722.3 KB · Views: 41
  • IMG_1062.webp
    IMG_1062.webp
    417.4 KB · Views: 46
  • IMG_1172.webp
    IMG_1172.webp
    1.5 MB · Views: 45
  • IMG_8783.webp
    IMG_8783.webp
    848 KB · Views: 47
  • IMG_8784.webp
    IMG_8784.webp
    1.2 MB · Views: 48
  • IMG_8760.webp
    IMG_8760.webp
    1.3 MB · Views: 45
  • IMG_8627.webp
    IMG_8627.webp
    1.9 MB · Views: 46
  • IMG_8727.webp
    IMG_8727.webp
    1.7 MB · Views: 46
  • IMG_8732.webp
    IMG_8732.webp
    1.2 MB · Views: 42
  • IMG_8660.webp
    IMG_8660.webp
    1.5 MB · Views: 49
More progress on the front rebuild. New dash tubes and cab cage tie ins. Still working on an engine cage to frame tie in that I like visually.

Hope to knock out remaining tube this week and then get motor/trans in place and mounted.
 

Attachments

  • IMG_0074.webp
    IMG_0074.webp
    1.2 MB · Views: 34
  • IMG_0075.webp
    IMG_0075.webp
    1.5 MB · Views: 32
  • IMG_0082.webp
    IMG_0082.webp
    1.1 MB · Views: 33
  • IMG_0196.webp
    IMG_0196.webp
    1.3 MB · Views: 36
  • IMG_0183.webp
    IMG_0183.webp
    1.1 MB · Views: 38
  • IMG_0181.webp
    IMG_0181.webp
    1.2 MB · Views: 37
  • IMG_0186.webp
    IMG_0186.webp
    1.6 MB · Views: 46
Almost finished mounting bumps on upper arms, just need to add a bump pad on top of the uniball and one tube supporting from the shock tower.

Now working on engine placement and designing a swing steering setup.
 

Attachments

  • IMG_0323.webp
    IMG_0323.webp
    911.2 KB · Views: 35
  • IMG_0324.webp
    IMG_0324.webp
    1.5 MB · Views: 36
  • IMG_0288.webp
    IMG_0288.webp
    337.4 KB · Views: 41
Quick little update:

I have most of the swing steer system designed and laser cut. Waiting on parts to arrive to start welding it together to mock up in the frame and finalize dimensions for the swingers. Using a Saginaw box from a K1500, and will do a pancake-style pitman arm.

Motor mounts are tacked in place and ready for a trans mount to be designed and implemented. Will need to make some slight modifications to the headers to clear the shock tower down tube.
 

Attachments

  • IMG_0563.webp
    IMG_0563.webp
    1.1 MB · Views: 22
  • IMG_0552.webp
    IMG_0552.webp
    1.2 MB · Views: 19
  • IMG_0511.webp
    IMG_0511.webp
    72.3 KB · Views: 18
  • IMG_0504.webp
    IMG_0504.webp
    1.5 MB · Views: 21
  • IMG_0567.webp
    IMG_0567.webp
    1.2 MB · Views: 26
Continued forward progress - motor mounts tack in place, boxed frame, and made a trans crossmember. Need to order some 1.5x .120 tube clamps to finish up the trans mount.

Followed up with cutting off the stock steering mount and grinding off the leftover metal to start mocking up the swing steering I designed. Going to be a tight fit but I think I can fit everything. Working on getting tie rod link and swingers built out. Then making a donut style pitman arm.
 

Attachments

  • IMG_0698.webp
    IMG_0698.webp
    921.5 KB · Views: 29
  • IMG_0699.webp
    IMG_0699.webp
    956.6 KB · Views: 23
  • IMG_0678.webp
    IMG_0678.webp
    918.8 KB · Views: 24
  • IMG_0680.webp
    IMG_0680.webp
    887 KB · Views: 25
  • IMG_0679.webp
    IMG_0679.webp
    816.1 KB · Views: 24
  • IMG_0618.webp
    IMG_0618.webp
    801.6 KB · Views: 24
  • IMG_0610.webp
    IMG_0610.webp
    904.6 KB · Views: 21
  • IMG_0590.webp
    IMG_0590.webp
    1.1 MB · Views: 23
  • IMG_1187.webp
    IMG_1187.webp
    911.6 KB · Views: 23
  • IMG_0566.webp
    IMG_0566.webp
    977 KB · Views: 24
  • IMG_0567.webp
    IMG_0567.webp
    1.2 MB · Views: 36
Escaping the AZ summer heat and life has got in the way a bit but finally have the swingers and center link tacked into place close to “stock” geometry.

Now onto frame plating with integrated steering box install and then a pitman arm & drag link.
 

Attachments

  • IMG_0037.webp
    IMG_0037.webp
    1.7 MB · Views: 27
  • IMG_0039.webp
    IMG_0039.webp
    1.5 MB · Views: 22
  • IMG_0042.webp
    IMG_0042.webp
    1.7 MB · Views: 20
  • IMG_0075.webp
    IMG_0075.webp
    913.2 KB · Views: 20
  • IMG_0105.webp
    IMG_0105.webp
    1.4 MB · Views: 22
  • IMG_0127.webp
    IMG_0127.webp
    1.1 MB · Views: 22
  • IMG_0155.webp
    IMG_0155.webp
    1.1 MB · Views: 23
  • IMG_0180.webp
    IMG_0180.webp
    993.7 KB · Views: 33
Took a look at the travel numbers and decided to make some changes in the up-travel department so it was time to cut off the existing engine cage.

Rough layout figured out, now prepping the chassis and starting to place tubes and install steering box.

On the plus side I found a fiberwerx raptor swap one piece and bedsides locally for a great deal.
 

Attachments

  • IMG_0754.webp
    IMG_0754.webp
    520 KB · Views: 23
  • IMG_0704.webp
    IMG_0704.webp
    840.9 KB · Views: 24
  • 748776E6-D05C-4E3C-9888-D3DEE14C3466.webp
    748776E6-D05C-4E3C-9888-D3DEE14C3466.webp
    440.4 KB · Views: 19
  • IMG_0697.webp
    IMG_0697.webp
    1,007.7 KB · Views: 23
  • IMG_0694.webp
    IMG_0694.webp
    1.9 MB · Views: 19
  • IMG_0580.webp
    IMG_0580.webp
    1.3 MB · Views: 33
I know it’s a rough sketch so I’m sure you’re not totally done and maybe you’re already planning it, but I would add atleast one more vertical tube per side. Design looks like it will be pretty good tho
 
I know it’s a rough sketch so I’m sure you’re not totally done and maybe you’re already planning it, but I would add atleast one more vertical tube per side. Design looks like it will be pretty good tho
Thanks man. I guess I should have clarified everything in red is going to be the .120 mains and may have an additional from the a pillar floor to just before the shock mounts. Then triangulating with .095.
 
Continued progress on the engine cage - mains are in, and now working on relaying out the shocks since I have some collision between the coilover spring and the spindle at full extension. Going to have to move the shocks in a bit on the LCA to get the clearance.
 

Attachments

  • IMG_0901.webp
    IMG_0901.webp
    1.1 MB · Views: 24
  • IMG_0903.webp
    IMG_0903.webp
    1.5 MB · Views: 23
  • IMG_0895.webp
    IMG_0895.webp
    1.6 MB · Views: 24
  • IMG_0886.webp
    IMG_0886.webp
    1.7 MB · Views: 34
Last edited:
Back
Top