4x4 DBL Cab Tacoma Build

I TIG welded my steering components and added doubler plates to my motor mounts
218849


I get decent TIG beads every once in awhile. Don't zoom on any other of the welds though haha
218850


Now I gotta figure what the heck to do with the pitman arm design. This is obviously the mock up but it's awkward adding the double sheer tab while still allowing clearance for the nut socket. I got the solo motorsports output shaft support which also makes it tricky.
218851


Xxxx
I like that, thanks turboyota! Anyone have any tricks to get that bend next to the notch without screwing up the points? I might have to partially cut the notch, bend, then cut the rest of the way. Not sure if any of that makes sense
218856


I made the tie rod that goes between the swinger and ...the other swinger
Before (that's dye, not blood)
218858


After
218857


Xxxx
Fuck yeahhh. took close to an hour to sand but finally got the bump can sanded out. What a pain. I used the small barrel sander at the welds then I made a big barrel sander just shy of the ID using aluminum stock and a shoulder bolt with the head cut off. Fits pretty nice now though. I need to take the internal spacer out so it has more travel. Should I do 3" or 4" length? I'll probably end up with 19.5" of travel bumped and strapped.

218896

218897

218898

218899


I'm about ready to drop the motor in for hopefully the last time so I stripped everything off the frame to start to paint. I won't paint the top of the engine cage because I still have a bunch of stuff to mount. Anyone have recommendations on undercoating for under the cab and the firewall?
218900


Pile of paper weights ready to paint
218901


Xxxx
Nothing too exciting but made some plugs for my snouts until I get 4WD working
218926


Xxxx
Mr @the bodj came over today and we got a ton done. Kevin killed it. It feels like I just skipped ahead a few months of progress. All the remaining fab work that i needed to complete before dropping in the motor is finished. I just need to do some painting

Mounted the steering box
219152

219151

219153


Boxed in the swinger mount and finished the ram assist mount
219154
 
Engine cage gusset
219155


Angled the steering tabs on the spindles and boxed
219156


Made the pitman arm
219157


Got the steering box support in. It was a little tricky making it so you could remove the rod end without having to remove the whole steering box.
219158


I machined some rear wheel spacers awhile ago and installed rear wheels. It was really tight when i was putting them on and I should have machined them a little smaller but i as in a hurry. long story short they have been pressed on the last 2 years. We were finally able to removed them using a bottle jack, straps, and some liquid courage. I'll machine them a little smaller now that i have the wheels off and probably knock a 1/4" of the spacing off too. i've been putting this off for so long so I'm stoked to have this off the list
219159


Xxxx
She's ready to drop the motor in. The cage/bulkhead is Steel-it. The firewall and transmission tunnel are POR-15 Rubberized coating (https://www.por15.com/POR-15-Rubberized-Under-Coating) with POR-15 Self-Etch Primer (https://www.por15.com/POR-15-Self-Etch-Primer). I'm really happy with all three of the products. They go on really nice and seem to be high quality. We'll see how well they hold up long term
219475


Xxxx
I was so tired after working last weekend I forgot to take pictures. Thanks @the bodj for the help! The motor is officially in! I got the trans in too which in hindsight, i probably should have waited until I got the motor running but whatever. Now I can start the wiring and plumbing
219819

219820


I started draining the 5 year old gas. It didn't seem to be any thicker than normal. I'll probably pull the whole cell and flush it after i get it drained. It felt super sketchy to run that drill pump over a open bucket of gas so I'm only pumping ~2 gallons at a time. My plan is to just let the old gas evaporate so the draining process is going to take me a week or so
219821


Xxxx
I think I have the plumbing figured out. If anyone knows what they're doing please double check what I'm doing

1: "PCV Valve" => Plug (See #6)
2: Connect to #7
3: EVAP => Plug
4: "Steam Tube" => Connect to radiator
5: Connect to oil catch can outlet
6: Connect to oil catch can inlet. Apparently the GTO valve covers have a PCV valve already in them which is why I can just plug #1.
7: Connect to #2
8: Brake Booster
9: HVAC => Plug

219822

219823

219824


Xxxx
PS If you haven't seen this site before it's super helpful. http://www.billavista.com/tech/index.html

I was looking specifically at the cooling page: http://www.billavista.com/tech/Articles/Cooling_Bible/index.html

Xxxx
Well it looks like I'm going to have to run normal air filters instead of the UMPs due to space. This is what I had in mind for the intake. That piece I'm holding is the MAF
219983


Is there a rule of thumb for the 02 sensor placement? I was thinking of adding it somewhere in here
219984
 
I got some more motor work done today. I had to weld up some funky fixtures in order to torque down the harmonic balancer pulley without the socket slipping off. It worked great
220313


I mounted the radiator. I didn't realize I bought one set up to push and not pull. It's not ideal but it should work fine. It's definitely sitting where the grill is supposed to be so I'll have to figure something out. I thought that was going to happen but haven't actually mocked it up until now. I'll either have to go to a conversion clip or try and extend the hood/fenders. I'm not sure which I'm leaning towards yet.
220314

220315


I mounted the radiator overflow can, steering cooler, and MAF. All the vacuum lines are plumbed now too.
220317

220316


I started to work on the exhaust but I needed to make cuts with the portable bandsaw so I finally got it mounted. It's not pretty but it's stout. I still need to swap the top plate hardware with some flat heads
220319

220320


xxxx
4x4 dbl cab tacoma build | Page 34 | DezertRangers

Got the suspension back from sandblast and laid down the first couple coats of steel-it. Used a hammock stand to hang the parts lol
220420


Tapped the steering box for the ram assist
220421


Started the wiring. It's a bit overwhelming. The wiring isn't too bad but trying to find the most efficient ways to run wires, combine wires, connectorize, and bus commons is going to be tedious. I think I should accept now that I wont get it my first try and move forward
220422

220423


Xxxx
I'll check when i get home but from my understanding my motor, 04-06 Pontiac GTO, is a little different than the normal LS1. It's a 5.7 and has an LS6 block and valley cover. There's not a lot of credible sources but I read that for my motor there is a PCV valve/baffle built in the valley cover. I've read people adding vents but I'm still not sure what's right and wrong

for my reference: https://www.ls1gto.com/threads/wheres-my-pcv-valve.769570/

The air filters should stick out just outside the radiator kind of in the wheel well. I got the Y-pipe in yesterday so let me mock it up before you hate it haha

Xxxx
thanks man, much appreciated. I took a look at the motor today and didn't see any vents on the P-side valve cover so IDK. I'll do some more research online
220502

220504


I got the steering box back together and installed. The process was a lot easier than I was expecting. This is the tutorial I watched,
220505

220506
 
I got the headers tacked up. It's a little goofy where the header tubes meet the main tube but that's what I get for adapting an off the shelf part. The flange on the off the shelf headers was angled wrong and necked way down which is why I decided to cut it off. There wasn't room to put the new clamp there so it's just after the frame. Should work fine.
220508

220509

220510


Xxxx
I got the dash fitting today. I had to cut the notches a lot deeper than I was expecting. it's poking several inches past the windshield. I'm pretty happy with how it sits with the steering wheel. It'll look a lot cleaner when I get the steering column cover on it. I'd like to get it upholstered once the rest of the truck is finished but it'll stay bare, maybe rattled canned for the moment. I just need to clean the the cuts and mount it and then it'll be ready to wire.
220534

220535


Xxxx
That was oddly satisfying. That was my first time using safety wire
220654


Xxxx
I had to order some hardware for the spindle assemblies so I started rebuilding the coilovers. I bought them used so I wanted to check what valving was in them. The oil that came out of there was pretty gnarly so I'm glad I pulled them apart. It looked like used engine oil. I don't really feel like pulling the reservoir apart to rebuild since it wasn't leaking but it's a blue fox so it's possible they're old and have never been rebuilt. Anyone have any thoughts on leaving it alone vs rebuilding it?
220726


Xxxx
I took this pic to show you how far it sticks past the windshield
220873

220874


Xxxx
I got the spindles together. Lookin sexy
220933


Xxxx
I'm using RCV toyota pickup cv on the outside (https://www.rcvperformance.com/ultimate-30-spline-cv-joint-for-toyota-axle-kits.html) and a plunging 930 on the inside (https://www.rcvperformance.com/ulti...nt-chromoly-cage-300m-race-and-30-spline.html). Then just a 30 spline axle shaft. My diff is from a supra which apparently is the same ring gear as land cruiser I believe so I can get reverse cut gears. The supra is flange mount so I just needed to adapt the hole pattern to match the 930. I probably wont set up the four wheel drive for another year so I can focus on getting all the other stuff done

Xxxx
Mine is a mid 90's MKIII as well with LSD. where you able to just drop that diff into your tundra case or did you swap out the whole thing? I like how your shifters enter the cab. I may try something similar.

Xxxx
I made a little progress on the wiring. The gauges will get loomed properly once I transfer them over to the real dash. I can only get the wiring 50% done on our dining room table before I have to work in the garage haha
220984

220985


Xxxx
Here's some motivation. A little over the top but I'm digging it. Feels like she's finally coming together
221060

221061

221062


Xxxx
This is what I have for the boot. It's a 337-10 by Rockford. I have no clue what it goes to. I got it from RCV awhile ago but it's either not on their site or listed as something different. I'll have the same problems with the flats. I haven't really thought about it too much. I wonder if you could get something to stay on the tapered part
221174
 
I finished rebuilding the coilovers. I got my bumpstops extended. They barely had any oil them so I filled them like someone explained in Mullen's thread. Completely bottomed out, took the Schrader valve out, then filled up to the top of the piston.
221232


Still hits the bump pad, sweeeet
221233


Annnd got the limit strap installed. (the coilover on the right is actually supposed to be the bypass)
221234

X

Xxxx
I've been knocking out a bunch of shitty tasks that aren't worth documenting but I'm getting close to starting the motor. I just need to finish draining the gas and flushing the tank.
I ghetto oil-primed the motor
221755

221756


Ran the throttle cable
221757

221758


My firewall plugs aren't as fancy as yours @FasterNU

Xxxx
I think I have the wiring figured out but I'm still a little confused about how to start this motor. Do I just short the switched ignition and the starter relay to positive voltage? once it's running, how do I stop it?
221760


Xxxx
So I thought there was a wire that told the ECM you were cranking. This is what I thought was the switched ignition was. So you're saying I connect the switched ignition to power, then i use the starter relay to crank the motor, and when i want to turn the motor off I just disconnect the switched ignition from power? the motor is ready to run when it has the switched ignition power and just needs to be cranked. That makes sense

I got the gas drained. I made this sweet gas bong so I could use the shop vac to prime the siphon without sucking in gas
221810


Xxxx
4x4 dbl cab tacoma build | Page 40 | DezertRangers

The day started off bad when I found out my old fuel pump was bad. luckily I had an idea. I essentially used the coolant reservoir as an accumulator. I filled it with gas and pressurized it with 50 psi from the air compressor.
221831


I cranked the motor over with the switched ignition disconnected and the spark plugs pulled. it took about 6-8 cranks to build oil pressure. Once I had oil pressure, i put the plugs back in and connected the switched ignition and did it for real. then this happened


After 5 years of sitting she came to life! fuck yessss. I've been dreading this day since i got the motor. Now that I know it runs I can start doing the final wiring and plumbing. I think it'll come together pretty fast now. Thanks for the help @the bodj ! you're the man

Xxxx
I picked up some fuel components off RDC so I started plumbing the fuel lines. I'm using a bosch 044 pump and areomotive filters and regulator. I'm still waiting on some more hose fittings so I can finish. F'ing christmas time is increasing delivery time everywhere.
222053


I really wish I would have done a better job power washing this thing before i started working on it…

Xxxx
I finally got another good session in on the truck over the weekend.

I secured the steering lines. I drilled out these separator clamps so I can hard mount them. This is a #12 self tapping screw
222150

222151


I finished the intake. It's a little behind the radiator but not too bad. I didn't have much of a choice, it gets tight at bump and lock
222152

222153

222154

222155
 
I got the radiator fittings welded and plumbed. Welds aren't the best but not the worst. I was using green tungsten, not sure if that's the best or a different color is. The engine compartment is starting to feel even tighter than it already was
222157

222156

222158


I ran the brake lines on the front suspension. I like the routing. I was worried the 36" line was going to be too short but it's going to be perfect. I used self tapping screws to hold the clamps. I'm interested to see how they hold up or if I'll have to replace them with tapped holes.
222159


I treated myself to a nice steering wheel
222160


I originally had a sweet disconnect but I was having issues trying to adapt to the stock splines without having to cut and weld. I ended up going with a NRG which mated to an adapter I found. It's nice quality and clean looking but I'm worried the mechanism will get gunked up with slit eventually. It uses a bunch of ball detents for both retention and twist. The sweet uses splines for twist and a single latch for retention which i like better. I'm sure it'll be fine for what i'm using it for
222161

222162


I made some progress on the fuel setup but I'll wait to post pics until I finish. It definitely feels like things are going quicker. I was waiting on so many things until I started the motor. Now everything can be done permanent.
 
The last components came in to finish up the fuel system so I got it all buttoned up. I was planning on ditching the stock tacoma emissions thing but the aftermarket rollover vent was stuck in the open position which is kind of scary. I ended up finding out that the emissions thing is also a check valve so I ended up using that for the vent and plugging the aftermarket one I got. I also welded up a few holes i wasn't using and got a new sender. It's going to be nice knowing how much gas i have haha. (I still need to run the breather hose)

Rollover vent
222250


222251

222252

222253


I just need to run the last line from the regulator to the motor. I have to run everything on the outside of my frame rails now that i'm planning on running dual exhaust.

Now that I have all the final plumbing done, my plan is to run the motor again for an extended period of time to check the vitals. I also need to make sure the steering hydraulics are all working correctly before I install the shocks and headers which would make it a pain to work on

Xxxx
I got all the holes cut in the dash. I eventually want to upholster it but in efforts to get it driving sooner rather than later it's getting rattle canned
222268


Xxxx
I got the last fitting for the coolant lines in after selling a kidney for it. It just clears the upper at bump. I got pretty lucky
222517


I was originally planning to run my original brake setup (stock tacoma master cylinder and brake booster) and hope for the best but after thinking about it longer it seemed like it wasn't a good fit for the big brakes I was using and I didn't want to have to redo the brakes if it was wrong. I used some math and some estimations and figured I needed something around a 1-1.125" master cylinder. I decided to start with a 1" MC and see how that feels. The stock tacoma is a 13/16 so it should be a pretty big difference over stock.
222525

222526


After doing some research, I couldn't find an elegant way to adapt an aftermarket MC onto my brake booster which I really wanted to keep. A little more research uncovered that I could swap both my MC and brake booster with a 96 4 runner for less than half the price of the wilwood MC I needed. The brake booster is a dual diaphragm vs the single stock tacoma one, so I also got an upgrade on the booster. The MC is a 1" and there is a 1 1/16" option from a t100 if I need to go bigger. It was almost a direct bolt in but I had to ditch a spacer so the fluid reservoir would fit. That made me have to cut down the push rod. Other than that it was an easy swap. Enough with the blabbering, more pics

Old vs new
222518

222519


old pushrod
222520


New Pushrod
222521


Modified Pushrod
222522


Installed
222523


I used a brass fitting with the center cut out to keep the pushrod straight while i tacked it back on after shortening it. I meant to leave more unthreaded section for the weld but after I added a chamfer I ended up back in the threads. Oh well, should be fine
222524
 
I got most of the dash stuff installed. I need find my wideband sensor buried in the garage somewhere. Not sure what I'll put in the other open gauge spot if any. I left two switches open in case I want to add something down road as well.
222531

222532


I originally was going to hard mount the tablet on the dash but decided with this magnetic mount in case I ended up with a bigger tablet. I recessed it about an inch so it didn't stick so far out
222533


Now I need to start wiring this bad boy

Xxxx
I swear I'm not just sitting on my ass. I'm just about done making all the connections just need to do a second pass and tidy it all up
223164


Xxxx
Finally making some progress again. I've working towards getting the motor running with the final wiring/plumbing. I'm ready to do final assembly on the suspension but I'm waiting to verify a few things in case I need to do some repairs/mods
* motor runs for ~30 minutes without exploding/overheating
* fuel system works
* coolant plumbing
* steering plumbing and ram assist
* brakes function

Oil temp sender
225838


Coolant temp sender
225839


Wiring harness pass through
225840

225841

225842


ECU mount wire pass-throughs. Having the bulkhead mount will allow be to easily pull the dash if I need to
225844


Xxxx
I finished welding the headers and got the front brakes plumbed
225870

225871

225872

225873


It's all AN fittings. I used a 37 degree flare on the tube with tube nuts and tube sleeves. It took me awhile to realize you can't cut the stainless tube with the type of tube cutter you spin around. It work hardens the metal and the flares kept on splitting on me. I ended up just using a cutoff wheel and they were all fine after that
 
Finished the dash wiring. Not the prettiest but not the ugliest
226122


I realized that there was nothing from keeping my truck from starting from gear anymore so I got this kit from winters. It adds a parking safety switch and reverse light switch. Well worth the $50
226144


Xxxx
I got a little bit farther on the wiring. It ended up being a lot more complicated than I thought it was going to be. I'm not reusing any of the stock wiring or than the modified wiring harness and probably door wiring.

I'm wondering what the hell I got myself into at this point
226236


The sleeving makes it look so much cleaner
226237


Final wiring leaving the firewall. one loom goes to the front and the other to the rear
226238


Half the dash wiring lands on this fuse panel and the other half goes into the bulkhead connector
226239


The dash is officially in. I just need to land all the wires. I decided to put voltage in the empty gauge spot. I'll make covers for the empty switch holes. I didn't end up needing the ones I had planned to put in there. I'm sure I'll need it for something.
226240


Xxxx
Yikes, my build is buried on page 4. I need to make some progress... I got the dash in and got everything wired up and went to start the truck and wasn't getting any ignition. I troubleshot my wiring and couldn't figure out what was happening...then it hit me. I removed the oil pressure sensor on the back of the block to put in an oil temp gauge. It was allegedly only used for a dummy light which I think is true on some LS's but not others. Well unfortunately, i was the other. I had to pull the dash and the firewall panel to get the sensor back in. Once I did that she fired right up. I hadn't run the motor with the actual fuel components.

Since I had the dash out, I decided to connectorize everything. It was a pain in the ass to try and wire everything behind the dash when it was in. I already had a 24 pin connector and I added another plus two 6 pins and one 2 pin connector. That will allow me to take out the dash much easier and also put the connectors on the truck side without the dash installed. Mas better. Wiring was definitely a bigger job than I anticipated.
228773

228772


Motor should be up and running tomorrow with the real wiring.

Xxxx
I forgot to take a picture of the finished wiring but here's everything before the dash went in.
228872


Before for comparison:
228873

228874


So after all of that, I went to fire up and it still wouldn't start. I found out that the contact switch on the shifter that prevents you from starting in gear can't pass enough current to the starter relay. That's my theory anyway. I bypassed the switch and had better luck....but still not good luck. I added coolant to check for leaks but I should have waited until I had it running again. I'm not sure if my issues are related to that or not but now the motor wont idle. I can get it to run when I have the throttle partially down but it dies when I let off. I haven't had much time to troubleshoot yet. Next step is to hook up the OBD to see if it's throwing codes
 
Sometimes my motor will idle fine on it's own and sometimes it will only run with the throttle slightly open. I'm guessing it has to do with needing to be tuned. When it idles well, i can start it over and over with good results until I disconnect the battery and then it has a hard time learning a good tune. It sounds pretty good in both conditions. That being said, I am confident enough that I won't have to pull it so I'm going to start final assembly on the front. I think things are going to start coming together fairly quickly.

Pulled the 3rd to regear
229105


Finished the brake lines. I need to bleed them all and check for leaks still
229106

229107

229108

229109


Xxxx
FINALLY!

I had to add a small always on fuse block and another relay but it finally starts through all the wiring and the key. It also runs great without needing to push the throttle like before. Not sure why that is. The Tach doesn't work for some reason so I gotta troubleshoot that too. At least the hard part is done

I finished regearing to 4.86. Thanks for the help @the bodj . It was about as much work as I was expecting. I got lucky and didn't need much adjustment.
230353

230354


I started final assembly on the front end after checking the brakes and power steering.
230355
 
Got a solid start on the exhaust. Just gotta add the mufflers and mounting. I'm going to dump the exhaust just behind the cab and not doing anything fancy. I decided to do an H-pipe instead of an X. It sounds like it's a little better for lower end and much easier for routing
230356

230357


Xxxx
I still can't post pics but I have a video. I got the exhaust finished and mounted up. I ended up going with Race Venom mufflers (https://blackwidowexhaust.com/mufflers/Race-Venom-3-offset-center-SKU-BW0010-P-p61516052). Thanks @aiiraciing! The truck sounds so much better with mufflers than straight pipes haha


Xxxx
Pics are finally working again. Here is the finished exhaust
-geAkp8L_b3EV3GAJnNJhiJghuCHtkOMpdm0My5V7nvxqx2obtw44QYjQekui9cbeV6so20nqwWFQBoCwifzzdGpr259-u104Iz8nr97Jeslq9avv-P1a_2AcNsZjIOIRFxqI4CDTe0vTA8C7RsIPo0

yFv5v-g8Cas9osjuVB40lyDR_WmiQA1retXAU9nBbMc1u-4PSfJSUSHJtqMBcYZJ_lYQjB9hI4kz4wgnQddLZeTC5kh15gfKE-D9Q9EkA5NtolvSo9zBfwTwVefWbxn3okPmyhSDLJSZQFgRSZTvUaE


Xxxx
231133

2 HP per panel. My plan is to wrap it in some kind of fabric. I also want to keep some padding on the cage so I need to figure out a clean way to do that

Xxxx
231349

Going to try this marine vinyl carbon fiber material for the paneling

Xxxx
I used poster board to make the templates
231468


I'm attaching the panels using these trick tabs and a spacer to set the depth.
231465


I really like these u-nuts. They float in the hole which allows for extra misalignment
231466

231467


Here is a panel all wrapped up. I like the material but I need to redo this one. I didn't realize my clamps were digging into it and I had missed some spots with adhesive were I was holding the panel while i was spraying. my only regret is putting a hard break in the panel instead of bending it with a radius. oh well
231469
 
Man this is way more complicated than I was expecting but I think I got it figured out. Using the toyota flanges was probably not the best idea but here we are. Swapping them out would probably cost the same as buying additional yoke flanges so i could go either way on that. I also used a toyota carrier bearing which caused issue. Anyone have any issues with this list?

Trans Flange (installed) (Toyota Triple Drilled 32 Spline NP205 Billet Flange)
https://www.northwestfab.com/Toyota-Triple-Drilled-32-Spline-NP205-Billet-Flange_p_4130.html


Yoke Flange, Trans Side (Driveshaft Flange Yoke for TOYOTA 1350 Series Pilot 3.575" (1.188 X 3.625) 60x68 )
https://www.ebay.com/itm/153823813580


U-Joint (SPICER 1350 Series, Non-Greasable )
https://www.northerndrivetrain.com/product/SPI-5-1350X.html


Tube Yoke (1350 series, Ø3.000 X .083 W tube)
https://www.northerndrivetrain.com/product/SPI-3-28-57.html


Driveshaft Tubing (3.000 x .083 tubing, 74" Long)
https://www.northerndrivetrain.com/product/SPI-24-30-42-7400.html


Midship Tube Shaft (1.375x10 spline, Ø3.000 X .083 tube)
https://www.northerndrivetrain.com/product/SPI-3-54-611.html


Carrier Bearing (Billet Aluminum Carrier Bearing Support for Toyota)
https://www.polyperformance.com/hen...um-carrier-bearing-support-for-toyota-cbs-001


Bearing (55x35x10 Sealing Ball Bearing)
https://www.vxb.com/v/vspfiles/cata...6907-2rs-sealed-bearing-35x55x10-kit7194.html


End Yoke (1350 series, U Bolt Style, Ø1.375x10 spline, Ø0.000 hub diameter)
https://www.northerndrivetrain.com/product/PTI-3504-101.html


Nut (1"-20 nut)
https://www.northerndrivetrain.com/product/SPI-16-74-101.html


CV (1350 series, 2.875 C-C )
https://www.northerndrivetrain.com/product/SPI-3-26-757.html


Tube Shaft (Ø1.500x16 spline, Ø3.000 X .083 Tube)
https://www.northerndrivetrain.com/product/SPI-3-40-1611.html


Slip Yoke (1350 series, Ø1.500x16 spline 8.000 Centerline to End)
https://www.northerndrivetrain.com/product/SPI-3-3-2681KX.html


Yoke Flange, Differential Side (1350 Series Toyota Flange Yoke - 66x66 - Spicer)
https://www.driveshaftparts.com/index.php?route=product/product&product_id=3051


66 x 66 Toyota Differential Flange (installed)

Xxxx
Well that escalated quickly. I ended up using the same carrier bearing as FasterNU. Thanks dick. But hopefully this all should be a one time purchase. This is also the last piece of the puzzle to get this thing drivable so possible hot lap around the cul de sac before new years? we'll see

Trans Flange (installed) (Toyota Triple Drilled 32 Spline NP205 Billet Flange)
https://www.northwestfab.com/Toyota-Triple-Drilled-32-Spline-NP205-Billet-Flange_p_4130.html


Yoke Flange, Trans Side (Driveshaft Flange Yoke for TOYOTA 1350 Series Pilot 3.575" (1.188 X 3.625) 60x68 )
https://www.ebay.com/itm/153823813580


U-Joint (SPICER 1350 Series, Non-Greasable )
https://www.northerndrivetrain.com/product/SPI-5-1350X.html


Tube Yoke (1350 series, Ø3.000 X .083 W tube)
https://www.northerndrivetrain.com/product/SPI-3-28-57.html


Driveshaft Tubing (3.000 x .083 tubing, 18" Long)
https://bustedknuckleoffroad.com/products/carrier-bearing-tubing


Midship Tube Shaft (1.5x10 spline, Ø3.000 X .083 tube)
https://bustedknuckleoffroad.com/co...arrier-bearing-with-mount-1-5x10-spline-shaft


Carrier Bearing (1350 Series Ultimate Billet Carrier Bearing)
https://bustedknuckleoffroad.com/co...arrier-bearing-with-mount-1-5x10-spline-shaft


End Yoke (1350 series, U Bolt Style, Ø1.5x10 spline, Ø0.000 hub diameter)
https://bustedknuckleoffroad.com/pr...lt-style-o1-500x10-spline-o1-881-hub-diameter


CV (1350 series, 2.875 C-C )
https://www.northerndrivetrain.com/product/SPI-3-26-757.html


Tube Shaft (Ø1.500x16 spline, Ø3.000 X .083 Tube)
https://www.northerndrivetrain.com/product/SPI-3-40-1611.html


Slip Yoke (1350 series, Ø1.500x16 spline 8.000 Centerline to End)
https://www.northerndrivetrain.com/product/SPI-3-3-2681KX.html


Yoke Flange, Differential Side (1350 Series Toyota Flange Yoke - 66x66 - Spicer)
https://www.driveshaftparts.com/index.php?route=product/product&product_id=3051


66 x 66 Toyota Differential Flange (installed)

Xxxx
I got almost everything in for the driveshaft over the weekend. I can't get as much angle out of these 1350 joints so hopefully that's not an issue. I'll need to cycle it. It's much beefier than the stock shaft though
232093


I finished the last of the paneling. I just need to add the roof rack attachment to the cage before i can weld on the roof
232094

232095


And finished the axle skid. The bottom of the axle is super scarred up. I've had the pinion guard just sitting around so I decided to added a skid to it.
232099

232101

232100
 
this is my reference (https://www.4crawler.com/4x4/CheapTricks/Driveline-101.shtml)
232182


My trans position and angle are set on the front and my pinion position and angle are set in the rear. I can really only set the height of my carrier bearing. I'm not sure how tolerant these angles are but I can get within a degree of setup 1 or 2.

For setup 1, I can get B=C but A=0.7 degrees
232189


For setup 2, I can get B=0 and A=B within 0.4 degrees.
232188


The height difference between 1 and 2 is only 0.28". Should I aim for 1 or 2? or split the difference? The smart thing to do is make it to 1 and I can shim to 2 if I have vibration issues

Xxxx
Wouldn't a wider joint give me less angle? I actually think I'm ok now that I've actually measured things. I should only need about 17 degrees from the pinion u-joint. I can get 24 before i get metal to metal.
232194

232196


Xxxx
I got the last part for the driveshaft in and have a problem. I didn't realize that the end yoke for the CV needed to be different and the carrier bearing I got comes with a end yoke that doesn't work with a CV. From My understanding the carrier bearing should have a companion flange instead of a yoke. Then the CV should have a CV socket on one side and a ball stud tube yoke on the other.

Companion Flange
https://www.northerndrivetrain.com/product/SPI-3-1-3341.html

Ball Stud Tube Yoke
https://www.northerndrivetrain.com/product/SPI-3-28-1327X.html

CV Socket Yoke
https://www.northerndrivetrain.com/product/SPI-212024X.html

You can see the CV is saggy titties without the ball to line up the yokes...
232513

232514


My plasma is also out so I have to cut out parts like a caveman using a cutouff wheel
232515


This how I lined up the centerlines
232516


Xxxx
That's better. I got all my measurements taken and am dropping everything off this week to get the driveshaft made
232820


I also finished up the mounting for the roof rack/overhead lights
232821

232822


Now I can paint the cage and get the roof on!
 
The driveshaft is finally finished. what a headache that was.
233125

233126


I got the cage painted
233127


And she's officially off the jack stands!
233128


I'm shooting to take her around the block next weekend and then the roof should be finished shortly after.

Xxxx


Xxxx
Thanks everyone. It felt great! Although not having the brakes work right was a little scary. I'm hoping it's just the pads need to be broken in. The rear pads have been sitting for 7 years with mud on them. I'm going to get a pressure gauge so I can check line pressures.

I've been super concerned that the steering wasn't going to work for some reason. I didn't have anything to base the fear on but it's a Frankenstein'd system so it seems like there was a lot of areas to go wrong. That being said, the steering felt awesome. The ram assist works really well and it's easy to turn when parked. Then there's the whine.... When i first start the truck, there's no whine. then when is start using the steering, it goes off and doesn't stop. I think the whine is being caused by air in the system. I'm not sure what's causing the air. My guesses are maybe 1) the cheap reservoir. there's a baffle in there that may be causing aeration when it's flowing 2) the power steering fittings in the box. I tapped a stock box. on one of the fittings, it's essentially bottomed out in the hole which seems like the flow is pretty restricted. Not sure how that would cause air, maybe just heat. 3) i simply just need to bleed the system by going lock to lock a few more times. I've maybe done that like 8ish times.

Power steering fluid latte
233321


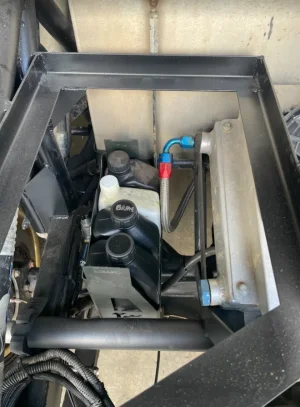
In other unexciting news, I mounted the trans cooler. I'm planning to build a shroud and possibly a small scoop to funnel in air from the bottom
233322


Xxxx
I have a saginaw box hooked up to a PSC pump (https://www.summitracing.com/parts/PFN-SP1200X)

Xxxx
After doing FasterNU's brake calcs I noticed mine had a couple errors. I also put a pressure gauge on the line and made my calcs match those. I was basically getting 400 psi with the truck off and the brake booster added another 500 psi. So in theory, my MC (1.0") is a little too big to lock up the fronts but should be fine for the rears. The front is also really close. So I don't think my lack of brakes was due to line pressure. I'm hoping it was just due to the pads/discs needing a little wear in. I'm going to try a few hard brakes again this weekend
234034

234032

234033
 
I got the trans lines plumbed. I decided to skip the shroud for now and see what the temps look like. I put the temp sender on the trans outlet line
234652

234653

234654

234655


I got enough of the bodywork done to get the roof skin on. I just need to weld at the pillars
234656

234657


I found a 2nd mcneil conversion clip online. I would have liked to keep the hood and fenders but I don't think they would have cleared the 37s or radiator. I can't test fit it until i get the truck turned around
234658


Xxxx
Mocked this up for motivation. It pushes the grill out just enough to clear the radiator. It's perfect. I think I may try to hinge it like a normal hood. I'm not sure how that would work with the headlights but I could just swing the headlights with it.
234949

234950

234951

234952
 
I decided to mount the front clip before getting the truck driveable because it makes it so much more fun to look at haha. I started a basic metal frame and it hinges off the stock hinges perfectly. Pretty stoke how that worked out. I'll probably end up doing some kind of baller gas shock to hold it up
235560

235561

235562


Unfortunately the grill and headlights I bought with the clip were from the wrong year so I had to rebuy them. I'm hoping to get that mocked up this weekend. I'm also planning to swap out my master cylinder this weekend to get my brakes to 100%. I'm going back to the stock tacoma MC which is 13/16" vs the 1" I put in. And of course I threw the old one away

Driving list:
* Swap Master Cylinder
* Radiator Leak
* Motor Tune
* Assemble drivers door

Road Worthy list:
* Windshields
* Mount headlights and grille
* Mount Rear fenders
* Blinkers
* Brake lights

Other to do list:
* Pull up resistor on Tach
* recalibrate Wide band
* Relocate trans temp sensor
* troubleshoot water temp sensor


Xxxx
Progress has been non-existent until this weekend. I ended up moving out of my house and then renting an industrial space. I have it just set up enough to work out of. Once I finish getting it set up it'll be way better than working in my last garage.

I added an oh shit handle and body gusset. These were the last two things I needed to do before I can put in the windshield
236306

236307


I took bodj's advice and bought on of these saws. Holy shit this thing is amazing. I had to rip a 3" plate in half to make the gusset. The cut was 15" long and the saw cut it like butter. I shouldn't have waited so long to get one. I highly recommend it.
236308


So last time I was at the pick n pull I grabbed some random shocks used to raise a van's rear door. I was thinking maybe I'll get lucky and I can use them on my hood. Well, I got damn lucky. They work perfect. We'll see how they hold up to the elements.
236310

236309


Xxxx
I've been wrapping up a bunch of shit jobs. Wiring lights, chasing leaks, assembling a door. Nothing really noteworthy but time consuming for sure
Got the rear glass installed. The front windshield is ready to drop in but I'm waiting to get my tach working since it's easier to access from the window
236901


My rear fenders got all jacked up in the roll so I repaired them last weekend. Next step is a little bondo and they should be good as new
Before:
236902

After:
236903

236904

236905
 
I took a hiatus from the truck and DR to get married and go to Australia. Happy to be back and working on the truck. I'm super close to being ready for the first trip. I just need to sort out my brakes before I'm ready to do some more test drives. I had bought these disc brakes used off RDC. I didn't realize that this face was grooved. Is it an issue or can I just roll like that? I could try and get it turned but I'm not sure if the machine would even be able to hold it. I checked for run out and it's pretty true, maybe +/- .002"
237846


Xxxx
4x4 dbl cab tacoma build | Page 50 | DezertRangers

Haven't been on DR for a long time. My old bookmark stopped working so I didn't realize it was back. Here's a dump

I got all my lights working to try and get as street legal as possible.
1670958652986.png


I did some fab on the rear so I figured I might as well paint it. I loathe painting
1670958781903.png


I mounted some harbor freight tool boxes. The just bolt to some angle iron frames
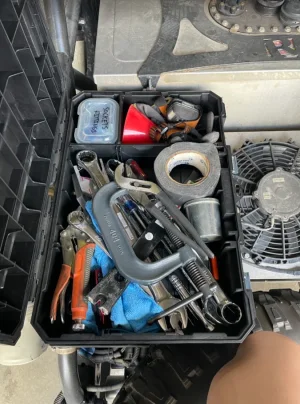
1670958823232.png

1670958865171.png


Made a skid for my jack. I don't love how I mounted it but it works well enough. It was ugly above the tire and I wanted to be able to get it out without removing the tire
1670958954320.png


The front hangs on pins then when it swings up, tabs keep it from sliding off
1670958999757.png

1670959023478.png


The rear has a quick release pin then it get's locked in with 2 bolts. I don't trust relying solely on the pin
1670959085040.png

1670959112073.png


Fits snuggly with the spare
1670959145013.png
 
Here's a pic of the jack from below. It's a little below the frame but it should be safe
1670959253992.png


Got the fenders completely fixed and then put bedliner on the insides
1670959386431.png

1670959513335.png


And got the windshield in. I put tint on the inside to cover from being able to see inside the dash...no one needs to see that mess haha
1670959587730.png


Xxxx
And the big update, she's driving! The motor seems to be running well and the steering feels good. The only real issue I notice off the bat is the brakes suck. I'm hoping it's just the proportioning valve but I still need to diagnose it. I'm leaving for vacation for a few weeks so I'm sure this is all I'm going to be able to think about haha.
RcHhX4RE7w7aNoyUtSany0huqW1t3OMuFI_96CmvlSZKhRbWZAxr_6c3UR9-j3scF6RK9C97Sr3-Zx9YhiVDkUDakX2_O9hzIqo_bXGq4U1oNuKsEmMsAHz4jnIIJzk8wiZlFYqlMJntWFscuZVEzvI

fTUki_USW-FFcFYK8qoQv_YFVY1up72ozYXDPQzHcHC1edvD7SPPnYbLrtTvTU9oPsiTpLxaymrowTY_qDmXlhiHBNTplDqwWRr4jWUbh4KGpR6ra8gzhq3AinTBDI9RyVjSN5nx_onYarwe0rwdWyw


Xxxx
I'm on a mission to get the brakes sorted.
1st thing I tried was adjusting the proportioning valve. I tried backing it off all the way and didn't feel any difference. Then I realized that the valve was actually seized and I was just unscrewing the knob. New valve is on the way. Figured I would replace the beat up hose while I'm at it too.
1673285435391.png

2nd thing I looked at was if my wheels were loose. This had happened to me before. My brakes were getting progressively worse right after a trip and I thought my brake booster was going bad. Turns out my spindle nut was coming loose and the caliper couldnt grab the wobbling rotor. They all seemed good except for the passenger rear. It wasn't super loose but enough where i could visible see the gap change between the pad and disc. I had set up my rear bearings using solid spacers and I think it was slightly off. Or maybe something got a little tweaked in the roll over. Either way, I decided to ditch the solid spacer and just preload the bearings. But I had to order a better locking nut so the truck is just sitting disassembled for now
1673285853643.png


I'm hoping one of these two issues will fix my braking problem
 
I got the brakes figured out. I think anyway. It ended up being a combination of a small air bubble in the lines and slightly changing the pedal geometry. Due to the hodge podge of random components thrown together, it just didnt work perfect the first try.

This is the final pedal components. I tried to keep the concept behind the stock linkage
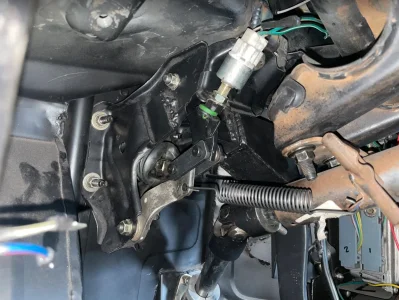
1706919493914.png
A few random pics of the prep before the first trip
1706919557154.png
1706919543256.png

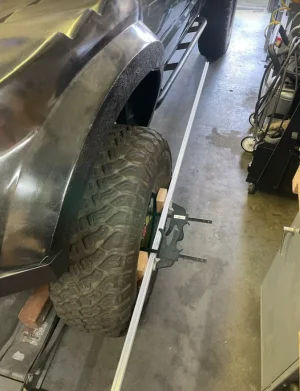
Steering alignment
1706919614480.png
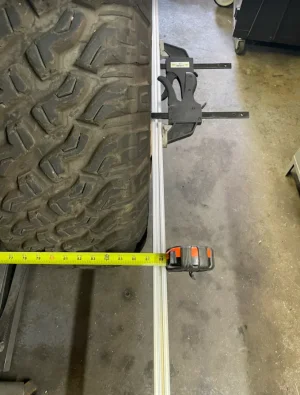
My track width is just under 86" (the tape is on the far side of the passenger bar)
1706919708233.png
 
Last edited:
but she is back and alive! I did a shakedown run at Gorman on Sunday. It was the first time the truck has seen the dirt in 9 years. Damn, it didn't feel like that long. Overall the truck did awesome. The front suspension is killer. It soaked everything up with zero adjustment. The motor ran strong and transmission felt great. I really only had one issue, the steering ram ripped off the frame. I removed it, plugged the lines and it drove fine. I'm not sure I even want to put it back on. The first real trip will be in 2 weeks and I'll get better videos. Feels great to be back out there though
2023-11-20_10h17_41.png

2023-11-20_10h17_20.png

2023-11-20_09h50_41.png


Last edited:
Back
Top