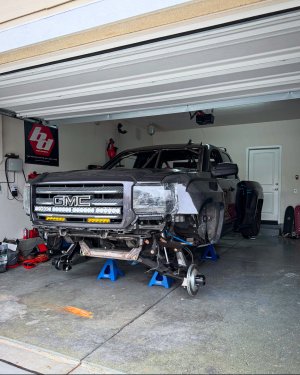
2015 GMC Sierra build

View attachment 25141
So we picked up the new kit!
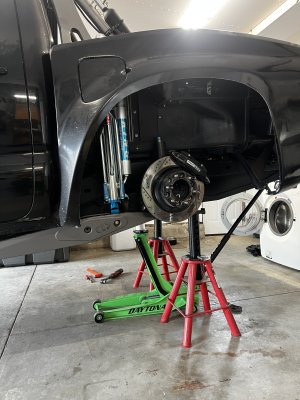
This time around for kit number 3 on this truck I decided to go with the Izzy fab race kit, I opted for the optional higher up travel shock towers and got the uprights tabbed for wilwood brakes.
I personally feel for Silverado kits these days this kit truly raises the bar, with the J-arms it allows for a 4.0 bypass to get squeezed in, and with the weight of a full size truck I feel that’s massively beneficial. It also pushes the wheels about 2” forward and is 5” wider per side. It doesn’t necessarily gain more travel with the wider track width it seems to more so prioritize proper geometry and not causing shocks to become diverted at full compression like some kits do to get the highest possible travel numbers to advertise. Truly impressed with this kit I guess to say the least.
Does the optional tower run a 12” bypass or is it still the 10”?
 
Does the optional tower run a 12” bypass or is it still the 10”?
So this is for 10” shocks still, the difference isn’t the amount of travel, it’s where the travel is. So the plus side is the truck will have a couple inches more up travel. The downside is the packaging of the taller shock tower option requires a brake system relocation or hydroboost conversion.
 
1796DC0E-89BB-4921-96EC-BADBF0BDED27.jpeg
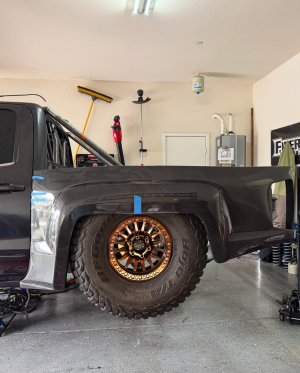
Last night I messed around with the glass and through one of the tires on! From here it still has a lot of uptravel so the fenders are gonna require some trimming to accommodate for the 40” tires. But none the less I’m super stoked to kinda get a glimpse of what the truck is going to look like!
 
BED1EFA6-744C-4A20-BD6B-DD45C52B2321.jpeg
Well we got some new trialing arms for the truck build. It’s one of the things that I don’t think gets brought up a lot is the ability of outside entities to postpone progress on your personal build.

So now for the second set of trailing arms.. I was able to get Izzy fab to make me a set of these links in the specific shock locations I needed. These are 55” and run the Coilovers 35” from the front uniball which allows for me to run the shocks outboard of the cab, and not run a digressive shock angle, with my wheel base shortened 15” from stock. I was also able to get these MiG welded and that helps with the financial side of things a bit!

Figured these may be worth noting that they exist now, because I haven’t seen an off the shelf option with this layout, I feel for super cab raptors, short bed tundras maybe even the tacomas would also require an option like this to achieve the same goals as I have!
 
View attachment 34300
Well we got some new trialing arms for the truck build. It’s one of the things that I don’t think gets brought up a lot is the ability of outside entities to postpone progress on your personal build.

So now for the second set of trailing arms.. I was able to get Izzy fab to make me a set of these links in the specific shock locations I needed. These are 55” and run the Coilovers 35” from the front uniball which allows for me to run the shocks outboard of the cab, and not run a digressive shock angle, with my wheel base shortened 15” from stock. I was also able to get these MiG welded and that helps with the financial side of things a bit!

Figured these may be worth noting that they exist now, because I haven’t seen an off the shelf option with this layout, I feel for super cab raptors, short bed tundras maybe even the tacomas would also require an option like this to achieve the same goals as I have!
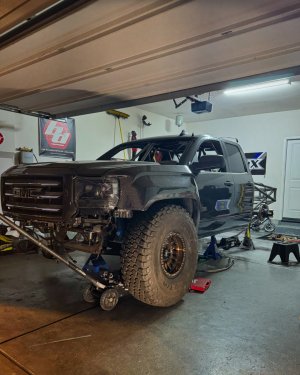
I have similar style links on my Tacoma. It’s definitely nice having the shocks outside of the cab. It allowed me to squeeze two prp seats in the back.

IMG_2339.jpeg
IMG_2425.jpeg
IMG_1948.jpeg
 

Attachments

  • IMG_1948.jpeg
    IMG_1948.jpeg
    2.1 MB · Views: 12
I have similar style links on my Tacoma. It’s definitely nice having the shocks outside of the cab. It allowed me to squeeze two prp seats in the back.

View attachment 34322
View attachment 34323
View attachment 34325
Those are super rad!! Im sure there’s a few other similar options out there. For me i I was just finding then where 1. They were going to force the coilover in the cab, or 2. They were putting the shocks too far back almost like a short course link would!

Ideally im trying, key word trying.. to run two seats im the rear of an extended cab so all the room i can keep in the cab the better!
 
IMG_4433.jpeg

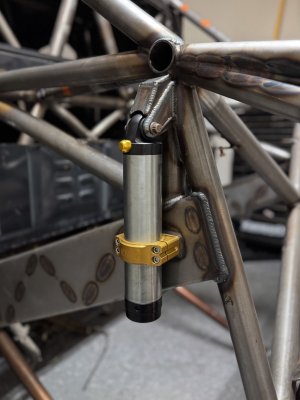
Got these bolt on style bump stops mounted and I’m super stoked on it. I used some tabs offered by Vulcan motorsports out of Idaho that saved me a ton of time, I had to edit them a bit to make it work for my application but dang. It’s crazy how far times have come with this hobby and how many products are available and being able to apply them saves SO much time!
 
IMG_4574.jpeg

IMG_4575.jpeg

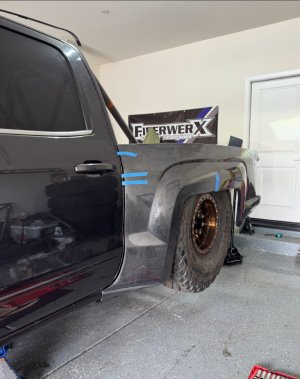
So I was able to get the wheels and tires on and cycle the suspension and just threw a bedside on to get a slight teaser of where the truck is headed.

So these specific bedsides are what dictated my wheel base, they are about 5” shorter than the crew can bedsides and designed around the idea that they overlap the cab. Which is also how I landed with a 130” wheel base on an ext cab Sierra.

So with reading on this forum and my degree from YouTube university says that up travel numbers really matter when it comes to overall handling and performance more than overall travel numbers. So I made my own custom edits to the back half kit I had to gain every possible inch of up travel that I could. My expectations at this point is to run about 26-27” of travel but about 15” of that being up travel from ride hight.

Anyways… I’m about to start getting the shocks in place and start cutting out some ram board to try and make a set of shock towers!
 
IMG_4739.jpeg
So I got the front fenders and lights mounted in the grille.
For this I was able to order Izzy fabs inner fenders but only the outside “skin” I guess you could call it, that way it didn’t come with the fuse box mount or the expansion tank normally included. Due to the 40” tires and the 1” body drop there was almost no way they were going to clear but they are damn close, only needing a slight trim at full turn.

As for the lights I was able to make a bracket out of ram board, shipped the template to a friend who then drew it up in cad so I could have it cut out from there. I was able to mount a curved 40” ONX6 and two 10” ONX6 ambers down below. This time around I was really going for a cleaner look than the old LP6 light set up and I feel like I nailed it!
 
Back
Top