Thanks Erik! Hope all is well dude!!Killing it Danny! Pumped for you brother!
You are using an out of date browser. It may not display this or other websites correctly.
You should upgrade or use an alternative browser.
You should upgrade or use an alternative browser.
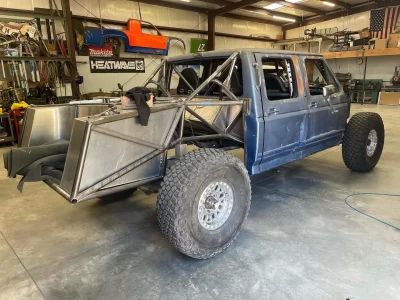
Denise the family hauler
- Thread starter DannyG
- Start date
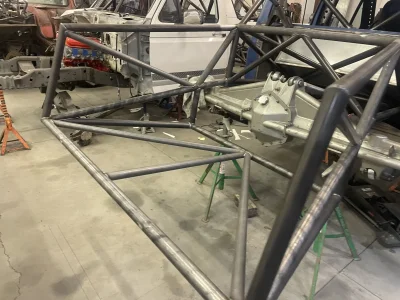
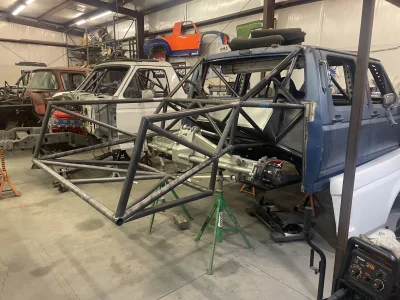
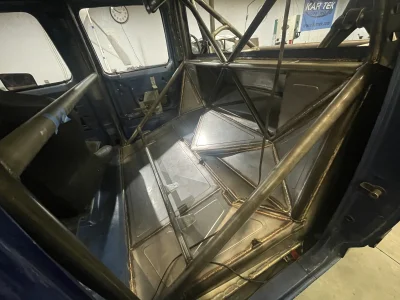
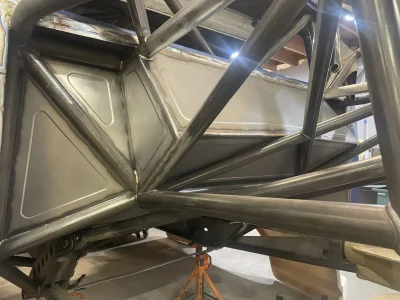
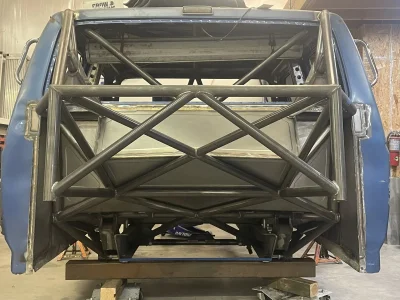
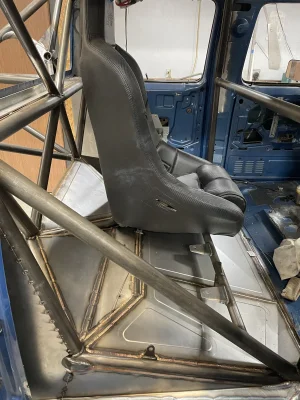
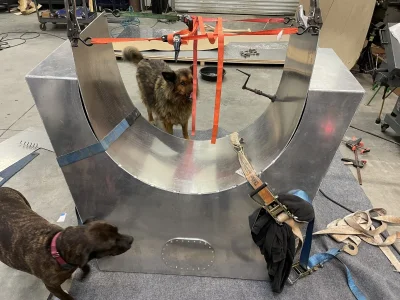
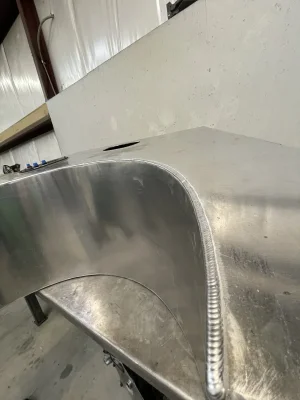
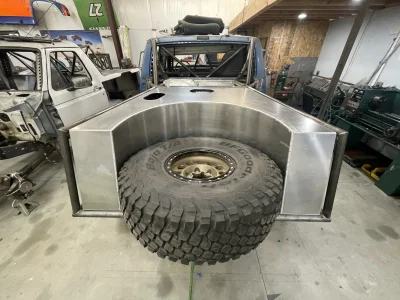
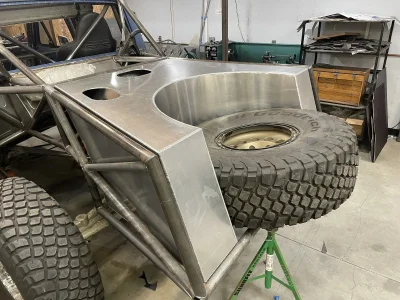
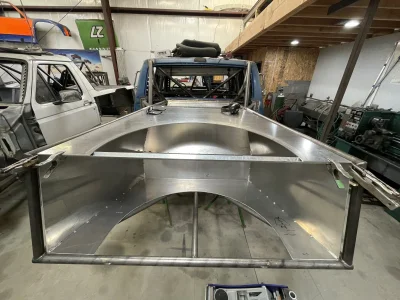
Rear floor & firewall section sealed back up using 18ga CR sheet, rear seat mounts in there too. Picked up a donor truck for the Dana 50 beams and a smog exempt diesel title. Tail section for backhalf roughed in.
Attachments
-
 IMG_6129.webp260.8 KB · Views: 144
 -
 IMG_6308.webp213.4 KB · Views: 104
 -
 IMG_6307.webp232.8 KB · Views: 71
 -
 IMG_6305.webp280.2 KB · Views: 62
 -
 IMG_6306.webp265.7 KB · Views: 56
 -
 IMG_6278.webp271.9 KB · Views: 55
 -
 IMG_6309.webp263.1 KB · Views: 57
 -
 IMG_6274.webp164.5 KB · Views: 54
 -
 IMG_6275.webp294.8 KB · Views: 55
 -
 IMG_6311.webp173 KB · Views: 54
 -
 IMG_6310.webp170.9 KB · Views: 71
 -
 IMG_6182.webp387.4 KB · Views: 66
 -
 IMG_6271.webp222.1 KB · Views: 65
 -
 IMG_6178.webp275.2 KB · Views: 53
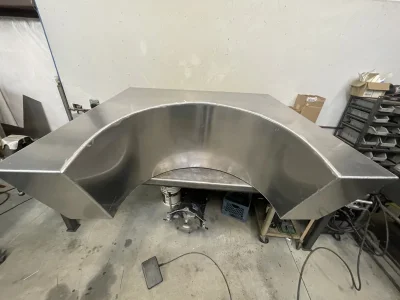
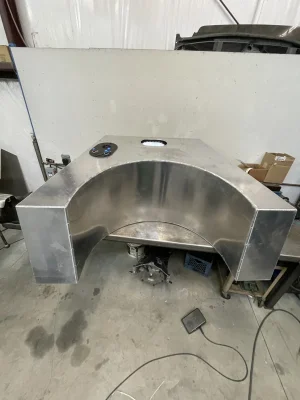
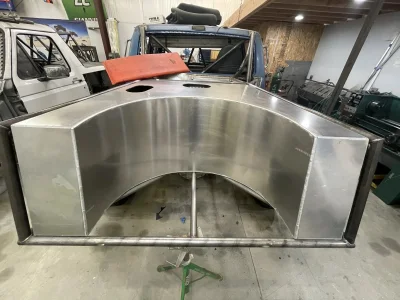
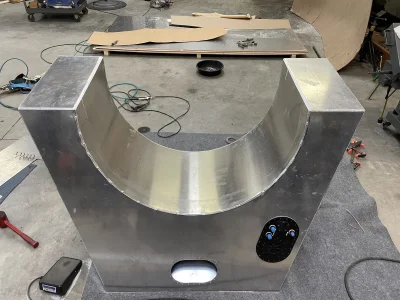
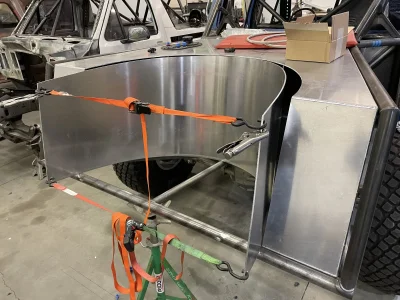
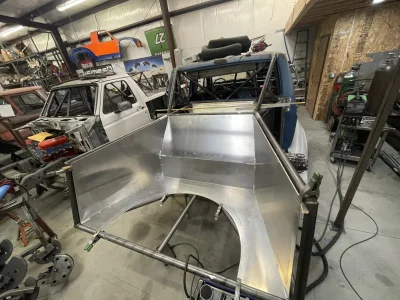
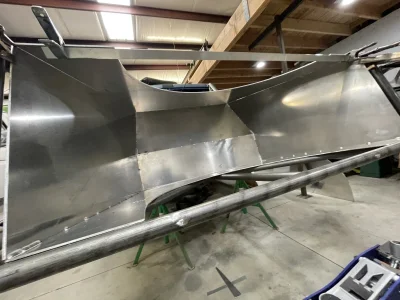
Fuel tank fabrication time! I elected to build a fuel “tank” instead of a traditional cell with a flexible foam filled bladder. After all, this is a “prerunner” not a racecar that would need to pass technical inspection. The fuel tank in my old prerunner was built in the same manner and provided years of trouble free service. This tank is built using .190 5052 aluminum. It has a couple baffles inside and a fuel pickup box with trap doors to capture and hold fuel. Chipboard templates were made and transferred to aluminum sheet then cut using a Skilsaw & jigsaw. Just slightly over 100gallon capacity. Forming the radius section was a bit time consuming, but overall not too bad. I’ve built three more for customers since this one was completed.
Attachments
-
 IMG_6711.webp141.4 KB · Views: 44
 -
 IMG_6708.webp153.6 KB · Views: 41
 -
 IMG_6713.webp214.9 KB · Views: 40
 -
 IMG_6706.webp350.2 KB · Views: 41
 -
 IMG_6709.webp142.8 KB · Views: 43
 -
 IMG_6715.webp249.9 KB · Views: 42
 -
 IMG_6716.webp291.4 KB · Views: 41
 -
 IMG_6712.webp131.8 KB · Views: 39
 -
 IMG_6707.webp310.7 KB · Views: 38
 -
 IMG_6691.webp246.9 KB · Views: 38
 -
 IMG_6504.webp298 KB · Views: 37
 -
 IMG_6506.webp203.2 KB · Views: 34
 -
 IMG_6505.webp240.4 KB · Views: 34
 -
 IMG_6507.webp251.6 KB · Views: 33
 -
 IMG_6509.webp286 KB · Views: 32
 -
 IMG_6511.webp249 KB · Views: 40
 -
 IMG_6524.webp266.8 KB · Views: 64
Baconcreekmetal
Active member
- Joined
- Mar 18, 2023
- Messages
- 168
Shoot, the donor was a decent looking rig. Those low side utility beds are rare around here.
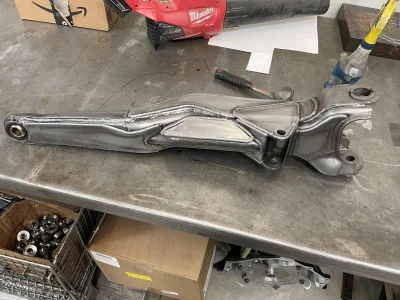
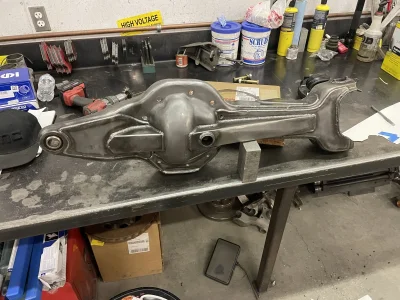
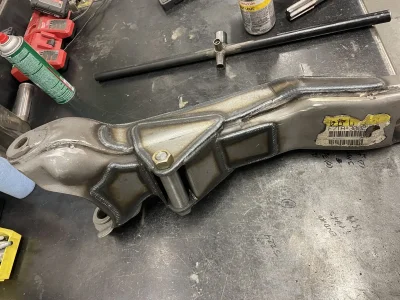
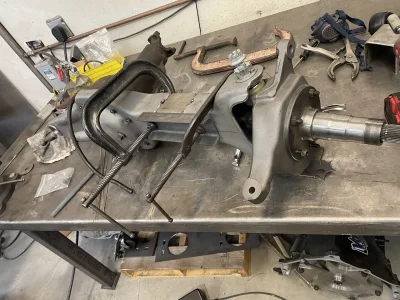
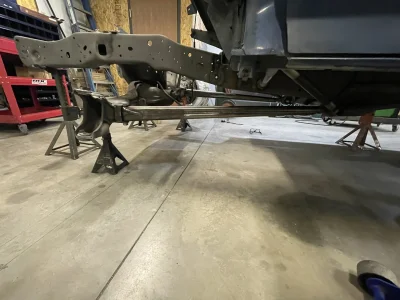
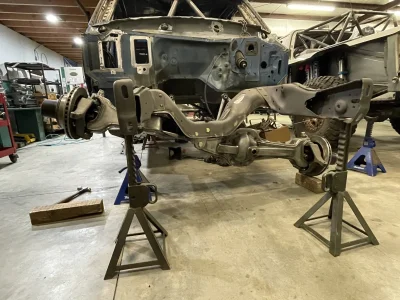
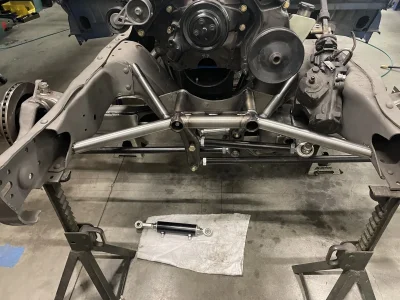
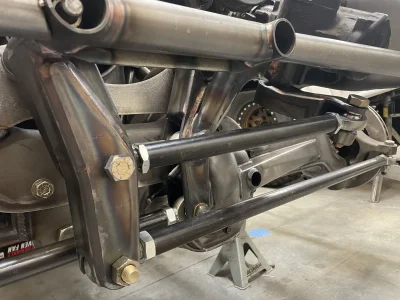
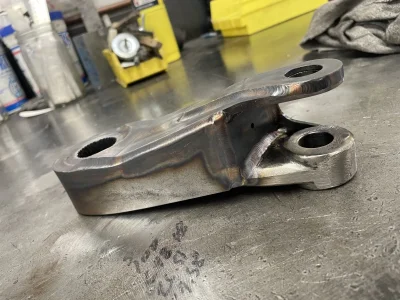
Beams!! I pulled the Dana 50 beams from the donor truck and sandblasted them. I purchased a 4.5” over plate kit from Threat Motorsports and got to work cutting & extending the beams. The plate kit worked out pretty well. I ended up modifying some of the plates and adding a little more gusseting here and there along with radius arm mounting brackets
Attachments
-
 IMG_7010.webp373 KB · Views: 59
 -
 IMG_7096.webp329.5 KB · Views: 55
 -
 IMG_7094.webp228.3 KB · Views: 57
 -
 IMG_7092.webp309 KB · Views: 54
 -
 IMG_7093.webp321.3 KB · Views: 49
 -
 IMG_7090.webp254.3 KB · Views: 48
 -
 IMG_7089.webp182.5 KB · Views: 47
 -
 IMG_7088.webp292.3 KB · Views: 52
 -
 IMG_7007.webp568 KB · Views: 56
 -
 IMG_6731.webp284.5 KB · Views: 52
 -
 IMG_6730.webp416.5 KB · Views: 49
 -
 IMG_6728.webp324.5 KB · Views: 54
 -
 IMG_6608.webp311.3 KB · Views: 54
Baconcreekmetal
Active member
- Joined
- Mar 18, 2023
- Messages
- 168
Beams look awesome!
I did weld as much of the driver side beam as possible with the diff bolted in place. Other than that i didn’t do any type of fixturing.Did you build any sort or fixture for the beams when you did all the welding? Did you weld with the 3rd bolted up to keep the sealing surface from distorting? They look great!
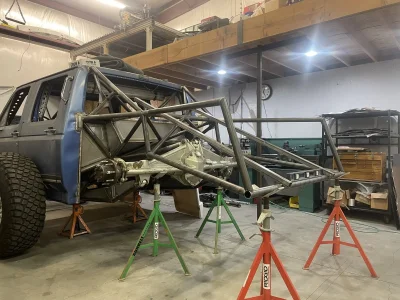
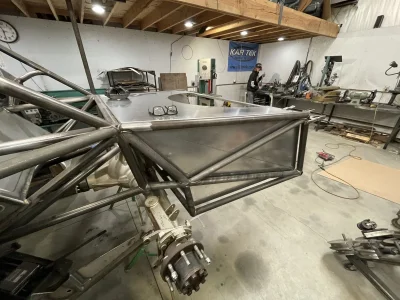
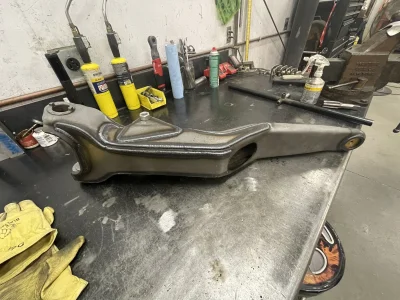
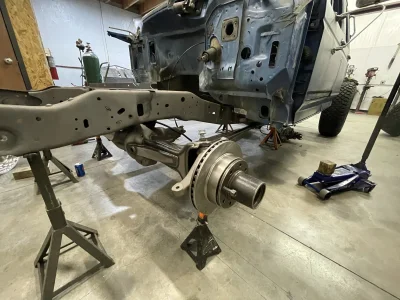
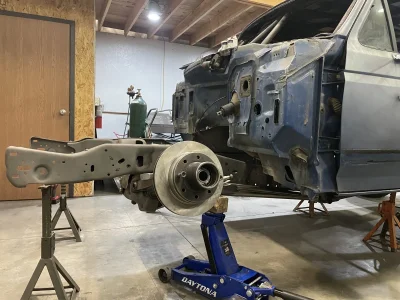
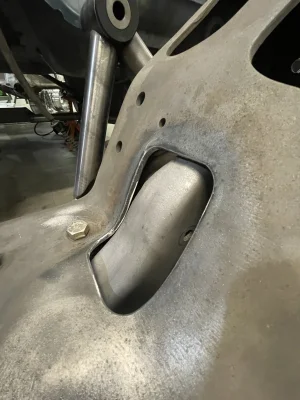
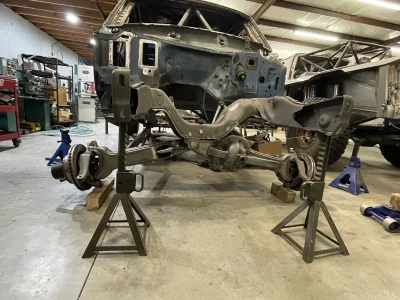
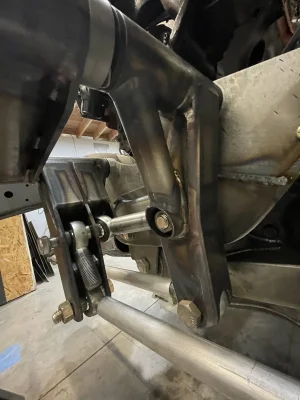
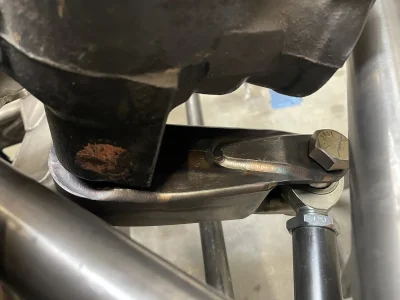
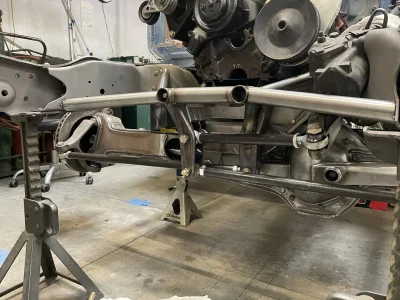
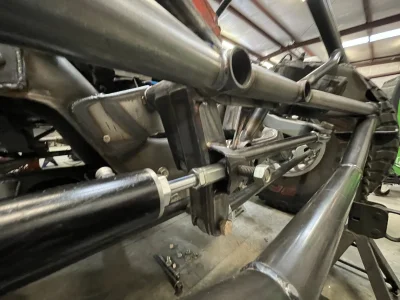
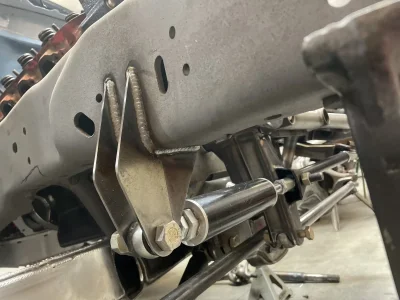
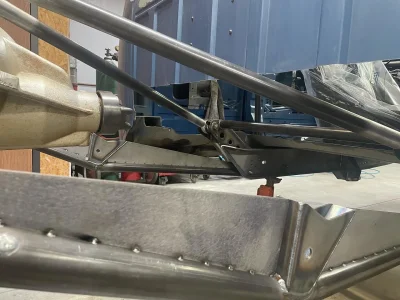
Radius arms built out, time to cycle the front suspension. There’s some massaging of a few sections of the frame to yeild more up travel. Those sections were plated over later on. Not sure if I have pics though.
Attachments
-
 IMG_6884.webp212.4 KB · Views: 42
 -
 IMG_6883.webp190.3 KB · Views: 41
 -
 IMG_6892.webp241.6 KB · Views: 41
 -
 IMG_6893.webp230.9 KB · Views: 45
 -
 IMG_6891.webp185.2 KB · Views: 46
 -
 IMG_6882.webp172.6 KB · Views: 42
 -
 IMG_6881.webp257.3 KB · Views: 41
 -
 IMG_6800.webp282.8 KB · Views: 54
 -
 IMG_6799.webp339.1 KB · Views: 43
 -
 IMG_6795.webp334.5 KB · Views: 42
 -
 IMG_6880.webp328.9 KB · Views: 42
 -
 IMG_6879.webp286.9 KB · Views: 44
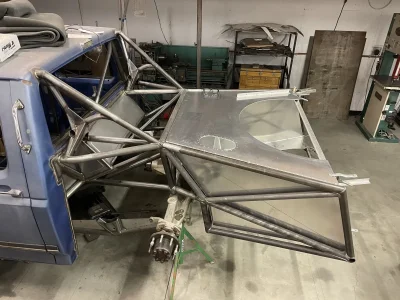
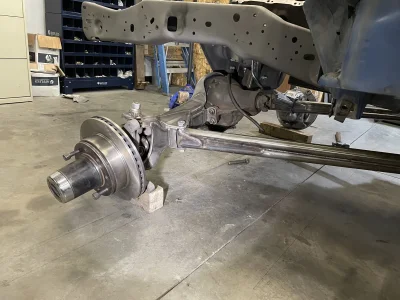
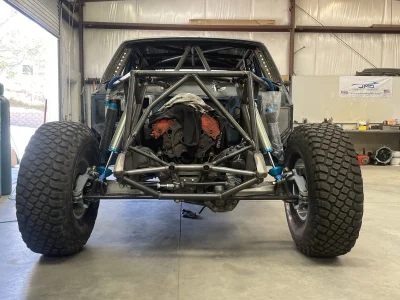
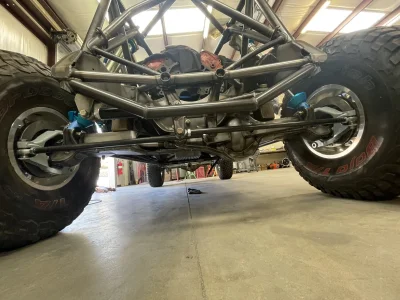
Cut & sleeved the axles, massaged the Ujount on the slip yoke of the driver side beam and was able to achieve nearly 20” of functional 4x4 wheel travel. I’m pretty pumped on that! My old prerunner was strapped at 18” in the front, this one will probably the same. Steering coming up next!
Attachments


Coolers!
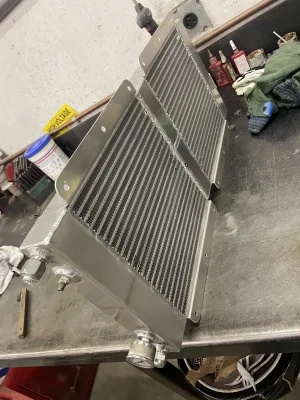
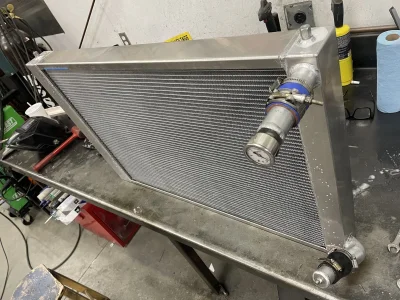
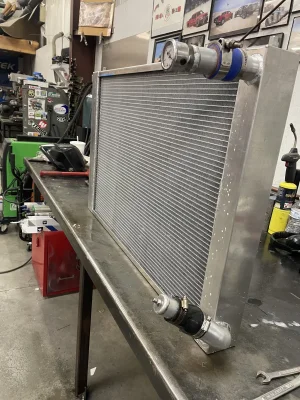
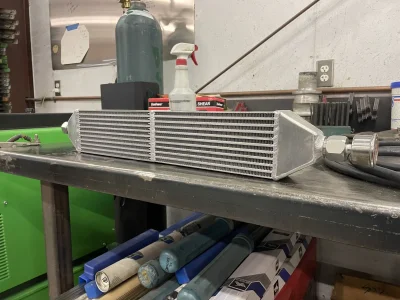
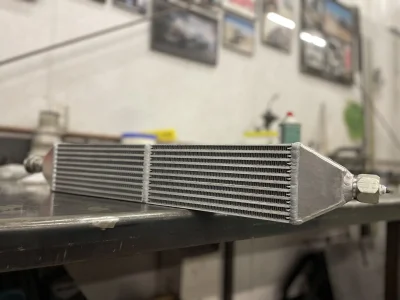
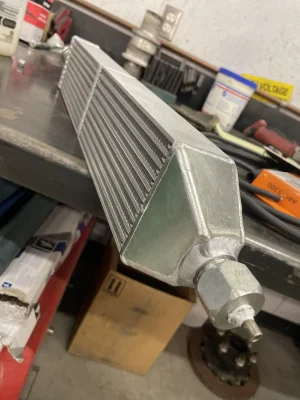
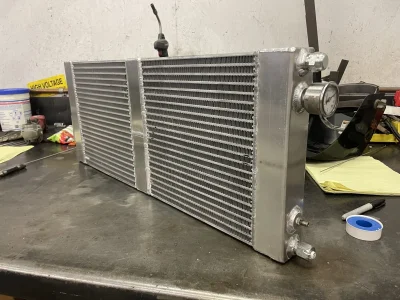
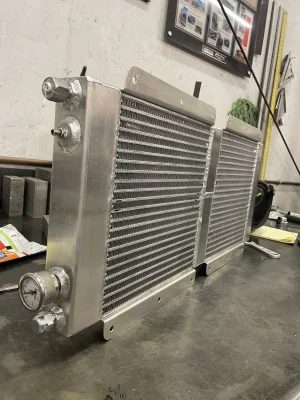
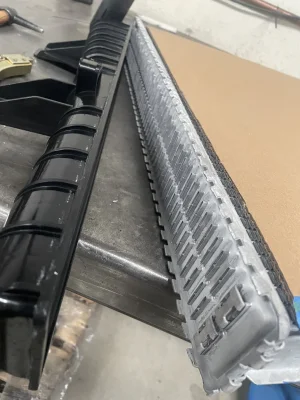
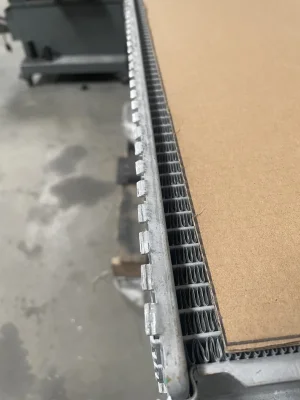
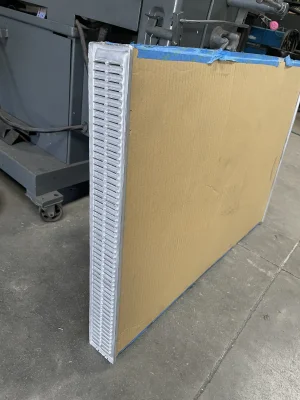
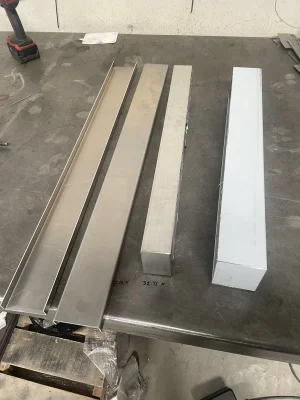
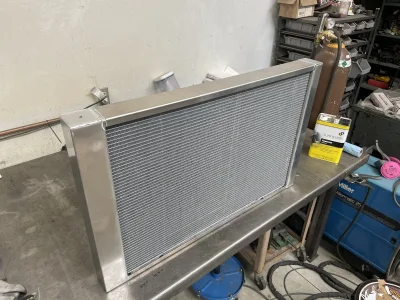
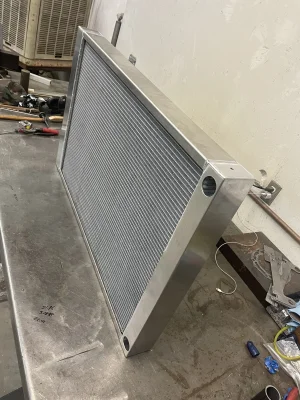
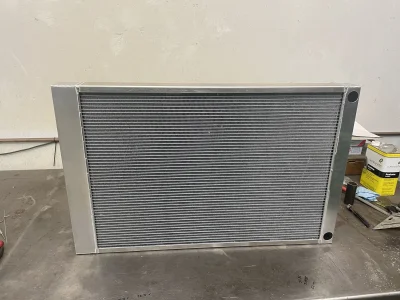
I decided to build my own coolers rather than purchasing them. The radiator is 2011 Duramax NAPA replacement. I pulled the end tanks and fabricated my own. One side tank has a bulkhead welded into it making the radiator a dual pass. The trans & engine oil coolers are built in the same fashion using 2 Vibrant cores welded together. The trans cooler, like the radiator is a dual pass as well while the engine oil cooler is single pass due to its smaller size with -12 a fittings on the end tanks.
I decided to build my own coolers rather than purchasing them. The radiator is 2011 Duramax NAPA replacement. I pulled the end tanks and fabricated my own. One side tank has a bulkhead welded into it making the radiator a dual pass. The trans & engine oil coolers are built in the same fashion using 2 Vibrant cores welded together. The trans cooler, like the radiator is a dual pass as well while the engine oil cooler is single pass due to its smaller size with -12 a fittings on the end tanks.
Attachments
-
 IMG_9307.webp274.1 KB · Views: 38
 -
 IMG_9314.webp339.5 KB · Views: 38
 -
 IMG_9310.webp102.8 KB · Views: 35
 -
 IMG_9411.webp406.8 KB · Views: 33
 -
 IMG_9410.webp370.1 KB · Views: 29
 -
 IMG_9515.webp224.4 KB · Views: 28
 -
 IMG_9516.webp104.4 KB · Views: 28
 -
 IMG_9517.webp122.2 KB · Views: 26
 -
 IMG_9522.webp206.1 KB · Views: 23
 -
 IMG_9308.webp296.9 KB · Views: 25
 -
 IMG_9311.webp310.6 KB · Views: 29
 -
 IMG_7358.webp183.4 KB · Views: 27
 -
 IMG_7359.webp176.3 KB · Views: 27
 -
 IMG_7360.webp142.7 KB · Views: 28
 -
 IMG_7340.webp251.8 KB · Views: 27
 -
 IMG_7355.webp203.5 KB · Views: 27
 -
 IMG_7350.webp350.6 KB · Views: 28
 -
 IMG_7371.webp372.3 KB · Views: 26
 -
 IMG_7372.webp416.7 KB · Views: 27
 -
 IMG_9317.webp280.4 KB · Views: 50
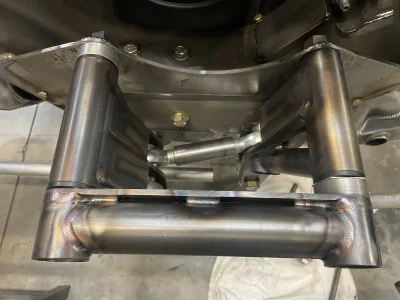
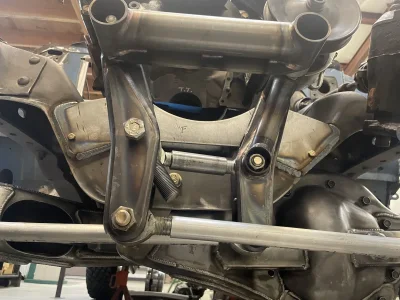
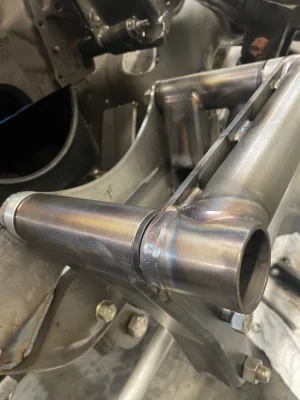
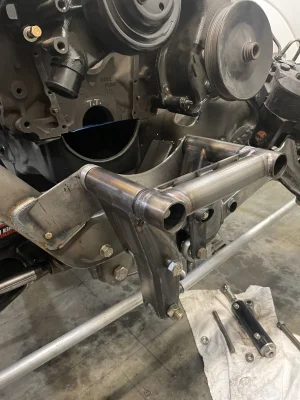
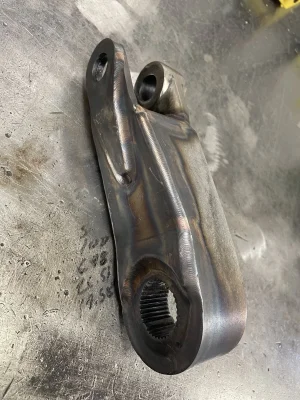
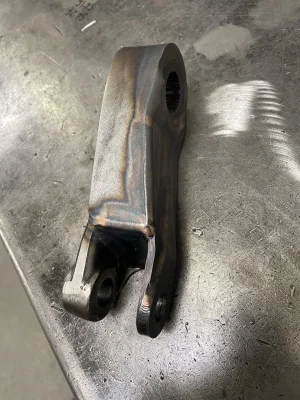
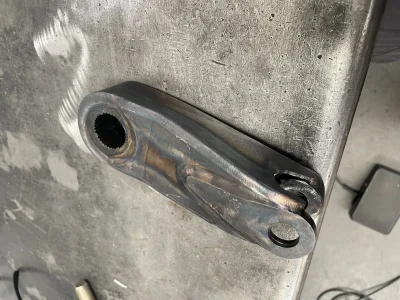
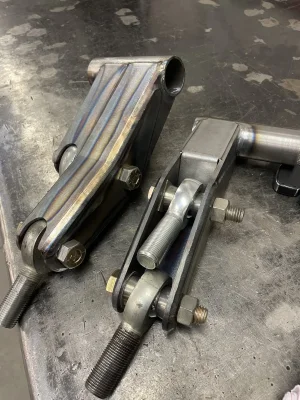
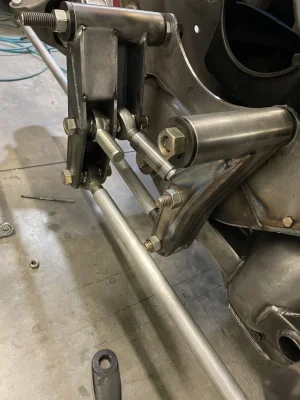
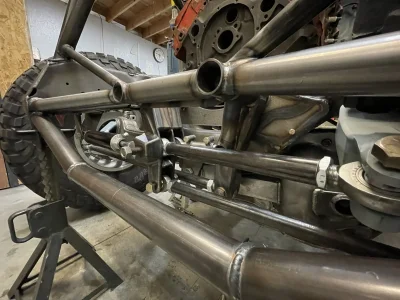
Dana 50 swingset steering. Since there is nothing commercially available for the D50 respective to steering, I set out to build my own. I don’t do anything in cad so I relied on the old school tools to get it done. Plumb Bob, string line, protractor, straight edges, paper templates, and a couple 40” lengths of aluminum angle bolted to the hub faces to measure toe change through the suspension cycle. A little bit of trial and error, moving pivot points around yeilds what you see here. A Clean cycling & robust steering setup that will handle the duty of controlling 40” tires at moderate speeds . (At least I think it will haha. That part is yet to be proven.)
Attachments
-
 IMG_7404.webp163.1 KB · Views: 49
 -
 IMG_7408.webp212.1 KB · Views: 51
 -
 IMG_7409.webp146.5 KB · Views: 49
 -
 IMG_7411.webp183.4 KB · Views: 51
 -
 IMG_7437.webp243.6 KB · Views: 50
 -
 IMG_7561.webp134.9 KB · Views: 49
 -
 IMG_7562.webp123.8 KB · Views: 45
 -
 IMG_7560.webp188.4 KB · Views: 45
 -
 IMG_7564.webp256.3 KB · Views: 46
 -
 IMG_7407.webp122.9 KB · Views: 43
 -
 IMG_7406.webp194.3 KB · Views: 46
 -
 IMG_7555.webp292.1 KB · Views: 45
 -
 IMG_7557.webp402.3 KB · Views: 43
 -
 IMG_7558.webp435.5 KB · Views: 41
 -
 IMG_7556.webp375 KB · Views: 37
 -
 IMG_7389.webp346.5 KB · Views: 36
 -
 IMG_7390.webp457.2 KB · Views: 37
 -
 IMG_7388.webp193 KB · Views: 37
 -
 IMG_7397.webp194.5 KB · Views: 40
 -
 IMG_7394.webp174 KB · Views: 48
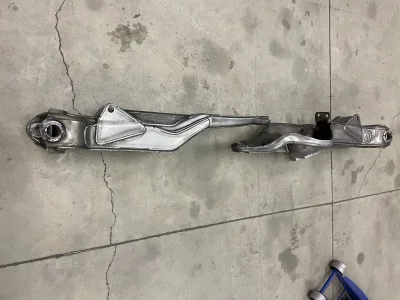
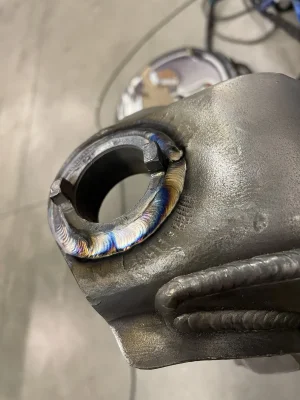
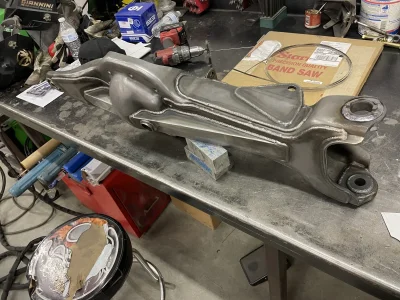
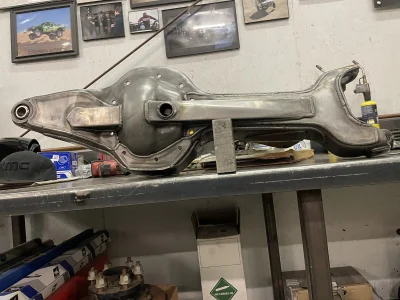
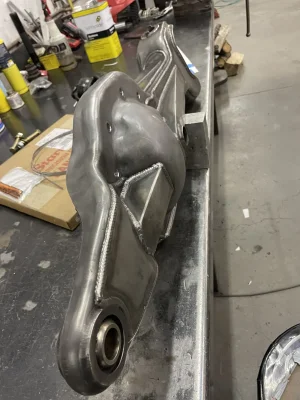
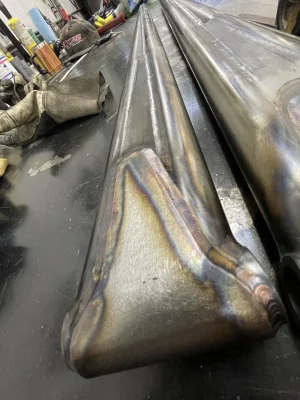
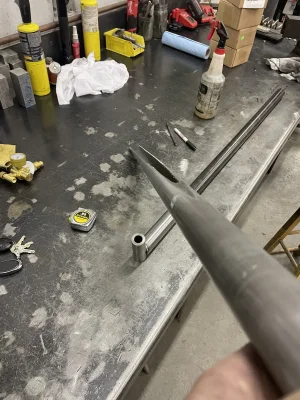
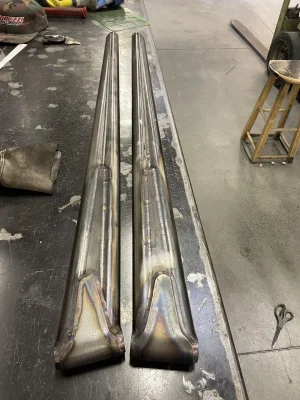
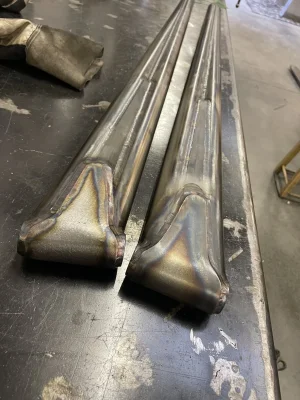
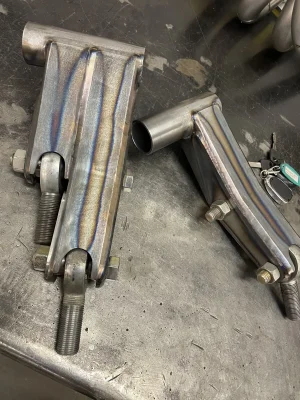
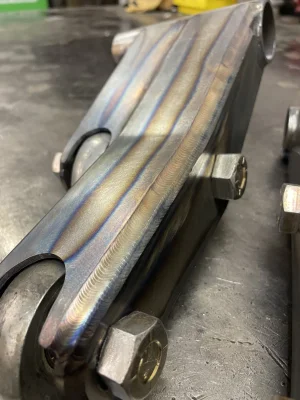
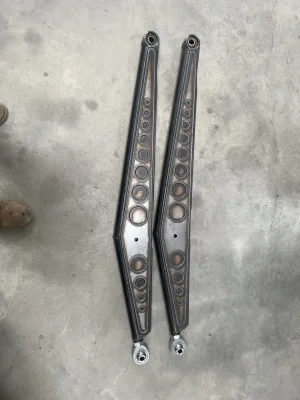
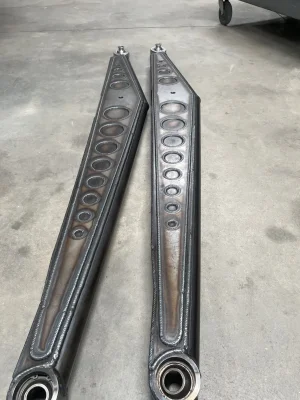
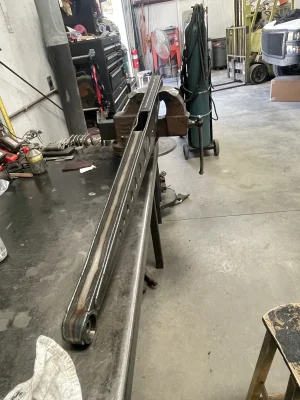
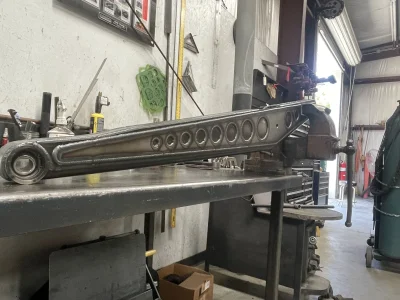
Trailing arms wrapped up. Simple 2d arms, all 4130 construction. 1.75”x.125” lower tube with .125” pocket, .090” vertical center gussets. .190 outer plates with .125” overlay. Mig blasted together. Dirt King wobble stopper uniball cups up front.
Attachments
-
 IMG_8143.webp265.9 KB · Views: 54
 -
 IMG_8144.webp275.6 KB · Views: 54
 -
 IMG_8145.webp237.4 KB · Views: 49
 -
 IMG_8142.webp267 KB · Views: 50
 -
 IMG_8141.webp223.3 KB · Views: 46
 -
 895B4E72-F103-4053-8673-2A0D708D5134.webp242.4 KB · Views: 45
 -
 3BDE8F3E-AC86-46DF-A83A-B08DECEE58AF.webp176.7 KB · Views: 44
 -
 IMG_5713.webp175.7 KB · Views: 64
Kellyex1450
Well-known member
What shock package are you running on the back? that single rear mount implies single 4.0 coilovers like old school Big Bird truck 
the bodj
Well-known member
Mannn side of those are looong mig pulls!
No, King 3.0 ibp I was dead set on running 3.5” but Keith Marigold advised me to stick with 3.0 because there’s way more spring rates available for 3.0 vs 3.5What shock package are you running on the back? that single rear mount implies single 4.0 coilovers like old school Big Bird truck
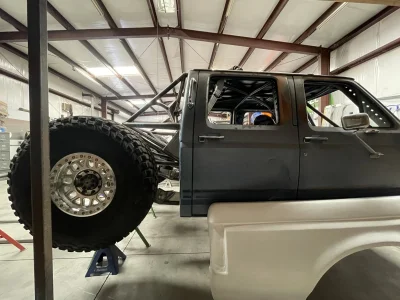
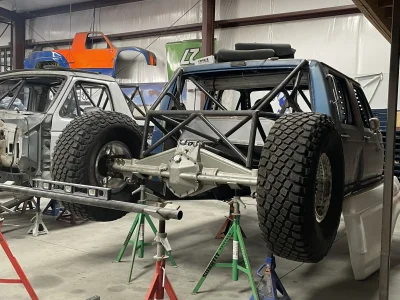
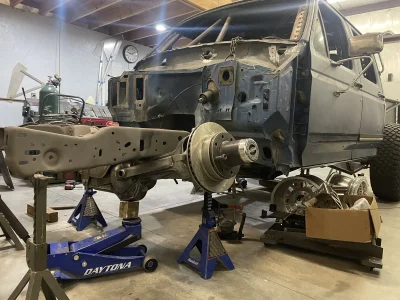
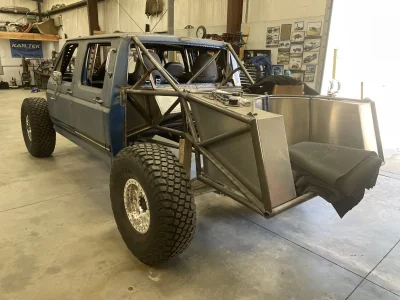
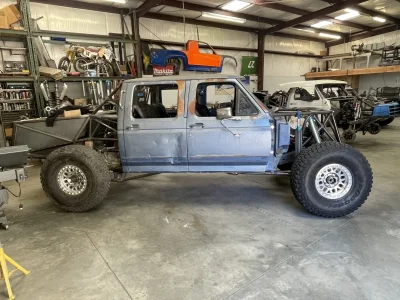
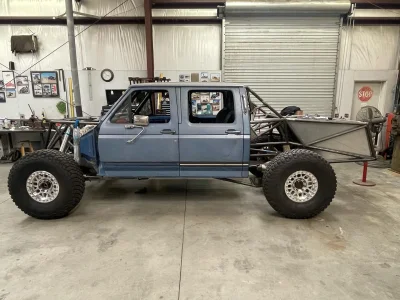
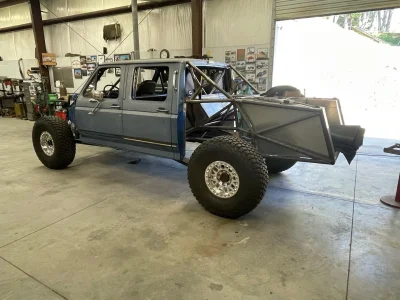
First time sitting on its own weight! Man that was a huge milestone for the build.
Attachments
-
 IMG_7946.webp277.8 KB · Views: 46
 -
 IMG_7942.webp211.7 KB · Views: 50
 -
 IMG_7938.webp242.7 KB · Views: 49
 -
 IMG_7949.webp336 KB · Views: 50
 -
 7C996AFD-1BEC-4960-B4C2-3585771CB925.webp317.1 KB · Views: 51
 -
 IMG_7944.webp248.7 KB · Views: 49
 -
 IMG_7945.webp276.6 KB · Views: 48
 -
 IMG_7947.webp285.9 KB · Views: 48
 -
 C9F4CF3F-F1A2-4F04-9B77-0A4D560C63E4.webp250.1 KB · Views: 51
 -
 971FC42C-0FA4-4D16-BFC7-D149AA15922E.webp221.1 KB · Views: 50
 -
 917B5BFB-8F55-4D27-BE13-500B5B48547F.webp310.1 KB · Views: 50
 -
 A1919EA9-ACFF-4D58-87E6-8C7AC29F57DB.webp279.5 KB · Views: 52
 -
 IMG_7940.webp233.3 KB · Views: 54
Similar threads
- Replies
- 11
- Views
- 2K
- Replies
- 200
- Views
- 15K