2000 Tacoma 4X4

Camper shell fun

Well-known member
Joined
Jun 10, 2022
Messages
105
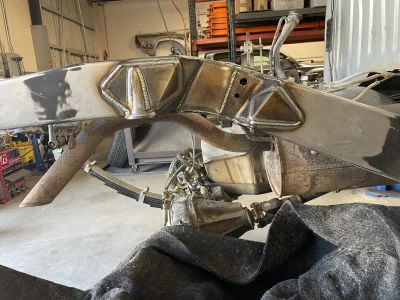
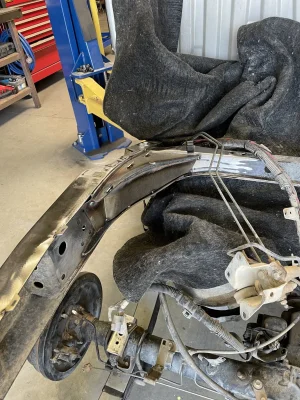
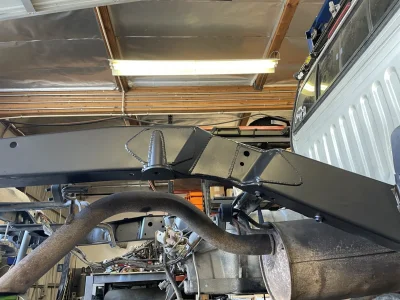
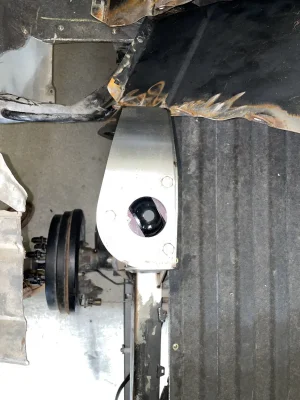
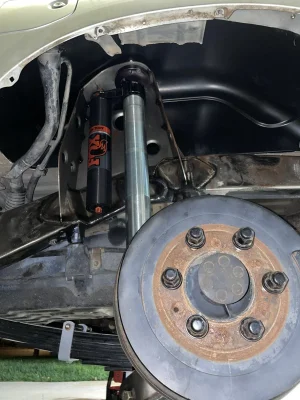
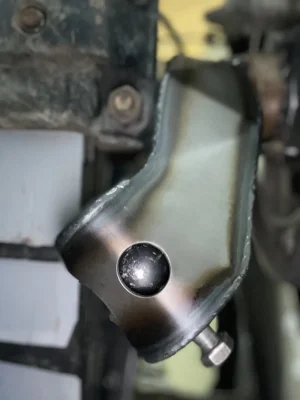
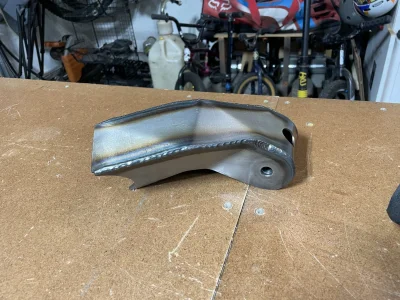
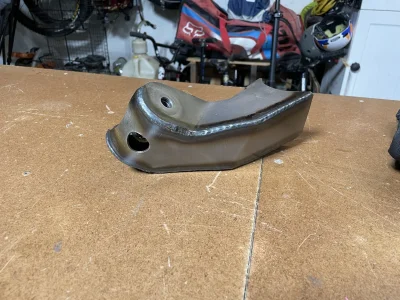
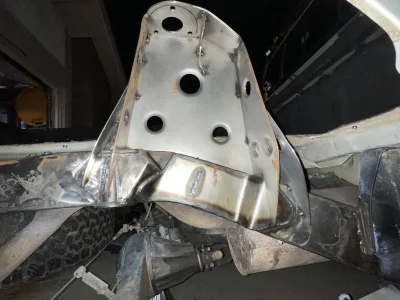
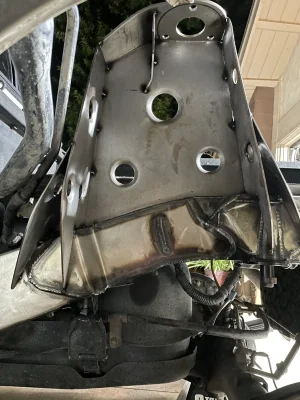
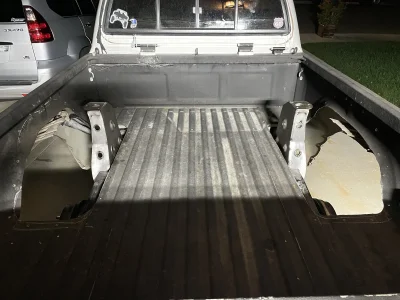
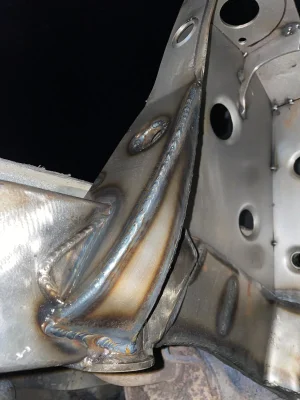
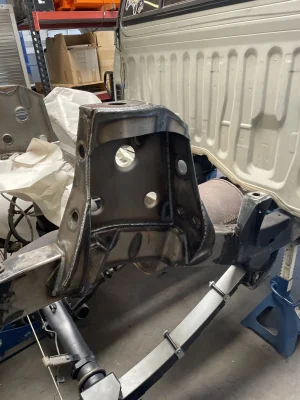
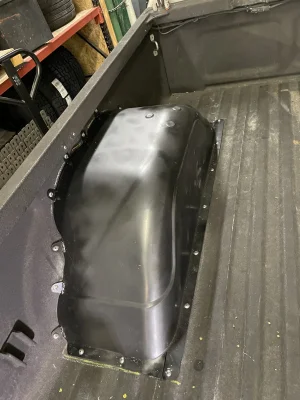
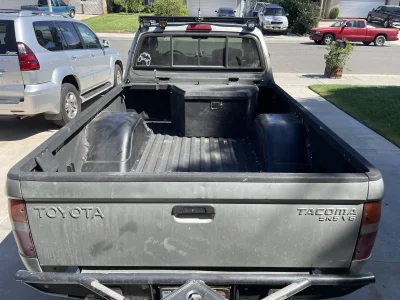
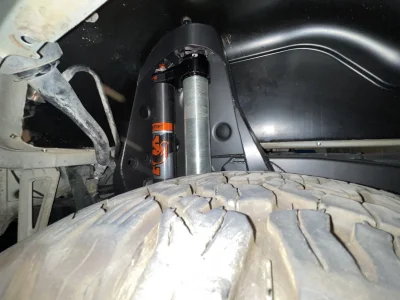
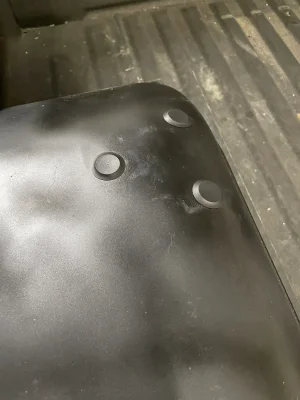
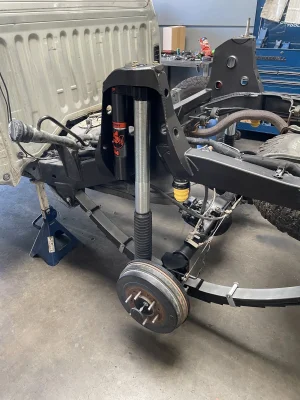
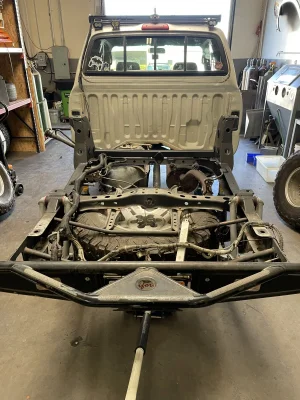
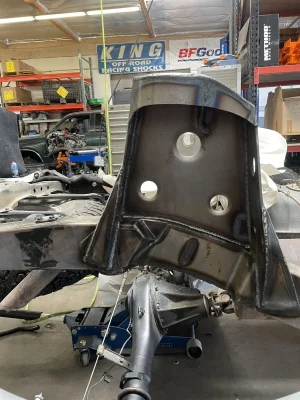
Hey guys, Eliot told me I should post this up in here. This is my 2000 Toyota Tacoma four-wheel-drive V6 five speed. It’s got 335,000 miles on the original engine and transmission and a lot of them are off-road. This is my first ever four-wheel-drive truck after years and years of driving a 86 Toyota 2wd with a total chaos lift spindle uni-ball kit. Someone here may have recognized that truck as it was blue with a camper shell hence my user name. Anyhow I bought this truck from my boss and it had an upper, 2.5 inch coil over, 2.5 inch bypass and spindle gusset. Since then I changed out the front suspension with a non-production kit that is 1 inch wider per side. There are also a couple of other goodies on the front end that I cannot really discuss right now as they are products that will be coming to market within the next few weeks. In the rear it had Spring over Deaver Spring’s with dual 2.0 shocks one bypass one smooth body. I then put F-67 springs on the back but left the shocks and shock mounts. Since the shock mounts were set up for spring over it drastically limitary of travel so recently hi mounted new rear shocks and here are the pictures from that project. I wanted to use long shocks so I can get the full amount of travel out of the leaf springs but I am picky and I did not want anything protruding through the bed as a ride motorcycles and whole things from time to time And just generally don’t want shit in the bed. Also the goal of this truck is to be the ultimate sleeper and I think so far that theme is working quite well. I did not want any clicking of bypass tubes because I am anal about my truck making noises. So I decided to use 2.5”x16”stroke fox internal bypass piggyback reservoir shocks. I also wanted to put them outside the frame and refused to use wheel spacers at all. If you know these trucks you know that nothing fits outside the frame really so I got to work. I notched the frame from the side and platted from the inside of the frame into the crossmember. Then I cut the whole wheel well out and started building my upper shock mount. I love using factory stuff and Toyota specific parts and I really wanted to use the upper billet shock mount that comes with OEM replacement fox coil overs that mounts with three bolts through the top so I basically built a coil bucket in the rear. I was taught to fabricate by someone who had a racing background in the 80s and 90s so everything is very lightweight and used .125 and .090 4130 plate for all of it. After that was done I mounted the lower shock mount as close to the leaf springs as possible so the shock body would not hit the leaf springs. I ended up covering up everything by using a late 60s Chevy truck tubbed wheel well I bought from jigs. I still need to put lining on the wheel well so it blends in better but I think it turned out pretty good.
 
Here are the photos
 

Attachments

  • 24314E44-2471-4536-8D17-05A0D022CFEA.webp
    24314E44-2471-4536-8D17-05A0D022CFEA.webp
    381.3 KB · Views: 74
  • 59141B80-13D7-4C6A-9F49-11625FA6C057.webp
    59141B80-13D7-4C6A-9F49-11625FA6C057.webp
    398.9 KB · Views: 71
  • 290D85C5-960A-4E5E-9063-72EEF800569D.webp
    290D85C5-960A-4E5E-9063-72EEF800569D.webp
    334.6 KB · Views: 66
  • 564ACD86-7813-4AE4-ACD2-D8AC69DFA92B.webp
    564ACD86-7813-4AE4-ACD2-D8AC69DFA92B.webp
    237.6 KB · Views: 67
And some more
 

Attachments

  • DBBF3B0E-AB94-4090-8A5B-54121AA55983.webp
    DBBF3B0E-AB94-4090-8A5B-54121AA55983.webp
    201.4 KB · Views: 70
  • ADBE848B-1203-40A5-ACF7-C8F3C8D7FB53.webp
    ADBE848B-1203-40A5-ACF7-C8F3C8D7FB53.webp
    200.3 KB · Views: 63
  • 356DA847-F10B-4AA8-8DB0-8AB8274739F9.webp
    356DA847-F10B-4AA8-8DB0-8AB8274739F9.webp
    161.7 KB · Views: 64
  • 8F0876C4-0B63-4BBB-B6A7-0DC08329B8CF.webp
    8F0876C4-0B63-4BBB-B6A7-0DC08329B8CF.webp
    388.7 KB · Views: 64
  • AAD0AA2B-1A27-4B82-A7B1-F75C19C5F25D.webp
    AAD0AA2B-1A27-4B82-A7B1-F75C19C5F25D.webp
    78 KB · Views: 60
  • 559AB8FB-4B80-4DAE-A64C-0AA45D1F8B53.webp
    559AB8FB-4B80-4DAE-A64C-0AA45D1F8B53.webp
    372.8 KB · Views: 59
  • A034FE13-2A72-42BB-B615-1E1CD4F6314D.webp
    A034FE13-2A72-42BB-B615-1E1CD4F6314D.webp
    336.8 KB · Views: 58
  • 7A81394B-56D6-4888-A26C-B42AA2E78AB2.webp
    7A81394B-56D6-4888-A26C-B42AA2E78AB2.webp
    222.3 KB · Views: 61
  • 738D10D5-7334-42FC-9389-F9C17AAD7BE1.webp
    738D10D5-7334-42FC-9389-F9C17AAD7BE1.webp
    224.9 KB · Views: 60
  • 06895257-39C1-42F0-99C0-3C81797838C7.webp
    06895257-39C1-42F0-99C0-3C81797838C7.webp
    244.4 KB · Views: 60
  • AB30E3C4-8662-41A7-8E8E-0D696B48B462.webp
    AB30E3C4-8662-41A7-8E8E-0D696B48B462.webp
    163.4 KB · Views: 58
  • F1D873B9-9F4C-4BE7-A584-D98556B3EEFC.webp
    F1D873B9-9F4C-4BE7-A584-D98556B3EEFC.webp
    167.3 KB · Views: 65
Last few
 

Attachments

  • AAB5C7D0-F9EF-455B-A768-A03803D9B60C.webp
    AAB5C7D0-F9EF-455B-A768-A03803D9B60C.webp
    258.6 KB · Views: 67
  • BA745B4E-B3BF-4D85-A7A1-985D22D830D0.webp
    BA745B4E-B3BF-4D85-A7A1-985D22D830D0.webp
    274.3 KB · Views: 69
  • D196FC87-54D9-459E-A4A9-FD351B343318.webp
    D196FC87-54D9-459E-A4A9-FD351B343318.webp
    149.7 KB · Views: 64
  • 7762F3DA-37D1-4B1A-B867-75C93555F562.webp
    7762F3DA-37D1-4B1A-B867-75C93555F562.webp
    217.1 KB · Views: 64
  • 40A808E3-0A87-4E90-8728-262C04205CBC.webp
    40A808E3-0A87-4E90-8728-262C04205CBC.webp
    280.1 KB · Views: 68
  • 1361D173-396F-4E54-82B9-616B291A257E.webp
    1361D173-396F-4E54-82B9-616B291A257E.webp
    293.9 KB · Views: 63
  • DDD977B5-F2F3-4384-AC58-385BAFA0A0D1.webp
    DDD977B5-F2F3-4384-AC58-385BAFA0A0D1.webp
    263.3 KB · Views: 60
  • 194D2846-58B5-47C7-A5B9-8D347549ACC3.webp
    194D2846-58B5-47C7-A5B9-8D347549ACC3.webp
    305.3 KB · Views: 59
  • 5DDE2FF5-1386-4C45-B559-E90AAD9AE103.webp
    5DDE2FF5-1386-4C45-B559-E90AAD9AE103.webp
    274.3 KB · Views: 71
This is great. Curious to see what front parts come to market, are you at total chaos?
 
Awesome build and fab work on the rear. I really appreciate the finished product. IBPs for the win!

Curious, why did you go with a top hat mount as opposed to a eyelet top? It's kind of an interesting design feature.
 
Awesome build and fab work on the rear. I really appreciate the finished product. IBPs for the win!

Curious, why did you go with a top hat mount as opposed to a eyelet top? It's kind of an interesting design feature.
I went with that design for two main reasons.

1. I wasn't 100% sure on what the inner fender/bedside was going to let me get away with for bump travel. With this design I can change the shock height drastically by making a "top hat" with adding or subtracting plates, or make a new "top hat" with different length tabs welded on.

2. Being that the shock is way up in the wheel well, its easier to just remove the three plugs on top of the wheel well and remove the 3-3/8" bolts that hold the shock in. If I had a 1/2" bolt going horizontally it'd be harder to get to. The way its made, the shock can be removed with the truck sitting on the ground with the wheels on it.
 
I was checking this thing out on Saturday, it's awesome. I was the guy asking around if people wanted to go drive after the raffle
 
Back
Top