Dont call it a build (Border Patrol raptor)

Aaron

Member
Joined
Nov 9, 2023
Messages
51
Location
So cal
I always struggle to call something a "build" when you just bolt on a bunch of pre fabbed parts, but here we go!

I flew out to Phoenix AZ and purchased from Rick (@dunewhore) in August of 2022 and drove home to So Cal in a monsoon with one headlight and blown out windshield wipers. Over the last year or so I have been slowly catching up on maintenance and upgrades to the truck. I will pop in here and make updates when i have some time to hopefully get caught up to current date.

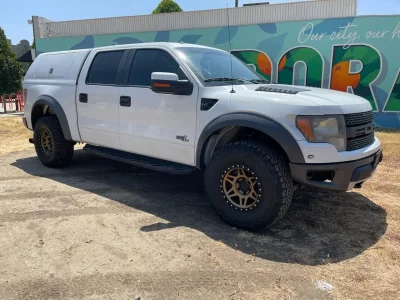
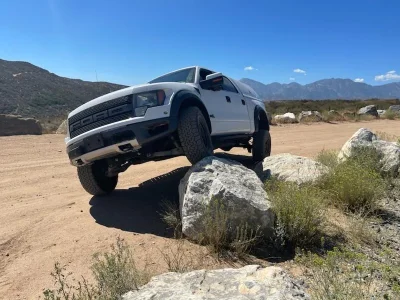
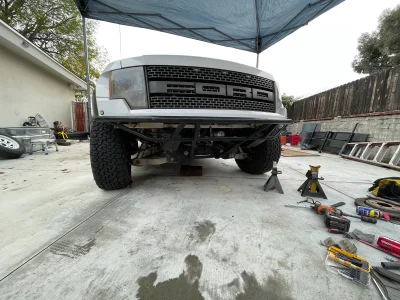
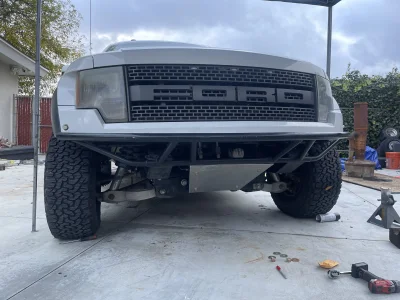
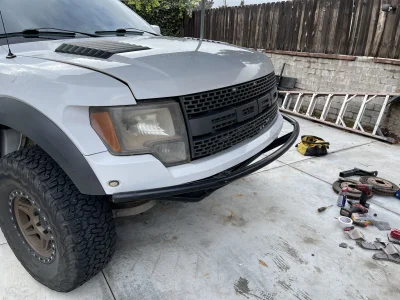
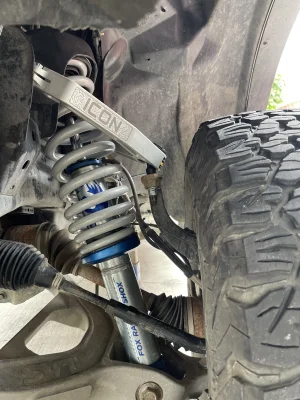
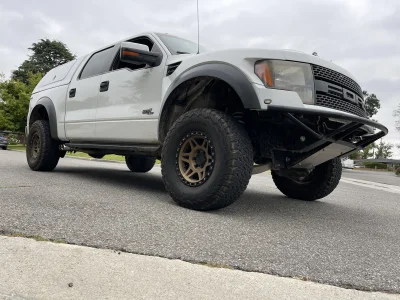
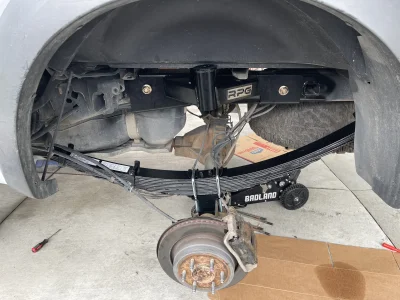
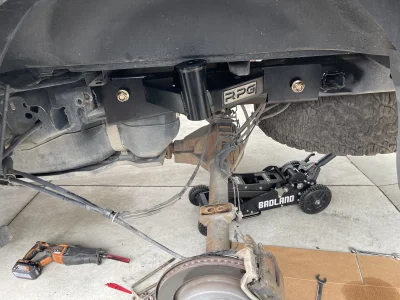
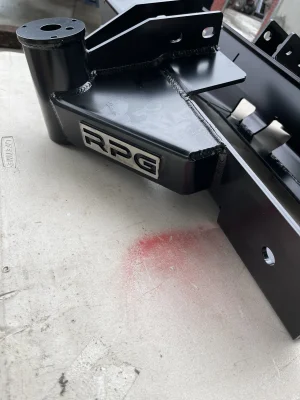
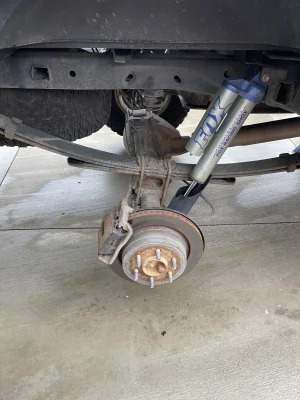
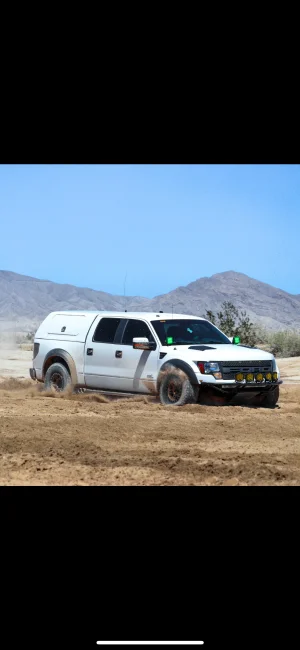
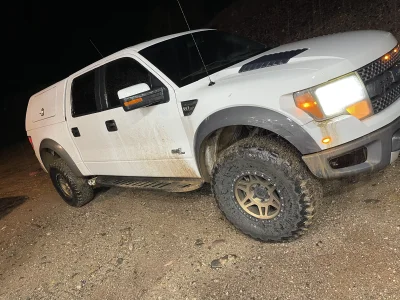
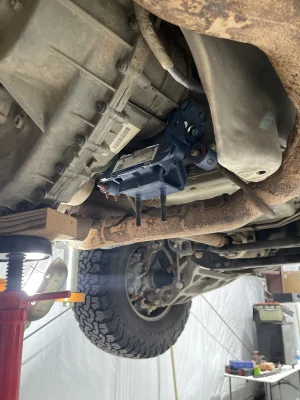
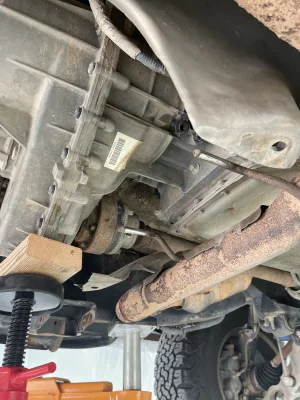
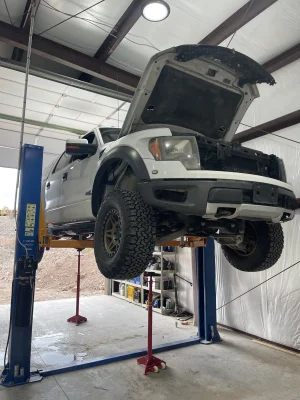
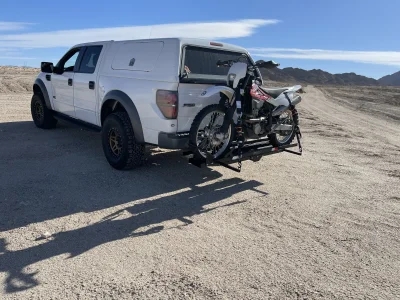
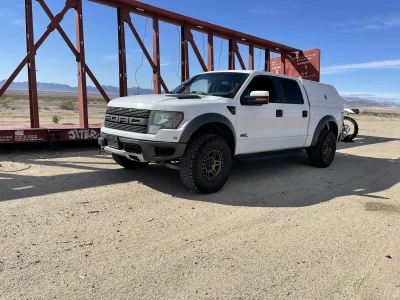
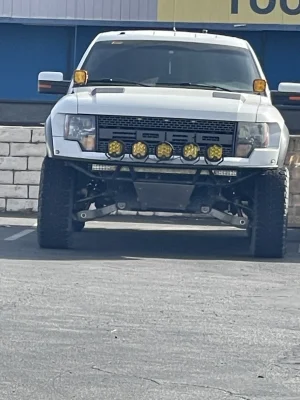
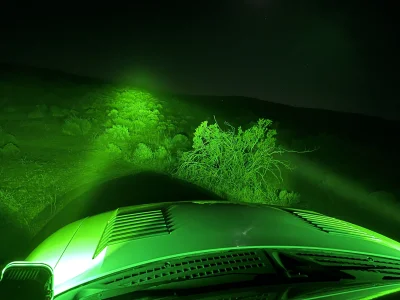
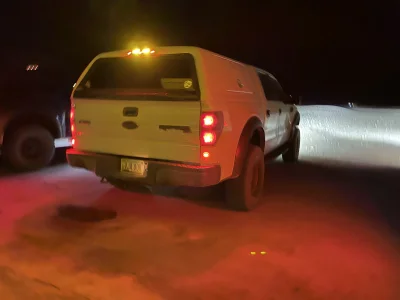
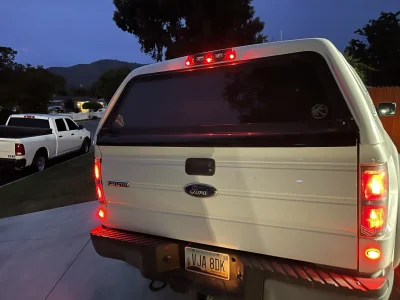
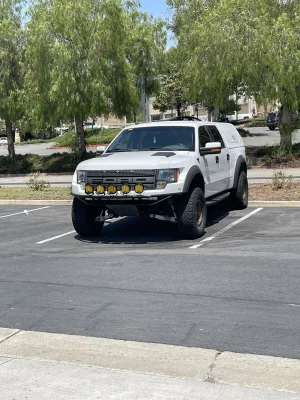
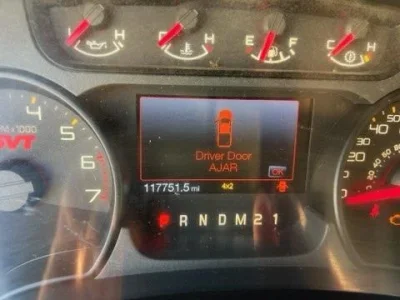
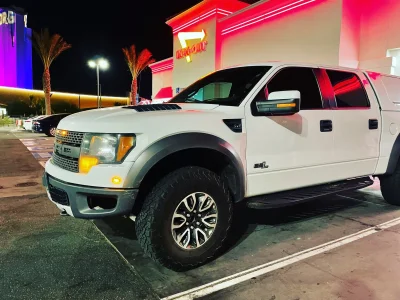
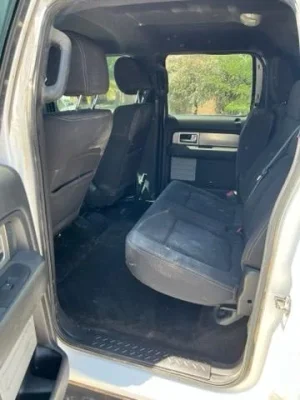
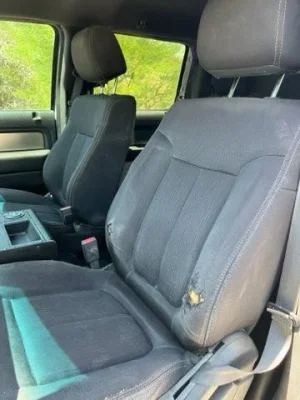
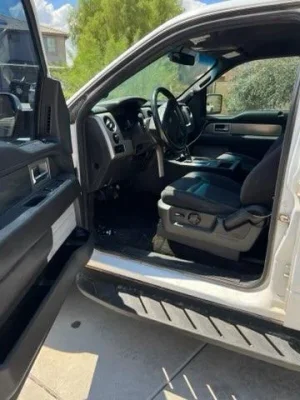
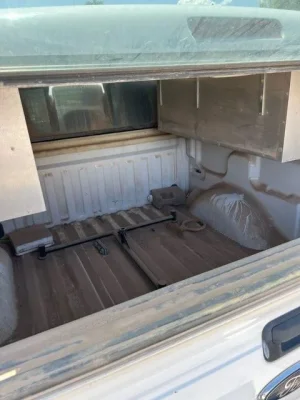
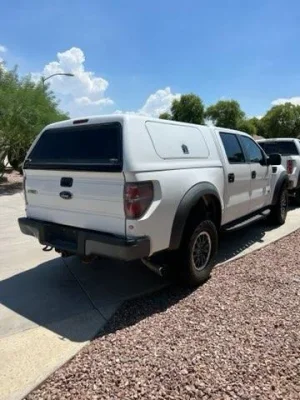
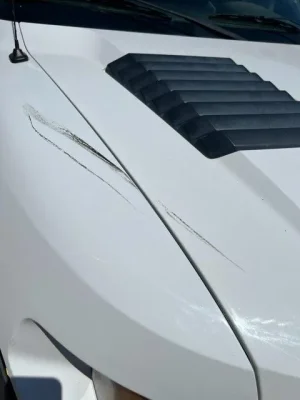
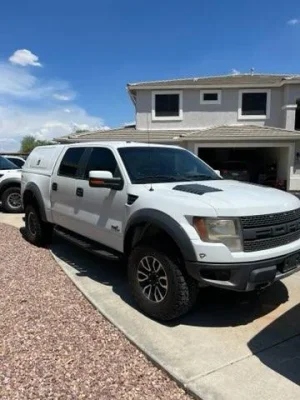
For the time being here are pics of the truck Rick sent. I bought the truck sight unseen... not my typical purchase but gotta say It was pretty painless and the truck was exactly as Rick described and what I expected.
 

Attachments

  • IMG_9807.jpg
    IMG_9807.jpg
    27.1 KB · Views: 75
  • 795231D4-5EDD-4975-99A5-45C5FF04244B.JPG
    795231D4-5EDD-4975-99A5-45C5FF04244B.JPG
    352.7 KB · Views: 46
  • IMG_9804.jpg
    IMG_9804.jpg
    25.1 KB · Views: 41
  • IMG_9803.jpg
    IMG_9803.jpg
    28.5 KB · Views: 36
  • IMG_9802.jpg
    IMG_9802.jpg
    32.9 KB · Views: 37
  • IMG_9801.jpg
    IMG_9801.jpg
    41.3 KB · Views: 37
  • IMG_9800.jpg
    IMG_9800.jpg
    35.2 KB · Views: 36
  • IMG_9799.jpg
    IMG_9799.jpg
    24.1 KB · Views: 33
  • IMG_9798.jpg
    IMG_9798.jpg
    32.5 KB · Views: 29
  • IMG_9797.jpg
    IMG_9797.jpg
    32.7 KB · Views: 30
  • IMG_9796.jpg
    IMG_9796.jpg
    25.6 KB · Views: 34
Between buying the truck and actually picking it up there was about a two week gap in which I bought a set of five used method wheels with 33" tires for $800. I sold the tires to a buddy along with a leveling kit I installed on his colorado for $1,000 so truck math means I got the wheels for free and they were like NEW!

I flew to Phoenix in the morning and got back home around midnight due to the weather slowing me way down with rain and wind making it impossible to drive over 35 mph for a bit and dodging blown over big rigs. I also just barely missed a bridge collapse 😁

Next day I was at the tire shop getting the new to me wheels mounted on the new tires the truck came with and ditching the mismatched gen 1 wheels. Over the next few months I was able to sell three of the oem wheels for $100 each to help fund towards future upgrades


Attachments

  • IMG_1291.jpg
    IMG_1291.jpg
    169 KB · Views: 41
I like this! How rough are former service Raptors?

I see them pop up fairly often for sale and I wonder how ragged they are?
 
I like this! How rough are former service Raptors?

I see them pop up fairly often for sale and I wonder how ragged they are?
Condition varies like any used vehicle. Some of them were used as commuters between offices and some of them were flooded and spent all their time in the dirt. I’ve met a few people that have them and one was really really rough with lots of issues, but he also paid way less for the truck.

Most of them have wear on the drivers seat from the agents gear belt that you can see in one of my pics. I’ll go more into detail on the interior soon. It’s one of the first things I did because one of the back doors wouldn’t open when I bought the truck.
 
Always wanted one of these because of the price... But I just never really needed one. But they are super intriguing at those price points Rick sells them at.

Stoked this guy is working out from you.

One thing to look for with these is the vehicle run time. Not sure if you can pull that off of the ECU but I know they idle a lot even if they are low miles.
 
Always wanted one of these because of the price... But I just never really needed one. But they are super intriguing at those price points Rick sells them at.

Stoked this guy is working out from you.

One thing to look for with these is the vehicle run time. Not sure if you can pull that off of the ECU but I know they idle a lot even if they are low miles.I
There is an hour meter in the console but its only showing 50ish hours.

I idle the shit out of the truck as well, ive never been one to restart my truck all day when out on a trip.

Part of the maintenance I did was replacing all 16 spark plugs/wires, evap purge valve, removed and cleaned the throttle body, removed valve covers and ran the valves, serviced the injectors and checked all the fluids. The idle was cleaned up pretty good after the maintenance was completed.

The 6.2 is known to be a pretty bulletproof motor. There are a few things to watch out for but for the most part they are solid, just keep an eye on valve springs (I rev this thing to the moon)
 
Last edited:
Next item on the list was adding some cup holders... Some of these trucks come with a cup holder bolted onto the rear of the console, but mine did not have that sweet option so I had to add it myself.

Some scrap aluminum and $10 cups holders from amazon worked out pretty good.

I promise I'll get to some real upgrades soon. I buy/sell/rent a few cars a year as a side hustle/hobby and it took me a little bit to decide if I was going to keep the raptor stock and just use as a tow truck and get around town vehicle or add upgrades to use it offroad. I had the truck about six months before I really decided to build it for off road use.

I did do some "testing" to see how it does in the dirt. crawls good for 6500 lbs and 45 psi in the tires. I had the truck about 7 days at this point so I was taking it very easy.


Attachments

  • IMG_1684.jpg
    IMG_1684.jpg
    87.6 KB · Views: 29
  • IMG_1359.jpg
    IMG_1359.jpg
    221.7 KB · Views: 35
  • IMG_1384.jpg
    IMG_1384.jpg
    175.3 KB · Views: 29
  • IMG_1385 (1).jpg
    IMG_1385 (1).jpg
    159.7 KB · Views: 27
Last edited:
Update since I haven’t posted anything on here in almost two years.

I have pieced this truck together with a ton of second hand parts and new parts I got ridiculous deals on.

I’ve put a ton of work into it so I’ll break it up into a couple of posts to keep the flow going.

First on the list was a used bumper from rpg. Found on marketplace for $400 and only about 45 minutes from me it was a no brainer. Hardware and skid plate did not come with it so we sourced hardware and had some scrap aluminum laying around to make a skid plate.
 

Attachments

  • F06E2609-03E8-434D-BC51-ACC78D713754.jpeg
    F06E2609-03E8-434D-BC51-ACC78D713754.jpeg
    1.7 MB · Views: 12
  • IMG_3147.jpeg
    IMG_3147.jpeg
    2.8 MB · Views: 13
  • IMG_3149.jpeg
    IMG_3149.jpeg
    3.4 MB · Views: 12
  • IMG_3150.jpeg
    IMG_3150.jpeg
    3.2 MB · Views: 12
  • IMG_3160.jpeg
    IMG_3160.jpeg
    3.5 MB · Views: 13
  • IMG_3162.jpeg
    IMG_3162.jpeg
    2.8 MB · Views: 13
  • IMG_3159.jpeg
    IMG_3159.jpeg
    3 MB · Views: 20
Next up rebuilt oem shocks with geiser springs and some second hand icon upper control arms. Truck got an attitude adjustment and really has the prelander look now.
 

Attachments

  • IMG_4250.jpeg
    IMG_4250.jpeg
    1.9 MB · Views: 18
  • IMG_4055.jpeg
    IMG_4055.jpeg
    1.2 MB · Views: 14
  • IMG_4045.jpeg
    IMG_4045.jpeg
    3.7 MB · Views: 13
Next on the list was deaver springs and RPG bump stop kit. I took the truck out 2-3 times and it was fun but pretty tough to handle since the rearend would just dance all over the place.

I was on the hunt for some used deavers and ended up finding a brand new set for sale in bend Oregon which is a short 850 miles from so cal….

The springs were +4.5hd which really only gives 2.5” of lift but I want certain they would work so I threw a Hail Mary and offered the guy $600 which after a day or two he messaged me back and said he would make the deal. The fam was out of town that weekend so I hopped in the ole parts runner Prius with 205k miles and took off at 4am and arrived in bend at 4pm. I was pretty bogged down and figured I’d grab a bite to eat, fuel up and maybe drive 2-3 hours then grab a cheap hotel for the night. But after food and fuel I was feeling pretty good and just drove straight home. 26 hours round trip and $180 in fuel made for a solid road trip.

The following week I went down to deaver with the springs and was just asking about how much lift and what would work for my setup and ended up trading g them for a set of +3hd springs for no charge. (Deaver is the best!)

Next up was finding a bump stop kit and just like the deavers they were non existent used so I found a good guy deal for a new rpg kit with king 2.5x2.5 bumps.

Now onto the install, went pretty smooth considering you need to fish the bolts thru the frame rail to mount it. Once everything was installed I slid those sweet king bumps into the cans only to find out that king had just revised their bumps and made the mounting pin 7/8 rather than 5/8 and the bump kit had old style cans… btw did I mention I was doing this on a Friday night and planned on a run Saturday morning at 8am?

Uni bit wasn’t working so I ended up closing shop and got at 6am to get a 7/8 drill bit and ream out the holes. Got the bumps in then we were off to octillo wells for a 50 mile trip in the dirt to plaster city.

Truck worked really well and I put the deavers, bumps and geiser to the test and they worked!
 

Attachments

  • IMG_5522.jpeg
    IMG_5522.jpeg
    2.7 MB · Views: 17
  • 10F83E13-9977-4AEA-A685-9F9BE6D45296.jpeg
    10F83E13-9977-4AEA-A685-9F9BE6D45296.jpeg
    3.4 MB · Views: 14
  • 86EADE36-8840-4BD1-AEE3-ECD7F26117E1.jpeg
    86EADE36-8840-4BD1-AEE3-ECD7F26117E1.jpeg
    1.2 MB · Views: 12
  • IMG_5373.jpeg
    IMG_5373.jpeg
    3.4 MB · Views: 9
  • 06A08A75-3911-4C27-BB04-AE1B28AA4F63.jpeg
    06A08A75-3911-4C27-BB04-AE1B28AA4F63.jpeg
    3.5 MB · Views: 9
  • IMG_5363.jpeg
    IMG_5363.jpeg
    1.8 MB · Views: 8
  • IMG_5361.jpeg
    IMG_5361.jpeg
    2.2 MB · Views: 11
  • IMG_4911.jpeg
    IMG_4911.jpeg
    2.5 MB · Views: 13
  • IMG_7467.png
    IMG_7467.png
    2.9 MB · Views: 15
Next was just some general maintenance and exhaust upgrade.

I found a stainless works new 2nd hand for $600 which was about half off retail so that was a no brainer. Took the truck out to the river and used a buddies lift to change trans mount, replace brakes, service trans/t case and install the new exhaust.

Note: updating this thread with work I’ve done over the past two years so some of it may be out of of order, chill 💀
 

Attachments

  • IMG_3044.jpeg
    IMG_3044.jpeg
    3.9 MB · Views: 15
  • IMG_3151.jpeg
    IMG_3151.jpeg
    3 MB · Views: 12
  • E93DD2F9-7EAD-44A3-8347-A335393926F4.jpeg
    E93DD2F9-7EAD-44A3-8347-A335393926F4.jpeg
    1.5 MB · Views: 12
  • 69905984753__4399CDA4-8B33-428E-8AA4-E657F9882BDC.jpeg
    69905984753__4399CDA4-8B33-428E-8AA4-E657F9882BDC.jpeg
    1.8 MB · Views: 11
  • F06E2609-03E8-434D-BC51-ACC78D713754.jpeg
    F06E2609-03E8-434D-BC51-ACC78D713754.jpeg
    1.7 MB · Views: 12
  • IMG_3020.jpeg
    IMG_3020.jpeg
    4.9 MB · Views: 12
  • IMG_3023.jpeg
    IMG_3023.jpeg
    4.5 MB · Views: 13
Next up was some budget Amazon design amber lights on the bumper, GG a pillar lights (green and amber lenses) and a free 50” light bar hiding under the bumper. Also added a 3rd brake chase light.
 

Attachments

  • IMG_6448.jpeg
    IMG_6448.jpeg
    1 MB · Views: 16
  • IMG_5226.jpeg
    IMG_5226.jpeg
    2.3 MB · Views: 14
  • IMG_4569.jpeg
    IMG_4569.jpeg
    1.5 MB · Views: 9
  • IMG_4065.jpeg
    IMG_4065.jpeg
    2.1 MB · Views: 10
  • IMG_4860.jpeg
    IMG_4860.jpeg
    2.1 MB · Views: 13
Next on the updates is NEW used shocks. In typical adhd fashion I was searching for any set of shocks for a 1st gen raptor within 1k miles and found a set of rusted out icons with bad shafts in Salt Lake City Utah. It’s only 700 miles away so I offered $500 and the dude said sure thing 🙄

This time I found a buddy to raid trip with me and we left around 8pm and were back in town by 4pm after the guy left the shocks out in the bed of his truck for a 4am pickup.

I sourced new shafts and a few other parts from icon then tore into my first set of shocks ever. Stripped down and found a local powder coat company to sandblast all the parts and coat the springs in flat black.

I wanted to match the shocks to my methods and found a cerakote that is almost a perfect match to method bronze. Picked up an electric oven off Craigslist for $20 and went to town on learning the cerakote process.

Ordered up some swag from shockseals.com and went to town on them. Couple tool purchases and swear words later we had some decent looking shocks.

Threw them on the truck two weeks before koh 2024 and went out to do some testing. First weekend of koh the shocks worked better than factory but still weren’t doing what I wanted. Also when I came out to the truck the next morning found a puddle of shock oil that pissed out.

Pulled the shocks on Sunday and headed out to Pasley shocks for a proper build and re valve. We contacted icon and gave them some videos of the truck, loadout details and what I was trying to do. Icon digestive valving is “weird” from what I know but the engineer at icon knew exactly what stack we needed. Pasley threw the shocks back together and replaced the shaft seals I put in upside down 🙃

The following weekend at KOH I was blown away at how well the truck handled with the new valving. Shock tuning has to be the most overlooked thing cause holy smokes the truck worked so well in chop and whoops now. I kept bracing for impact and it would just float on all the same trails I ran the weekend before. Boone rd whoops off the graded road were 25 mph max first weekend out and with the new valving I was able to cruise at 40 very comfortably.

That’s it for the coilovers. The rest bypass shocks are a whole other story I’ll drop in a different reply
 

Attachments

  • IMG_5762.jpeg
    IMG_5762.jpeg
    1.8 MB · Views: 7
  • IMG_5731.jpeg
    IMG_5731.jpeg
    3 MB · Views: 6
  • IMG_6197.jpeg
    IMG_6197.jpeg
    2.5 MB · Views: 6
  • IMG_6196.jpeg
    IMG_6196.jpeg
    2.8 MB · Views: 7
  • IMG_6291.jpeg
    IMG_6291.jpeg
    2.3 MB · Views: 7
  • IMG_7815.jpeg
    IMG_7815.jpeg
    2 MB · Views: 7
  • IMG_6203.jpeg
    IMG_6203.jpeg
    2.1 MB · Views: 7
  • IMG_6459.jpeg
    IMG_6459.jpeg
    148.3 KB · Views: 7
  • IMG_5527.jpeg
    IMG_5527.jpeg
    443.5 KB · Views: 11
  • IMG_5528.jpeg
    IMG_5528.jpeg
    599.5 KB · Views: 6
  • IMG_5531.jpeg
    IMG_5531.jpeg
    294.3 KB · Views: 6
  • IMG_5532.jpeg
    IMG_5532.jpeg
    323.4 KB · Views: 7
  • IMG_5543.jpeg
    IMG_5543.jpeg
    3.5 MB · Views: 7
  • 8EB8B825-BEDB-4BAC-B470-EB168871FDAF.jpeg
    8EB8B825-BEDB-4BAC-B470-EB168871FDAF.jpeg
    1.3 MB · Views: 11
Now onto the rear bypass shocks. When I picked up the shocks they were holding nitrogen so I formed I’d tackle the coilovers first and sometime in the future year into the rears.

I saw an “influencer” who posted they were looking for some beadlock method wheels and I had a set I was selling. Said “influencer” is a big name in the socal truck scene and has a shop that provides cerakote. I struck up a deal to do the coating on rear shocks for trade of the method wheels.

Right out of the gate I went and delivered the wheels and had the fully assembled shocks to drop off. Dude said he wanted to charge me to tear down the shocks so I left the wheels and took the shocks home. Tearing apart the shocks was a huge pain getting the top caps off. The coilovers were tough but with enough heat and breaker bar I got those apart. The top caps wouldn’t come off the rears so I ended up heading back to paisley who ended up at icon to take them off.

I took all the parts back to Mr “influencer” and he gave me a lead time of 1-2 weeks. Sounded good enough but after 2 weeks I called to check in and got the old “their in coating and will be done next week, I want them to be perfect and sick a$ fawk when I’m done”

Two more weeks came and went with no word and I got the same runaround for another 8 weeks. Finally I said I was going to come get the parts and I needed cash or the wheels back. “Influencer”
Said come Fri morning and they will be ready.

No call I just showed up on Friday to find 80% of the parts were coated but had zero prep work before they were coated. On top of that the coating was missing in a few spots and all the bypass tubes weren’t even touched.

I figured at this point it’s just a bad deal and I gotta move on so I took the parts and went back to Pasley for the rebuild and valving.

Shocks are back now but I have yet to bolt them into the truck so no reviews yet on the new rear valving. Hoping it’s going to be “sick a$ Fawk” though.

I guess sometimes that’s just how these deals go, not going to blast “influencer” as it seems this is a common issue with them and I figure it’s not worth the drama.

I’ll upload some pics of the bypass shocks tomorrow…
 

Attachments

  • IMG_3086.png
    IMG_3086.png
    3.6 MB · Views: 29
Dude killed it on the cerakote
It’s pretty sad that the guy has a whole business of just doing cerakote and my dumbass did a better job in my backyard with a free oven and zero experience. His IG is full of full blown custom jobs that look amazing but he is constantly deleting comments from people asking where their orders are that were paid for 8-12 months ago.
 
It’s pretty sad that the guy has a whole business of just doing cerakote and my dumbass did a better job in my backyard with a free oven and zero experience. His IG is full of full blown custom jobs that look amazing but he is constantly deleting comments from people asking where their orders are that were paid for 8-12 months ago.
Dang! Sucks you got taken and ended up with some half coated shocks
 
Back
Top