Da boat

Chancegoodman

Well-known member
Joined
Oct 2, 2022
Messages
268
Location
temecula , ca
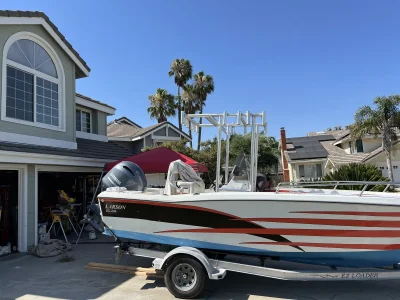
Alright so this project is for the other kind of off-road . The water
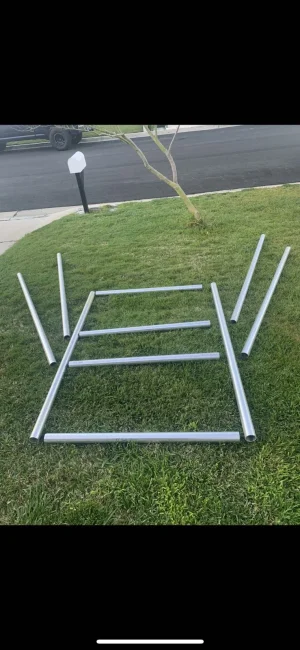
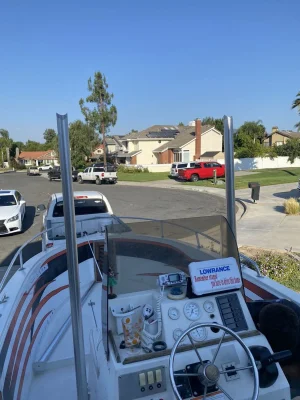
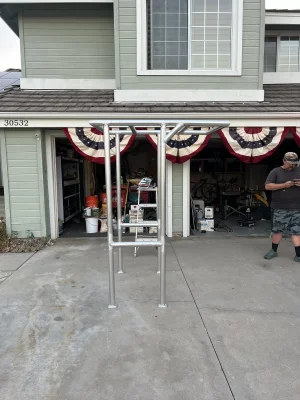
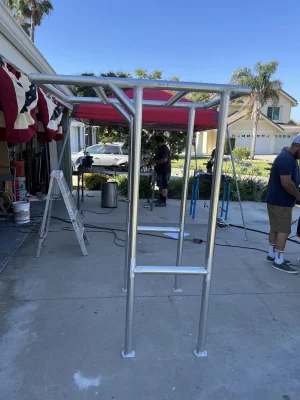
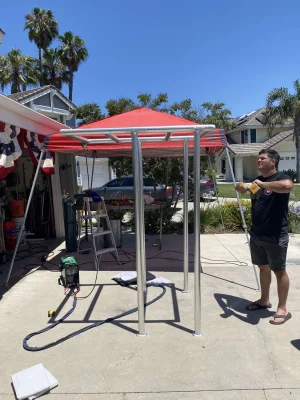
My buddy has a 20ft center console that we use for fishing and since he’s got we wanted to do a t-top for the boat. We started off with a loose plan and just went for it.
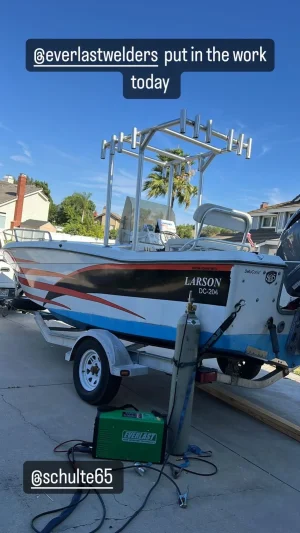
Material we have used was some 2-3/8” aluminum tubing but it was all anodized so we had the fun time of sanding the ever living shit out of it to get through that layer
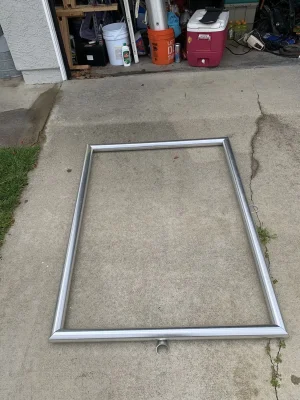
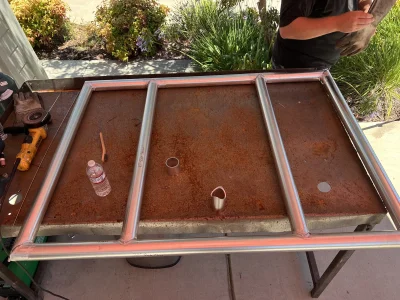
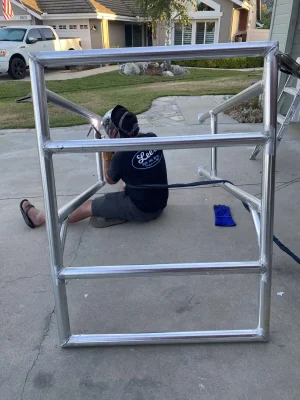
Once we got all sanded down and it was time to weld we used some 3/32” rod with my everlast welder that did damn well I will say and recommend it for anyone looking for a welder for aluminum
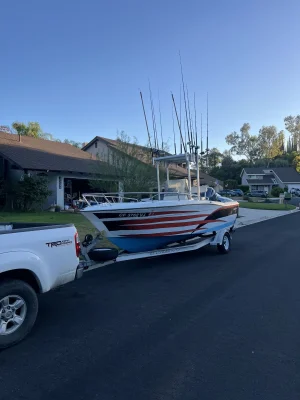
 

Attachments

  • IMG_8156.webp
    IMG_8156.webp
    729 KB · Views: 17
  • IMG_8155.webp
    IMG_8155.webp
    206 KB · Views: 13
  • IMG_8153.webp
    IMG_8153.webp
    501.1 KB · Views: 11
  • IMG_8137.webp
    IMG_8137.webp
    404.9 KB · Views: 9
  • IMG_8152.webp
    IMG_8152.webp
    203.3 KB · Views: 10
With tooling we were pretty basic with a notcher off Amazon that’s a knock off of the jd2 one tape chop saw grinder and a square and this whole process has been pretty good experience with my minimal tig experience to just saying fuck it and figure it out as we go and as long as the material was clean it wasn't that bad to weld until I would hit a patch of anodizing that was missed
 

Attachments

  • IMG_8139.webp
    IMG_8139.webp
    214 KB · Views: 8
  • IMG_8142.webp
    IMG_8142.webp
    279.1 KB · Views: 8
  • IMG_8141.webp
    IMG_8141.webp
    268.7 KB · Views: 9
  • IMG_8150.webp
    IMG_8150.webp
    299.9 KB · Views: 13
  • IMG_8147.webp
    IMG_8147.webp
    257.7 KB · Views: 14
  • IMG_8146.webp
    IMG_8146.webp
    304.3 KB · Views: 20
Still have a bunch to go with adding pole holders and some stand off to tie it back to the console along with making a storage compartment
 
Nice, Chance! Check out Martinmarinedesign on Instagram. The dude is a machine at anodized aluminum. I think he burns right through it using the cleaning action of ac tig
 
Took the weekend to work on the boat again added the supports to console which helped stiffen up the frame by a lot. Ended up only doing heavy tacks on the pole holders because they were just fighting me the hole time and I was about to burn it all down. My guess is I didn’t have enough tungsten stick out and the arc was just way unstable. Also thank you to @the bodj for showing me that guy on insta made welding all thst way better I owe you a rack of beer for how much of a headache you saved me
 

Attachments

  • IMG_8219.webp
    IMG_8219.webp
    231.3 KB · Views: 15
  • IMG_8220.webp
    IMG_8220.webp
    182.9 KB · Views: 17
  • FC1AC3FF-1FAC-406C-8F4F-40A349E8AED0.webp
    FC1AC3FF-1FAC-406C-8F4F-40A349E8AED0.webp
    158.6 KB · Views: 19
This was my brother‘s old 20ft skipjack. The top was on it when he bought it, but there was zero triangulation, so the whole thing would shift side to side like 4” when hitting a swell. I added the diagonals in front of the windshield and it made it rock solid.

60055AE9-93FE-42C6-B21C-7C8884929429.webp
 
Here’s another boat update that no one asked for:
Thank god for my work letting use a spool gun I got all pole holders welded up in a hour compared to probably 3/4 hours with tig. Once the booger welds were all done it was time to add the abs plastic to the roof and we made sure it wasent going anywhere by putting about 150 riviots or so along with using a heat gun so we can wrap the abs over the front so wind doesent get under it. Last thing that was done was moving the antenna for the radio and the puck for the lowrance was moved to the roof. Later on we are going to have some fun doing fiberglass work molding in the bait tank and when that happens we’re going to take the time to paint it and make it semi pretty
 

Attachments

  • IMG_8374.webp
    IMG_8374.webp
    278.9 KB · Views: 6
  • IMG_8372.webp
    IMG_8372.webp
    217.4 KB · Views: 4
  • IMG_8370.webp
    IMG_8370.webp
    369.1 KB · Views: 4
Back
Top