Whipple Charged Gen Juan Raptor Build

blueherron96

New member
Joined
Nov 25, 2025
Messages
21
Location
MI
Figured it was time to start a build thread. This one is going to be long as I’ve had the truck for a couple years and have done a lot of work to it already so just bear with me.

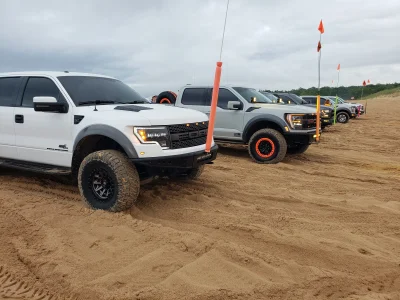
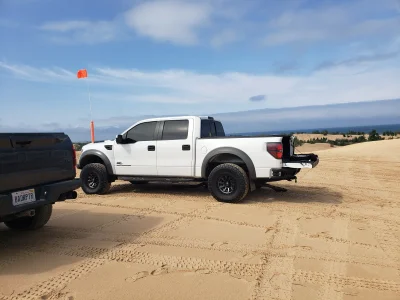
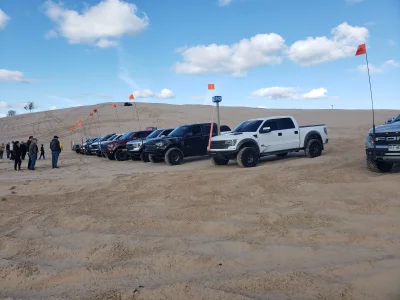
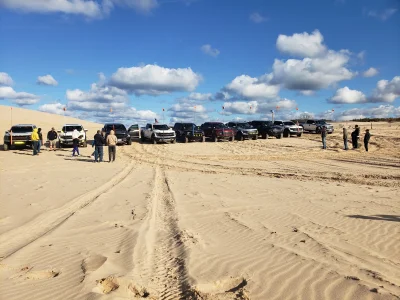
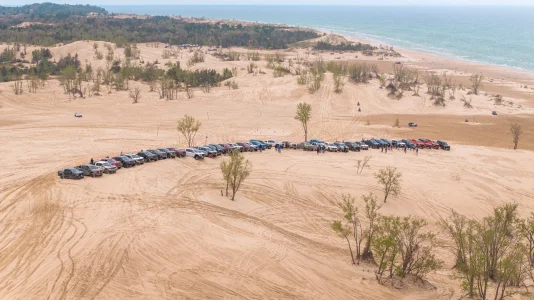
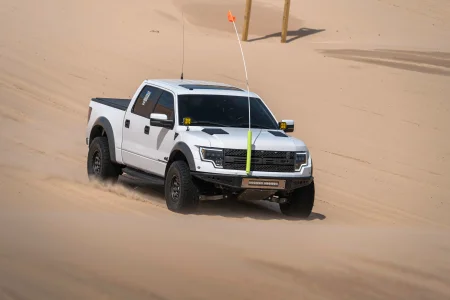
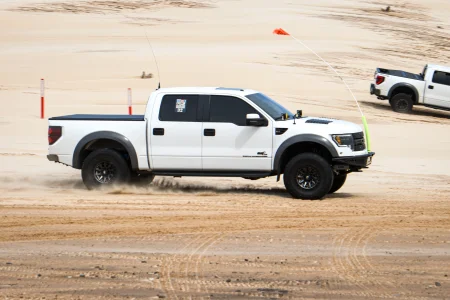
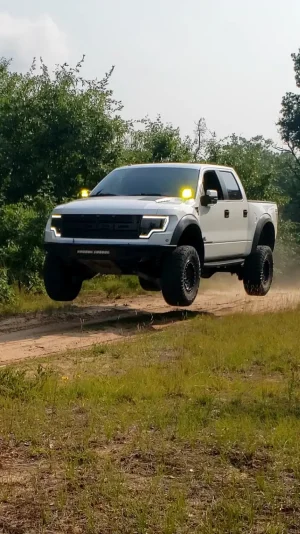
I guess I’ll start at the beginning of it all. I was always intrigued by the raptor since it was released and after seeing Mike Higgins tearing up the Silver Lake Sand Dunes back in 2011 I knew I had to have one.

https://www.youtube.com/watch?v=xDjODVPP6dM

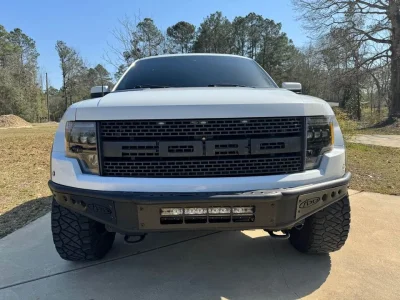
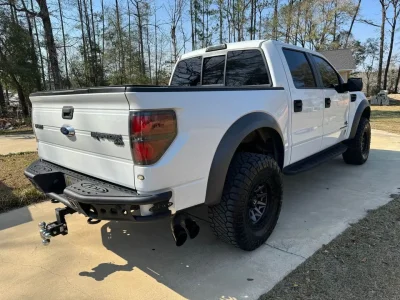
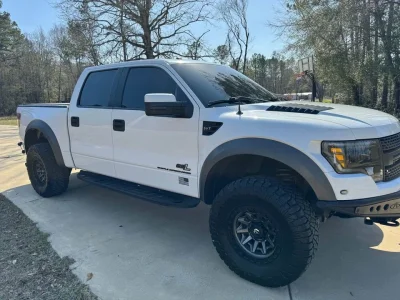
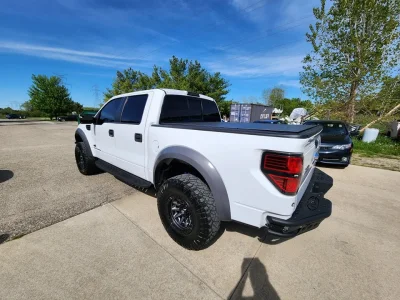
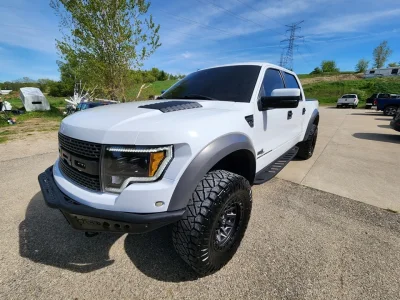
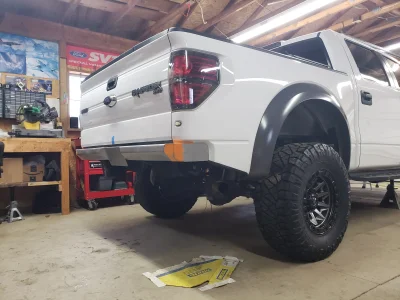
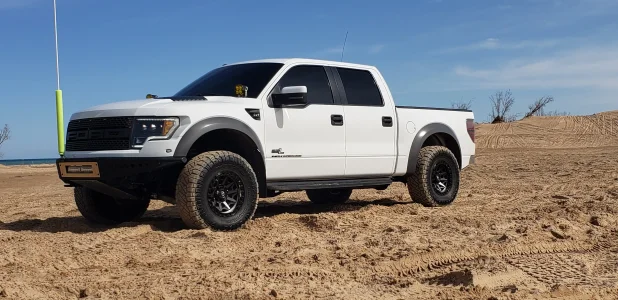
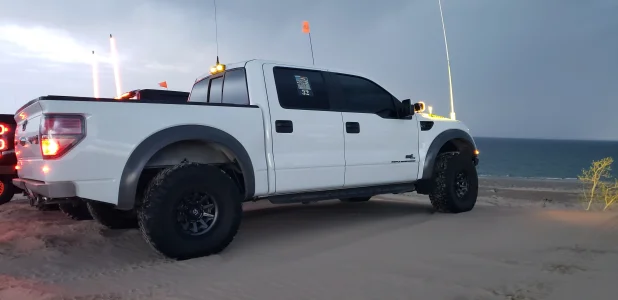
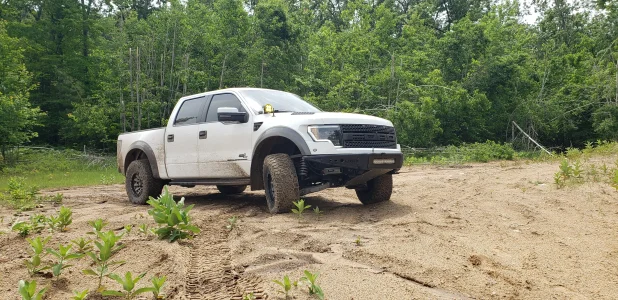
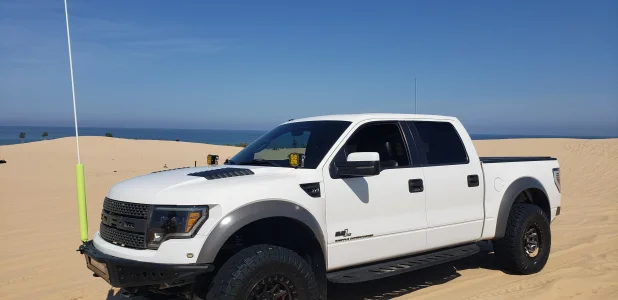
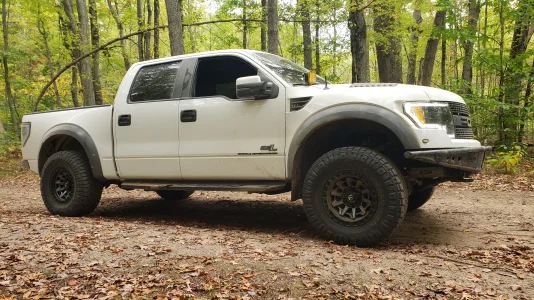
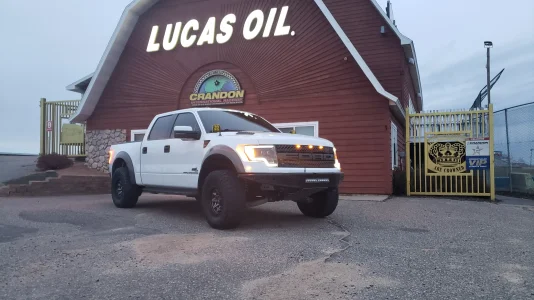
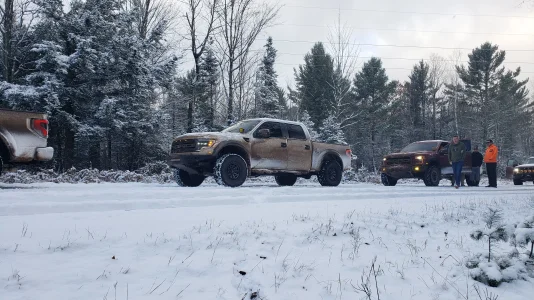
Fast forward to 2023 and I was finally in a position to buy my dream truck. After 8 months of searching (now March of 2024), I finally found a 2014 that had pretty much everything I wanted to do to the truck (at the time lol) for a good price. And the biggest thing was NO RUST. So I jumped on a plane as fast as I could and flew from Michigan to the coast of Mississippi and picked up my dream truck and drove it 1200 miles back home.

Mod list when I bought it:

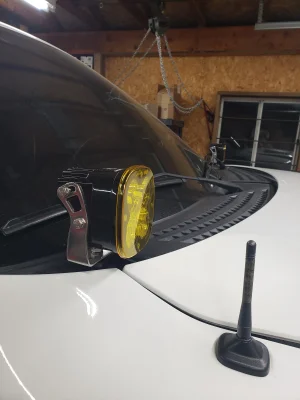
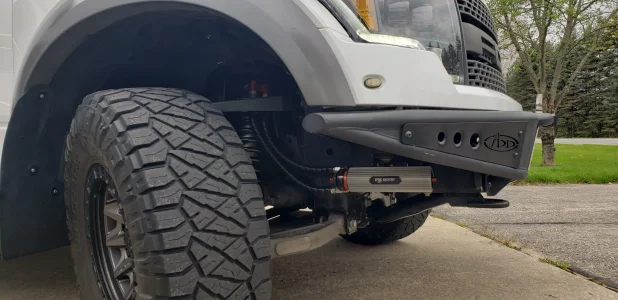
  • ADD bumpers front and rear with rigid lights
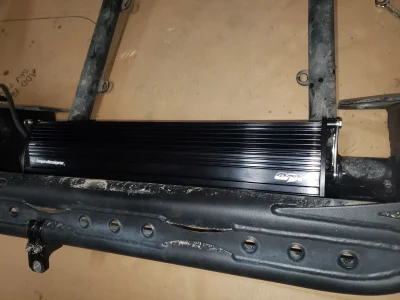
  • SYNC 3 head unit with full custom stereo
  • Morimoto headlights
  • 5% tint all around / 35% windshield
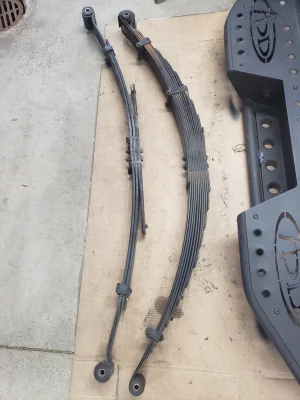
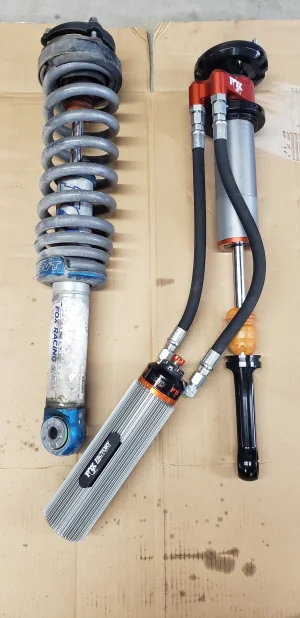
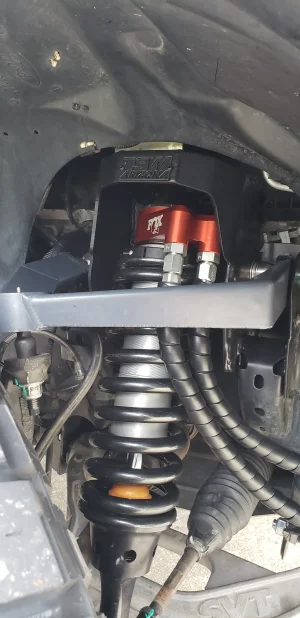
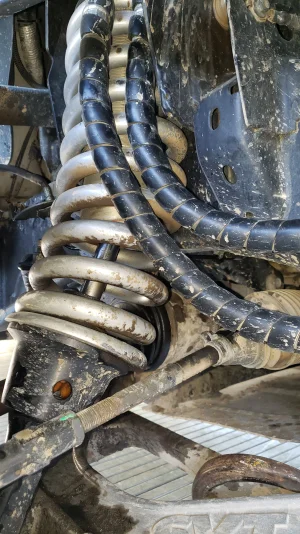
  • Geiser progressive rate front springs on mid perch
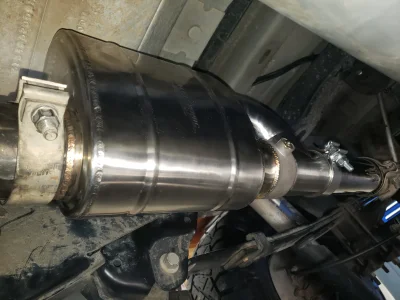
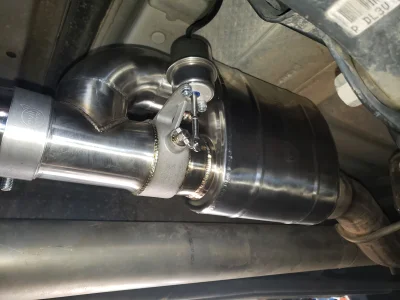
  • Stainless works catless headers
  • Corsa extreme exhaust
  • And the best part – a Whipple supercharger
 

Attachments

  • 408990275_10225505621489522_3048121032961710897_n.webp
    408990275_10225505621489522_3048121032961710897_n.webp
    138.4 KB · Views: 6
  • 428685084_10225505621769529_4715663197486201537_n.webp
    428685084_10225505621769529_4715663197486201537_n.webp
    170.3 KB · Views: 5
  • 428694217_10225505621729528_4602405668482282550_n.webp
    428694217_10225505621729528_4602405668482282550_n.webp
    145.5 KB · Views: 5
After driving home in the dark and rain, I knew the 35% windshield tint had to go so after a full fluid maintenance it went to a good friend for a paint correction and ceramic coat application along with replacing the 35% windshield tint with 50% ceramic tint. The difference was unbelievable. I could actually see out of the windshield but still get the benefits of reduced interior temp and I don’t have to hunt for my sunglasses every time the sun comes out. It’s also light enough that I don’t get harassed by the popo.
 

Attachments

  • 489743762_1228872455906215_7377872320258307145_n.webp
    489743762_1228872455906215_7377872320258307145_n.webp
    160.6 KB · Views: 3
  • 490135475_1228872705906190_8878631821101523802_n.webp
    490135475_1228872705906190_8878631821101523802_n.webp
    176.6 KB · Views: 3
Last edited:
I absolutely loved driving this thing. The power band with the Whipple is so addicting with the way it just keeps pulling. It wasn’t until I took it offroad for the first time that I fell in love with the truck and just could not stop laughing and grinning ear to ear.

This is when everything changed… Originally, I hadn’t planned on offroading it that hard and planned on it more just being mostly a street truck.

So, after a handful of dune trips throughout the year and some solo trail runs I had plans for the winter “build season” as we know it in Michigan to make the truck more offroad capable and ready to do some group runs.
 

Attachments

  • 20240518_133152.webp
    20240518_133152.webp
    3.3 MB · Views: 4
  • 20240622_103929.webp
    20240622_103929.webp
    1.7 MB · Views: 3
  • 20240817_112443.webp
    20240817_112443.webp
    1.1 MB · Views: 3
  • 20241026_110614.webp
    20241026_110614.webp
    1.3 MB · Views: 3
  • 20241026_110814.webp
    20241026_110814.webp
    1.4 MB · Views: 4
Last edited:
I wasn’t really sold on the ADD rear bumper because it stuck out so far. After seeing a Mazzulla bumper in person, I was sold. I wanted to keep a rear hitch receiver for doing recoveries and since the Mazzulla bumper doesn’t come with one, I had to get creative. I didn’t want to do a hidden hitch with a flip up license plate like I have seen others do because during a rear hook recovery it could get ripped off when flipped up if pulling at an extreme angle. I decided to make my own brackets to mount the bumper which would include provisions for a cross bar for the hitch receiver.

Was able to get the receiver up as high as possible just underneath the license plate. The hitch receiver is bolted on with 6 ¾” bolts and everything is ¼” thickness and where the cross bar meets the frame horn brackets is doubled up ¼” plates. The bumper then bolts to the receiver very similar to the factory configuration.

This thing is stout. I jack the rear of the truck up from this location and it has been used to pull several stuck trucks out at the sand dunes without any issues.
 

Attachments

  • 20241130_160908.webp
    20241130_160908.webp
    603.1 KB · Views: 4
  • 20241130_162925.webp
    20241130_162925.webp
    852.2 KB · Views: 4
  • 20241215_131826.webp
    20241215_131826.webp
    784.3 KB · Views: 4
  • 20241219_183142.webp
    20241219_183142.webp
    1.3 MB · Views: 3
  • 20241226_172041.webp
    20241226_172041.webp
    765.3 KB · Views: 2
  • 20250329_124958.webp
    20250329_124958.webp
    550.3 KB · Views: 2
  • 20250329_184318.webp
    20250329_184318.webp
    1.2 MB · Views: 2
  • 20250330_121137.webp
    20250330_121137.webp
    1,000.8 KB · Views: 2
  • 20250401_190409.webp
    20250401_190409.webp
    333.4 KB · Views: 1
  • 20250401_190415.webp
    20250401_190415.webp
    462.9 KB · Views: 1
  • 20250401_190548.webp
    20250401_190548.webp
    334.8 KB · Views: 2
Last edited:
I always get asked about my exhaust setup. With dovetailing the bedsides, the standard exit corsa exhaust wasn’t going to work. My wife and I also had a baby on the way and my wife wanted me to make the exhaust quieter for the baby. During one of the dune trips, my exhaust kept falling off so I ran most of the day with open headers dumped under the passenger floor. I absolutely loved the way that the open headers sounded in the dunes. I looked into cutouts, but the electronic ones are known to have all kinds of issues. I finally landed on a Valvetronic Designs valved muffler that uses a vacuum actuated valve.

I was able to adapt it to the piping from the corsa cat back setup so it was basically just a muffler swap. I cut the tailpipe into a over the axle dump so it would look better with the dovetailed bedsides. I really like the way that it came out and with the valve closed it sounds pretty close to stock and with the valve open it is an absolute screamer. Really wish I had better videos of it because the ones I have do not do it justice.
 

Attachments

  • 20250131_150940.webp
    20250131_150940.webp
    714.2 KB · Views: 2
  • 20250131_151008.webp
    20250131_151008.webp
    775 KB · Views: 2
  • Video Project 1.mp4
    Video Project 1.mp4
    5.1 MB
Last edited:
I knew if I wanted to do group events then I was going to need to upgrade my lighting and radio package. I needed to add chase lights and after doing a few group trail runs I understand why. Driving in the dust is knarly. I also wanted to upgrade the rigid lights that came with the truck because they just didn’t work as good as I thought they should so it got a full Baja Designs lighting package.

  • 20” OnX6 bar for the front bumper
  • XL80 ditch lights
  • S2 pros for the rear bumper for reverse lights
  • RPG third brake light w/ S2 sports and NMO antenna mount
Since the high beams of the Morimoto headlights really don’t do much, I wired the OnX6 to be triggered with the high beam switch. I didn’t want the light bar to come on every time I hit the high beam switch so instead of wiring the relay direct to the battery, I wired the power to the relay to an upfitter switch and the trigger wire to the high beams. This allows me to maintain normal operation of the high beams and if I flip upfitter switch 1 AND turn the high beams on, the OnX6 bar will turn on.

I also needed to upgrade from a 5W handheld radio to a 50W mounted radio. Ended up going with a Icom 2730A from LVJ Motorsports that comes programmed with just about every channel you would need for doing any raptor run in the country. I’m not a fan of the traditional dash or center console mount so decided to mount the face plate in the headliner with the main box under the passenger seat. For an antenna, Keith from LVJ recommended a longer steel whip antenna for doing trail runs and a shorter flexible antenna for daily driving or dune trips where we don’t get that far spread out.
 

Attachments

  • 20241215_175842.webp
    20241215_175842.webp
    437.6 KB · Views: 2
  • 20241216_181615.webp
    20241216_181615.webp
    927.4 KB · Views: 2
  • 20250116_173617.webp
    20250116_173617.webp
    850.9 KB · Views: 1
  • 20250311_174108.webp
    20250311_174108.webp
    1.8 MB · Views: 1
  • 20250311_174225.webp
    20250311_174225.webp
    1.1 MB · Views: 0
  • 20250311_174236.webp
    20250311_174236.webp
    1.3 MB · Views: 0
  • 20250312_160149.webp
    20250312_160149.webp
    507.2 KB · Views: 0
Last edited:
On the final dune trip of the year, I blew the power steering pump. After talking to a lot of people, I decided to do the full Lee kit. While I was in there, I replaced the steering rack because it had some slop and a slight leak. While the rack was out, I serviced the front diff with new fluid and a Spicer cover. Also added an oil pressure sensor since these trucks don’t have one from the factory. While I was doing this, I also added a boost gauge so I could see how much boost the truck is making along with a carbon fiber gauge pod. This setup goes perfect with the Edge CTS3 monitor. Also swapped out the factory trans cooler for the “Saudi cooler” as well as deleted the quick connect fittings on the trans cooler lines that are known to fail.
 

Attachments

  • 20241114_165352.webp
    20241114_165352.webp
    1.2 MB · Views: 0
  • 20241119_180757.webp
    20241119_180757.webp
    888.7 KB · Views: 0
  • 20241227_143703.webp
    20241227_143703.webp
    1.4 MB · Views: 0
  • 20241228_153056.webp
    20241228_153056.webp
    1.5 MB · Views: 0
  • 20241228_153105.webp
    20241228_153105.webp
    1 MB · Views: 0
  • 20241231_172546.webp
    20241231_172546.webp
    858.9 KB · Views: 0
  • 20241231_172608.webp
    20241231_172608.webp
    1 MB · Views: 0
  • 20250206_161924.webp
    20250206_161924.webp
    1.1 MB · Views: 0
  • 20250206_165329.webp
    20250206_165329.webp
    796.5 KB · Views: 2
Last edited:
And this is when everything started to snowball… It started with finding a set of used deaver +3 leaf springs for a good deal. Then I found a bypass rack and 3.0x16 triple bypass shocks for a deal I couldn’t pass up. It was getting close to spring, so I wasn’t going to have time to get the shocks done right but I did get the deavers and bypass rack w/ bed support installed.

I was trying to figure out what I was going to do for front shocks to pair with the bypasses out back and was leaning towards doing the gen 2 coil bucket conversion with King IBP coilovers for the gen 2. Then a set a of gen 2 FRS Foxes went on a sale that I couldn’t pass up. So I started gathering parts for the coil bucket conversion.

In the meantime, it was now spring and Silver Lake Sand Dunes opens every year on April 1. Was able to make it out for opening weekend which is always a different experience than the rest of the year because the sand is so smooth and you can just run laps all day long.
 

Attachments

  • 20250208_133800.webp
    20250208_133800.webp
    1 MB · Views: 2
  • 20250213_165754.webp
    20250213_165754.webp
    1.2 MB · Views: 2
  • 20250319_181437.webp
    20250319_181437.webp
    832.7 KB · Views: 1
  • 20250319_182013.webp
    20250319_182013.webp
    964.2 KB · Views: 1
  • 20250322_152040.webp
    20250322_152040.webp
    765.2 KB · Views: 1
  • 20250405_112443.webp
    20250405_112443.webp
    735.9 KB · Views: 1
  • 20250405_112502.webp
    20250405_112502.webp
    927.8 KB · Views: 2
Last edited:
Had some fun in the sand and then it was time to get back to work with the gen 2 coilover conversion. While I was doing this, I decided to do a slot delete with some old adjustable Rogue control arms I had picked up with a bunch of other spare front end parts. The goal was to get this completed within 4 weeks because there was a big raptor event at the dunes in May that I wanted to go to.
 

Attachments

  • 20250410_161131.webp
    20250410_161131.webp
    718.4 KB · Views: 2
  • 20250410_165253.webp
    20250410_165253.webp
    662.2 KB · Views: 2
  • 20250411_102226.webp
    20250411_102226.webp
    704.7 KB · Views: 1
  • 20250411_103939.webp
    20250411_103939.webp
    606.7 KB · Views: 2
  • 20250504_173659.webp
    20250504_173659.webp
    578.3 KB · Views: 2
  • 20250504_173716.webp
    20250504_173716.webp
    655 KB · Views: 2
  • 20250504_174028.webp
    20250504_174028.webp
    798.3 KB · Views: 1
  • 20250504_174102.webp
    20250504_174102.webp
    818.6 KB · Views: 1
Last edited:
Was able to get the gen 2 conversion wrapped up and made it to the event at Silver Lake. Had a blast and learned very quickly that the 550lb springs that came on the FRS coilovers were not near enough spring rate to hold the gen 1 up. After talking to a local shock guy, ended up swapping to 700lb springs and it is much better offroad.
 

Attachments

  • 20250516_204658.webp
    20250516_204658.webp
    285.1 KB · Views: 1
  • 20250517_155717.webp
    20250517_155717.webp
    666 KB · Views: 1
  • DJI_20250517190414_0489_D-HDR-Enhanced-NR-Edit.webp
    DJI_20250517190414_0489_D-HDR-Enhanced-NR-Edit.webp
    4.8 MB · Views: 1
  • DSC_4778-Enhanced-NR-Edit.webp
    DSC_4778-Enhanced-NR-Edit.webp
    722.1 KB · Views: 1
  • IMG_3564.webp
    IMG_3564.webp
    570.7 KB · Views: 0
  • KRG_0285.webp
    KRG_0285.webp
    1.3 MB · Views: 1
Last edited:
The rest of 2025 was spent enjoying the truck. Lots of great adventures and some broken parts along the way. Here’s a photo dump of some of the adventures along with some of the carnage.
 

Attachments

  • 20250621_133534.webp
    20250621_133534.webp
    2.4 MB · Views: 2
  • 20250717_110213.webp
    20250717_110213.webp
    959.7 KB · Views: 2
  • 20250717_110238.webp
    20250717_110238.webp
    807.9 KB · Views: 3
  • 20250721_105918.webp
    20250721_105918.webp
    376.1 KB · Views: 4
  • 20250722_195432.webp
    20250722_195432.webp
    431.5 KB · Views: 3
  • 20250731_103243.webp
    20250731_103243.webp
    1.7 MB · Views: 2
  • 20250731_122315.webp
    20250731_122315.webp
    2 MB · Views: 1
  • 20250731_130430.webp
    20250731_130430.webp
    231.6 KB · Views: 2
  • Video Project 2.mp4
    Video Project 2.mp4
    6.7 MB
Last edited:
Photo dump continued...
 

Attachments

  • IMG_4510.webp
    IMG_4510.webp
    1.4 MB · Views: 2
  • IMG_4504.webp
    IMG_4504.webp
    1.3 MB · Views: 2
  • 20250823_205414.webp
    20250823_205414.webp
    905.6 KB · Views: 3
  • 20250823_192210.webp
    20250823_192210.webp
    1.2 MB · Views: 3
  • 20250823_210652.webp
    20250823_210652.webp
    275 KB · Views: 3
  • Video Project 7.mp4
    Video Project 7.mp4
    6.8 MB
  • 20251010_150102.webp
    20251010_150102.webp
    2 MB · Views: 2
  • 20251018_121056.webp
    20251018_121056.webp
    807.1 KB · Views: 1
  • 20251018_132047.webp
    20251018_132047.webp
    957.1 KB · Views: 6
Last edited:
Photo dump continued...
 

Attachments

  • 20251106_164130.webp
    20251106_164130.webp
    806.5 KB · Views: 6
  • 20251108_090706.webp
    20251108_090706.webp
    2 MB · Views: 6
  • 20251108_090959.webp
    20251108_090959.webp
    1.7 MB · Views: 1
  • 20251108_100733.webp
    20251108_100733.webp
    647.1 KB · Views: 0
  • 20251108_112951.webp
    20251108_112951.webp
    803.4 KB · Views: 1
  • 20251109_095908.webp
    20251109_095908.webp
    1.6 MB · Views: 1
Last edited:
So that brings us to the winter of 2025. The big project this winter is a major overhaul of the rear suspension adding the 16” bypasses thru the bed. I started with cutting the shock mounts and front bed mounts off the frame. Replaced the bed mounts with some reinforced ones from TSW AZ. Got the holes cut in the bed to run the shocks thru. While disassembling the leaf spring packs to cycle the suspension, I found several cracked leafs. This was a big bummer because I didn’t plan on having to buy new leaf springs but that’s what happens when you buy used parts. At least I got a season out of them. I went with deaver +4.5s this time to have more free arch for more available up travel.
 

Attachments

  • 20251121_195017.webp
    20251121_195017.webp
    2.4 MB · Views: 1
  • 20251122_110445.webp
    20251122_110445.webp
    2.7 MB · Views: 1
  • 20251122_162833.webp
    20251122_162833.webp
    1.5 MB · Views: 1
  • 20251123_201153.webp
    20251123_201153.webp
    4.3 MB · Views: 1
  • 20251126_212607.webp
    20251126_212607.webp
    2.6 MB · Views: 2
Last edited:
Once the deavers arrived, I got those torn down so I could start cycling the suspension. I’m trying to get everything I can out of this spring over setup so that means pushing the boundaries on up travel. Deaver recommends to not exceed 1” of negative arch on the spring. I ended up at 1.5” of negative arch. Any more up travel and the springs start crashing into the bump kit. I could clearance the bump kit for more up travel but the spring is already at its limit for negative arch. So with the bump height set, I was able to start designing the shock mounts. I wanted to integrate the shock mount and bump pad into one piece and I really like the way they came out. Not giving away travel numbers yet but I’m very happy with where it came out with the 16” stroke shocks.
 

Attachments

  • 20251212_173505.webp
    20251212_173505.webp
    606.2 KB · Views: 2
  • 20251213_132359.webp
    20251213_132359.webp
    2 MB · Views: 2
  • 20251213_134000.webp
    20251213_134000.webp
    2.2 MB · Views: 2
  • 20251213_200154.webp
    20251213_200154.webp
    2.4 MB · Views: 2
  • 20251216_213049.webp
    20251216_213049.webp
    1.1 MB · Views: 3
Last edited:
Now it’s time for the highly debated topic of traction bars. The deavers alone were not enough to stop the wheel hop with the added power from the Whipple so I needed some kind of axle wrap control system. I looked at every available option on the market and really didn’t trust any of the claims that different brands make. It makes sense why they wouldn’t work with extended travel but I wanted to find out for myself just how much they would limit travel. So I built my own set of traction bars and quite frankly I’m impressed. Yes, you do give up some down travel. But the amount I’m giving up is almost negligible. I’ll get into final travel numbers later but I’m excited to do some testing with these in the dirt to see how much of a difference they make.
 

Attachments

  • 20251226_211724.webp
    20251226_211724.webp
    1.8 MB · Views: 3
  • 20251228_170841.webp
    20251228_170841.webp
    1.9 MB · Views: 4
  • 20251228_172037.webp
    20251228_172037.webp
    1.6 MB · Views: 3
  • 20251228_172055.webp
    20251228_172055.webp
    1.3 MB · Views: 3
  • 20251228_174552.webp
    20251228_174552.webp
    479.5 KB · Views: 3
Last edited:
While I waited on limit straps to show up, I started working on the new layout for the bed cage. After using the bypass rack and bed support system for a year there were some things I really didn’t like about it and wanted to move some things around and add additional items such as an easily accessible box with my air compressor and recovery gear that wasn’t buried at the front of the bed and better storage for spare fluids. I was able to come up with a layout that works and will add rigidity to the rear frame section to hopefully cure some of the gen 1 twerk. I added mounting points to tie the bed cage directly to the frame in 2 additional spots. This is still a work in progress and will have x bracing between all the mounting points where the bed cage bolts to the bed and frame.
 

Attachments

  • 20260104_123903.webp
    20260104_123903.webp
    1 MB · Views: 3
  • 20260104_143245.webp
    20260104_143245.webp
    3.1 MB · Views: 3
  • 20260104_143257.webp
    20260104_143257.webp
    2.8 MB · Views: 3
  • 20260104_210102.webp
    20260104_210102.webp
    1 MB · Views: 5
Last edited:
And this is where we are currently. Got the limit straps installed and am finally done cycling the suspension. Now it’s time to give these deavers a proper coating so they don’t rust so easily.
 

Attachments

  • 20260109_180009.webp
    20260109_180009.webp
    4.9 MB · Views: 5
  • 20260109_213921.webp
    20260109_213921.webp
    970.8 KB · Views: 5
  • 20260110_134114.webp
    20260110_134114.webp
    1.1 MB · Views: 5
Last edited:
Back
Top