DZRT XJ 2.0

Dzrt.XJ

Member
Joined
Dec 1, 2024
Messages
17
I’m not sure why I’ve procrastinated this long to create a build thread, but here I am! I’m so glad to finally have an original style forum to do build threads again!


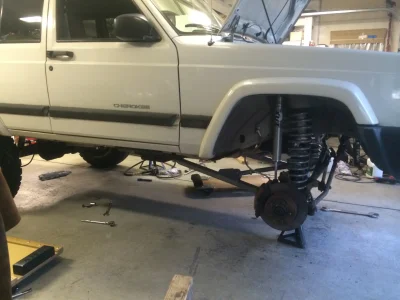
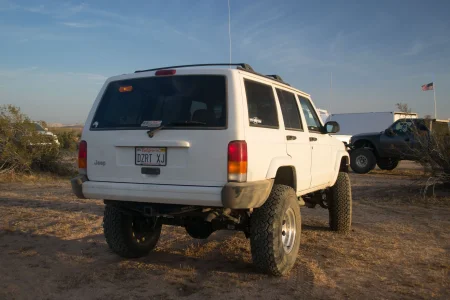
Time for a little history on DZRT XJ. Before I left SoCal and moved to NC I had a 99 XJ that I was building into a Jeepspeed style prerunner. It was a super clean 2wd 5 speed that I put a RE 5.5 long arm kit, Fox 2.0’s, 4.10’s and 33’s. That Jeep saw a ton of dirt miles, but as a high school/college kid I could never do everything I wanted to it. I ended up selling that Jeep before I moved east and have regretted selling it ever since. This is where the story of DZRT XJ 2.0 starts.

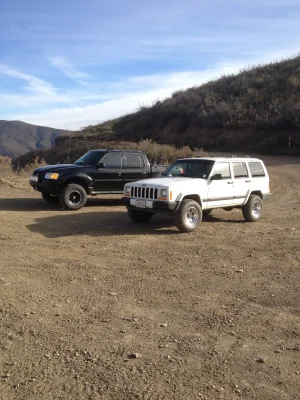
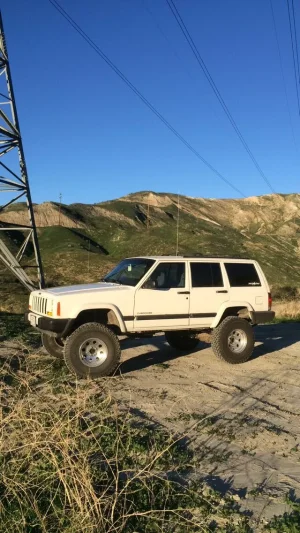
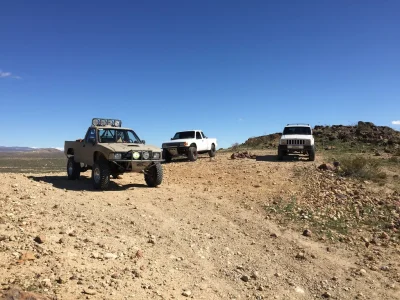
Here’s some photos of my old 99’ featuring some glamour shots with the mouse back in the day.
 

Attachments

  • IMG_4793.jpeg
    IMG_4793.jpeg
    2.2 MB · Views: 46
  • IMG_0033.jpeg
    IMG_0033.jpeg
    1 MB · Views: 33
  • IMG_0725.jpeg
    IMG_0725.jpeg
    234.9 KB · Views: 19
  • IMG_1247.jpeg
    IMG_1247.jpeg
    326 KB · Views: 15
  • IMG_9069.jpeg
    IMG_9069.jpeg
    1.7 MB · Views: 13
Time for a quick update on version 2.0. After trying to hunt my old jeep down and buy I back I decided to just build a new one. Years later I’ve decided to build another one, and do it the right way. This thing is going to be a little more of a crawler than the last one, but still with a ton of west coast and Jeepspeed influence.

I picked up this pretty clean and rust free 98’ for $1200 with a blown motor. The interior and body are in pretty good shape considering it has 240k on it. This old motor was completely trashed and overheated to an extent that I’ve never seen before. I built up a brand new 4.0 with help from a friend of mine that is a leader in the performance Jeep 4.0 industry. This new engine is 100% freshly built. It’s .030 over, .030 decked, aftermarket pistons cut to deck height, a Newcomer Racing cam, and a built head with some port and chamber work. I got it installed early last year and now that the tune has been dialed in with HP Tuners it’s a whole different animal now. At this point it was finally time move onto actually building this thing.
 

Attachments

  • IMG_8353.jpeg
    IMG_8353.jpeg
    1.9 MB · Views: 9
  • IMG_8356.jpeg
    IMG_8356.jpeg
    3 MB · Views: 8
  • IMG_8358.jpeg
    IMG_8358.jpeg
    2.8 MB · Views: 8
  • IMG_8614.jpeg
    IMG_8614.jpeg
    1.9 MB · Views: 9
  • IMG_8290.jpeg
    IMG_8290.jpeg
    1.7 MB · Views: 8
  • IMG_8089.jpeg
    IMG_8089.jpeg
    2.1 MB · Views: 8
  • IMG_8046.jpeg
    IMG_8046.jpeg
    1.7 MB · Views: 9
  • IMG_8011.jpeg
    IMG_8011.jpeg
    2 MB · Views: 9
  • IMG_2249.jpeg
    IMG_2249.jpeg
    2.4 MB · Views: 9
  • IMG_2252.jpeg
    IMG_2252.jpeg
    1.3 MB · Views: 9
  • IMG_1036.jpeg
    IMG_1036.jpeg
    2.4 MB · Views: 10
This is where the parts hoarding started for the first phase of the build.

5.5 Rubicon Express long arm
Barnes full frame stiffeners and axle brackets
XJ Dana 44 I found on marketplace
4.56’s
ARB’s front and rear
ECGS chromoly rear shafts
Method MR304’s with 33x12.50 KM3’s
 

Attachments

  • IMG_8448.jpeg
    IMG_8448.jpeg
    4 MB · Views: 9
  • IMG_2482.jpeg
    IMG_2482.jpeg
    2.5 MB · Views: 9
  • IMG_9758.jpeg
    IMG_9758.jpeg
    2.1 MB · Views: 9
  • IMG_6494.jpeg
    IMG_6494.jpeg
    2.5 MB · Views: 12
Trying to catch up on updates, so here’s a big one. A few weeks ago I got the Barnes frame stiffeners knocked out and started to install the front kit. I’m pretty stoked with how it’s coming out. I’m waiting on some tabs for the front sway bar, and then I can cycle the front end and check everything out. Next up, building axles and other Misc side projects!
 

Attachments

  • IMG_2683.jpeg
    IMG_2683.jpeg
    3.1 MB · Views: 10
  • IMG_2667.jpeg
    IMG_2667.jpeg
    3.1 MB · Views: 10
  • IMG_2604.jpeg
    IMG_2604.jpeg
    2.6 MB · Views: 12
  • IMG_2584.jpeg
    IMG_2584.jpeg
    3.4 MB · Views: 14
  • IMG_2580.jpeg
    IMG_2580.jpeg
    4.4 MB · Views: 14
  • IMG_2579.jpeg
    IMG_2579.jpeg
    3 MB · Views: 15
  • IMG_2577.jpeg
    IMG_2577.jpeg
    2.3 MB · Views: 12
Knocked out a couple side projects. I 3D printed the final version of my switch pro mount that I designed, mounted my ARB compressor for the lockers, and put a riv-nut in the back window to hold my s2 dust light.
 

Attachments

  • IMG_3387.jpeg
    IMG_3387.jpeg
    1.1 MB · Views: 12
  • IMG_3359.jpeg
    IMG_3359.jpeg
    1.9 MB · Views: 11
  • IMG_3351.jpeg
    IMG_3351.jpeg
    1.9 MB · Views: 11
  • IMG_3347.jpeg
    IMG_3347.jpeg
    2 MB · Views: 13
  • IMG_2359.jpeg
    IMG_2359.jpeg
    1.9 MB · Views: 12
  • IMG_3302.jpeg
    IMG_3302.jpeg
    2.8 MB · Views: 12
  • IMG_0708.jpeg
    IMG_0708.jpeg
    1.9 MB · Views: 14
Time for another update! I got the front end all setup and assembled. The 4.56’s and an ARB should make this thing plenty capable. It’s got all new axle shafts, Barnes lower arm skids and an upper arm mount gusset. It’s finally sitting under its own weight!

Friendly tip for anyone running a Dana 30 and they’re sick of the plastic vent fitting. A JK vent fitting (68017179AA) fits perfectly and won’t break off like the brittle plastic ones.
 

Attachments

  • IMG_3211.jpeg
    IMG_3211.jpeg
    2.8 MB · Views: 12
  • IMG_3206.jpeg
    IMG_3206.jpeg
    3.2 MB · Views: 11
  • IMG_3203.jpeg
    IMG_3203.jpeg
    2.3 MB · Views: 10
  • IMG_3202.jpeg
    IMG_3202.jpeg
    2.1 MB · Views: 11
  • IMG_3083.jpeg
    IMG_3083.jpeg
    3.8 MB · Views: 9
  • IMG_3081.jpeg
    IMG_3081.jpeg
    2.1 MB · Views: 11
  • IMG_2742.jpeg
    IMG_2742.jpeg
    2.2 MB · Views: 11
  • IMG_2715.jpeg
    IMG_2715.jpeg
    2.4 MB · Views: 9
  • IMG_2711.jpeg
    IMG_2711.jpeg
    3.2 MB · Views: 9
Update time! I got this Dana 44 buttoned up with her 4.56’s, and ARB and chromoly shafts. I took the time to remove all holes for the original brake line brackets and retapped for a new vent since the old one was stripped out.
 

Attachments

  • IMG_3614.jpeg
    IMG_3614.jpeg
    2.1 MB · Views: 7
  • IMG_3615.jpeg
    IMG_3615.jpeg
    1.9 MB · Views: 7
  • IMG_3608.jpeg
    IMG_3608.jpeg
    1.9 MB · Views: 7
  • IMG_3606.jpeg
    IMG_3606.jpeg
    1.4 MB · Views: 7
  • IMG_3604.jpeg
    IMG_3604.jpeg
    2.1 MB · Views: 8
  • IMG_3485.jpeg
    IMG_3485.jpeg
    2.2 MB · Views: 7
  • IMG_3483.jpeg
    IMG_3483.jpeg
    1.9 MB · Views: 7
  • IMG_3482.jpeg
    IMG_3482.jpeg
    1.9 MB · Views: 7
  • IMG_3487.jpeg
    IMG_3487.jpeg
    3.1 MB · Views: 10
dang dude going all out on this one. Any good wheeling out by you ?

Are you still a mechanic on that race team ?
That’s the plan! My last jeep was fun, but this one is going to be so much better. I have way better tools and way more experience than I had back in high school! lol

The wheeling isn’t the best by me, but I’m a couple hours away from Windrock. I’d like to venture back west with this thing one day.


I don’t work in racing anymore, I work for GM now.
 
Last edited:
That’s the plan! My last jeep was fun, but this one is going to be so much better. I have way better tools and way more experience than I had back in high school! lol

The wheeling isn’t the best by me, but I’m a couple hours away from Windrock. I’d like to venture back west with this thing one day.


I don’t work in racing anymore, I work for GM now.
Not much public land out that way is there ?
 
Not much public land out that way is there ?
Sadly there isn’t. That’s something I definitely didn’t appreciate as much as I should have before I moved. I never realized how good we had it in SoCal😂
 
Side project #69:

I decided this thing really needed a winch and some sweet lighting so I picked up this Dirtbound Off-road DIY bumper, a Warn Zeon 10-S and a 10” BD S8. After doing some metal finishing I got it painted up and installed. Stoked with how it looks!
 

Attachments

  • IMG_8297.jpeg
    IMG_8297.jpeg
    2.1 MB · Views: 10
  • IMG_8310.jpeg
    IMG_8310.jpeg
    3.1 MB · Views: 8
  • IMG_3339.jpeg
    IMG_3339.jpeg
    2 MB · Views: 9
  • IMG_3344.jpeg
    IMG_3344.jpeg
    1.8 MB · Views: 9
  • IMG_3368.jpeg
    IMG_3368.jpeg
    3.3 MB · Views: 9
  • IMG_3589.jpeg
    IMG_3589.jpeg
    2.6 MB · Views: 9
  • IMG_3656.jpeg
    IMG_3656.jpeg
    3.1 MB · Views: 13
In typical XJ fashion the drag link hits the sway bar tabs when you cycle the suspension and turn right. The fact that I’ve swapped over to bigger V8 ZJ steering definitely doesn’t help. I ordered these massive high clearance sway bar tabs from Metalcloak and ended cutting them 2” shorter to optimize my sway bar angle. They’re way over kill, especially with this doubler plate on them, but atleast I know they won’t fold or snap.
 

Attachments

  • IMG_3433.jpeg
    IMG_3433.jpeg
    1.8 MB · Views: 9
  • IMG_3684.jpeg
    IMG_3684.jpeg
    1.9 MB · Views: 9
  • IMG_3686.jpeg
    IMG_3686.jpeg
    2.8 MB · Views: 8
  • IMG_3688.jpeg
    IMG_3688.jpeg
    1.3 MB · Views: 7
  • IMG_3690.jpeg
    IMG_3690.jpeg
    2 MB · Views: 7
  • IMG_3697.jpeg
    IMG_3697.jpeg
    2.1 MB · Views: 8
  • IMG_3722.jpeg
    IMG_3722.jpeg
    1.8 MB · Views: 13
With the front end all assembled, cycled and back under its own weight it’s time to move onto the rear.
 

Attachments

  • IMG_3595.jpeg
    IMG_3595.jpeg
    1.9 MB · Views: 7
  • IMG_3717.jpeg
    IMG_3717.jpeg
    1.9 MB · Views: 8
  • IMG_3712.jpeg
    IMG_3712.jpeg
    1.8 MB · Views: 6
  • IMG_3714.jpeg
    IMG_3714.jpeg
    1.9 MB · Views: 6
  • IMG_3713.jpeg
    IMG_3713.jpeg
    1.5 MB · Views: 6
  • IMG_3708.jpeg
    IMG_3708.jpeg
    2.6 MB · Views: 8
It took most of the day, but I got the rear section of the chassis stripped, prepped with some Alloy Armor, and frame stiffeners welded up.
 

Attachments

  • IMG_3742.jpeg
    IMG_3742.jpeg
    1.6 MB · Views: 9
  • IMG_3745.jpeg
    IMG_3745.jpeg
    2.2 MB · Views: 8
  • IMG_3788.jpeg
    IMG_3788.jpeg
    2.2 MB · Views: 12
I’m way behind on updates, and one of these days I’ll get caught up.

After I finished up the rear stiffeners I got the rear suspension installed and the rear axle mocked up for setting the spring perches and shock brackets. I got it all dialed in, welded up and painted. After some bolt shanking and OCD work I finally got it installed into the Jeep! After months of work it’s finally off jackstands!
 

Attachments

  • IMG_3795.jpeg
    IMG_3795.jpeg
    2.9 MB · Views: 6
  • IMG_3798.jpeg
    IMG_3798.jpeg
    3.3 MB · Views: 7
  • IMG_3807.jpeg
    IMG_3807.jpeg
    1.8 MB · Views: 9
  • IMG_3810.jpeg
    IMG_3810.jpeg
    2.2 MB · Views: 8
  • IMG_3814.jpeg
    IMG_3814.jpeg
    2.5 MB · Views: 9
  • IMG_3816.jpeg
    IMG_3816.jpeg
    3 MB · Views: 10
Back
Top