LPR_Bronco
Member
The BFG tires are a 37x12.5r17. The other tires are just stock sized that I use to move the bronco in and out of the garage.
Is it running?
Nice. Please do an update/review of the Aces when you get more driving time.It's up and running. Starts with ease unlike when I hard the carb. I need to take the time to drive it around for it to do the self-tuning to smooth it out. I've driven it around the block once, onto a trailer and in the garage.
Nice. Please do an update/review of the Aces when you get more driving time.
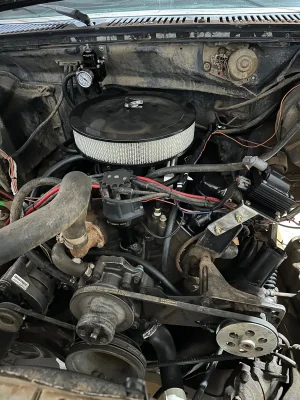
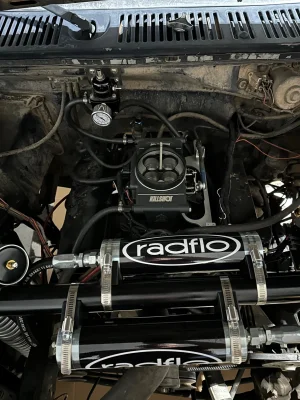
Engine pics would be a bonus.
Nice. Thanks.Here's a couple for you. I will update on how it's running once I have time to get it out of the garage.


Doing my 86 was a nightmare I wired the back window to a toggle and hard wired the power windows but got rid of everything else kept the headlights and taillights on stock switch. Wired the windshield wipers to the medium speed on a toggle as well.Didn't realize I haven't updated this thread since January. Probably because not a thing has been done in the last 8 months. I've been postponing the inevitable and addressing the wiring issue this truck is plagued with.
But now the time has come. So, I ordered a Painless Performance wire harness a few months ago. I'm hoping the name will live up to itself.
View attachment 41397
This week is the first time I've decided to get out in the garage after work and strip everything down.
View attachment 41398
I am more than likely going to do something similar. I bought the full harness to have everything wired for changes down the line, like adding heat/ac back. I'm also leaning towards making an aluminum dash since my factory one is cracked to hell and nobody makes factory replacements.Doing my 86 was a nightmare I wired the back window to a toggle and hard wired the power windows but got rid of everything else kept the headlights and taillights on stock switch. Wired the windshield wipers to the medium speed on a toggle as well.
Dude I love the look of these bull nose broncos, this thing is cool.
Can you confirm what tire size that is?
Ya I trashed my dash as well and did a temp dash to hold stuff till I cage it it’s ugly but works great and took 10min to whip togetherI am more than likely going to do something similar. I bought the full harness to have everything wired for changes down the line, like adding heat/ac back. I'm also leaning towards making an aluminum dash since my factory one is cracked to hell and nobody makes factory replacements.